Military history of Australia during World War II
Australia entered World War II on 3 September 1939, following the government's acceptance of the United Kingdom's declaration of war on Nazi Germany. Australia later entered into a state of war with other members of the Axis powers, including the Kingdom of Italy on 11 June 1940,[1] and the Empire of Japan on 9 December 1941.[2] By the end of the war, almost a million Australians had served in the armed forces, whose military units fought primarily in the European theatre, North African campaign, and the South West Pacific theatre. In addition, Australia came under direct attack for the first time in its post-colonial history. Its casualties from enemy action during the war were 27,073 killed and 23,477 wounded.[3]
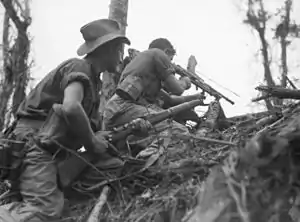
Australian Army units were gradually withdrawn from the Mediterranean and Europe following the outbreak of war with Japan. However, Royal Australian Air Force and Royal Australian Navy units and personnel continued to take part in the war against Germany and Italy. From 1942 until early 1944, Australian forces played a key role in the Pacific War, making up the majority of Allied strength throughout much of the fighting in the South West Pacific theatre. While the military was largely relegated to subsidiary fronts from mid-1944, it continued offensive operations against the Japanese until the war ended.
World War II contributed to major changes in the nation's economy, military and foreign policy. The war accelerated the process of industrialisation, led to the development of a larger peacetime military and began the process with which Australia shifted the focus of its foreign policy from Britain to the United States. The final effects of the war also contributed to the development of a more diverse and cosmopolitan Australian society.
Outbreak of war
.jpg.webp)
Between World War I and World War II Australia suffered greatly from the Great Depression which started in 1929. This limited Australian defence expenditure and led to a decline in the size and effectiveness of the armed forces during the 1930s. In 1931, the Statute of Westminster granted the Australian government independence in foreign affairs and defence. Nevertheless, from the mid-1930s, Australian governments generally followed British policy towards Nazi Germany, supporting first the appeasement of Hitler and the British guarantee of Polish independence.[4]
Australian Prime Minister Robert Menzies asked the British government to notify Germany that Australia was an associate of the United Kingdom.[5] On 3 September 1939, Britain declared war when its ultimatum for Germany to withdraw from Poland expired.[6] Because the Statute of Westminster had not yet been ratified by the Australian parliament, any declaration of war by the UK applied to Australia by default. After the British informed Menzies of the declaration of war, the Governor-General of Australia issued a proclamation of the existence of war in Australia.[2] Menzies' support for the war was based on the notion of an imperial defence system, upon which he believed Australia relied and which would be destroyed if the UK was defeated. This position was generally accepted by the Australian public, although there was little enthusiasm for war.[7]
At the time war broke out in Europe, the Australian armed forces were less prepared than at the outbreak of World War I in August 1914. The Royal Australian Navy (RAN), the best-prepared of the three services, was small and equipped with only two heavy cruisers, four light cruisers, two sloops, five obsolete destroyers and a number of small and auxiliary warships.[8] The Australian Army comprised a small permanent cadre of 3,000 men and 80,000 part-time militiamen who had volunteered for training with the Citizen Military Forces (CMF). The Royal Australian Air Force (RAAF), the weakest of the services, had 246 aircraft, few of them modern.[9] While the Commonwealth Government began a large military expansion and transferred some RAAF aircrew and units to British control upon the outbreak of war, it was unwilling to immediately dispatch an expeditionary force overseas due to the threat posed by Japanese intervention.[10]
The first Australian shot of the war took place several hours after the declaration of war when a gun at Fort Queenscliff fired across the bows of an Australian ship that failed to identify itself as it attempted to leave Melbourne without required clearances.[11] On 10 October 1939, a Short Sunderland of No. 10 Squadron, based in England for re-equipment, became the first Australian and the first Commonwealth air-force unit to go into action when it undertook a mission to Tunisia.[12]
.jpg.webp)
On 15 September 1939 Menzies announced the formation of the Second Australian Imperial Force (AIF). This expeditionary force initially consisted of 20,000 men organised into an infantry division (the 6th Division) and auxiliary units. The AIF was institutionally separate from the CMF, which was legally restricted to service in Australia and its external territories, and was formed by raising new units rather than transferring CMF units. On 15 November, Menzies announced the reintroduction of conscription for home-defence service, effective 1 January 1940.[13] Recruitment for the AIF was initially slow, but one in six men of military age had enlisted by March 1940, and a huge surge of volunteers came forward after the fall of France in June 1940. Men volunteered for the AIF for a range of reasons, with the most common being a sense of duty to defend Australia and the British Empire.[14] In early 1940, each of the services introduced regulations which prohibited the enlistment of people not "substantially of European origin"; while these regulations were strictly enforced by the RAN and Army, the RAAF continued to accept small numbers of non-European Australians.[15]
The AIF's major units were raised between 1939 and 1941. The 6th Division formed during October and November 1939, and embarked for the Middle East in early 1940 to complete its training and to receive modern equipment after the British Government assured the Australian Government that Japan did not pose an immediate threat. The division was intended to join the British Expeditionary Force in France when its preparations were complete, but this did not eventuate as Axis forces conquered France before the division was ready.[16] A further three AIF infantry divisions (the 7th Division, 8th Division and 9th Division) were raised in the first half of 1940, as well as a corps headquarters (I Corps) and numerous support and service units. All of these divisions and the majority of the support units deployed overseas during 1940 and 1941. An AIF armoured division (the 1st Armoured Division) was also raised in early 1941 but never left Australia.[17]
While the Government initially planned to deploy the entire RAAF overseas, it later decided to focus the force's resources on training aircrew to facilitate a massive expansion of Commonwealth air-power.[18] In late 1939, Australia and the other Dominions established the Empire Air Training Scheme (EATS) to train large numbers of men for service in the British Royal Air Force (RAF) and in other Commonwealth air units. Almost 28,000 Australians eventually trained through EATS in schools in Australia, Canada and Rhodesia. While many of these men were posted to Australian Article XV squadrons, the majority served with British and other Dominion squadrons. Moreover, these nominally "Australian" squadrons did not come under RAAF control and Australians often made up a minority of their airmen.[19] As the Australian Government had no effective control over the deployment of airmen trained through EATS, most Australian historians regard the scheme as having hindered the development of Australia's defence capability.[20] Nevertheless, RAAF airmen trained through EATS represented about nine percent of all aircrew who fought for the RAF in the European and Mediterranean theatres and made an important contribution to Allied operations.[21]
North Africa, the Mediterranean and the Middle East
During the first years of World War II, Australia's military strategy was closely aligned with that of the United Kingdom. In line with this, most Australian military units deployed overseas in 1940 and 1941 were sent to the Mediterranean and Middle East where they formed a key part of the Commonwealth forces in the area. The three AIF infantry divisions sent to the Middle East saw extensive action, as did the RAAF squadrons and warships in this theatre.[22]
North Africa
_cropped.jpg.webp)
The RAN became the first of the Australian services to see action in the Mediterranean theatre. At the time Italy entered the war on 10 June 1940 the RAN had a single cruiser (Sydney) and the five elderly destroyers of the so-called 'Scrap Iron Flotilla' at Alexandria with the British Mediterranean Fleet. During the first days of the Battle of the Mediterranean, Sydney sank an Italian destroyer and Voyager a submarine. The Mediterranean Fleet maintained a high operational tempo, and on 19 July, Sydney, with a British destroyer squadron in company, engaged the fast Italian light cruisers Bartolomeo Colleoni and Giovanni delle Bande Nere in the Battle of Cape Spada. In the running battle which followed, Bartolomeo Colleoni was sunk. The Australian ships spent much of their time at sea throughout 1940. Sydney's sister ship, Perth, relieved her in February 1941.[23]
The Australian Army first saw action in Operation Compass, the successful Commonwealth offensive in North Africa which took place between December 1940 and February 1941. The 6th Division relieved the 4th Indian Division on 14 December. Although the 6th Division was not fully equipped, it had completed its training and was given the task of capturing Italian fortresses bypassed by the British 7th Armoured Division during its advance.[24]

The 6th Division went into action at Bardia on 3 January 1941. Although a larger Italian force manned the fortress, with the support of British tanks and artillery the Australian infantry quickly penetrated the defensive lines. The majority of the Italian force surrendered on 5 January, and the Australians took 40,000 prisoners.[25] The 6th Division followed up this success by assaulting the fortress of Tobruk on 21 January. Tobruk was secured the next day, with 25,000 Italian prisoners taken.[26] The 6th Division subsequently pushed west along the coast road to Cyrenaica and captured Benghazi on 4 February.[27] The 6th Division withdrew for deployment to Greece later in February and was replaced by the untested 9th Division, which took up garrison duties in Cyrenaica.[28]
In the last week of March 1941, a German-led force launched an offensive in Cyrenaica which rapidly defeated the Allied forces in the area, forcing a general withdrawal towards Egypt (April 1941). The 9th Division formed the rear guard of this withdrawal, and on 6 April, was ordered to defend the important port town of Tobruk for at least two months. During the ensuing siege of Tobruk the 9th Division, reinforced by the 18th Brigade of the 7th Division and British artillery and armoured regiments, used fortifications, aggressive patrolling and artillery to contain and defeat repeated German armoured and infantry attacks. The Mediterranean Fleet sustained Tobruk's defenders, and the elderly Australian destroyers made repeated supply "runs" into the port. Waterhen and Parramatta were sunk during these operations. Upon the request of the Australian Government, the bulk of the 9th Division was withdrawn from Tobruk in September and October 1941, and was replaced by the British 70th Division. The 2/13th Battalion was forced to remain at Tobruk until the siege was lifted in December when the convoy evacuating it was attacked, however. The defence of Tobruk cost the Australian units involved 3,009 casualties, including 832 killed and 941 taken prisoner.[29]
Two Australian fighter squadrons also took part in the fighting in North Africa. No. 239 Wing, a Curtiss P-40-equipped unit in the Desert Air Force, was dominated by Australians, in the form of two RAAF squadrons—No. 3 Squadron and No. 450 Squadron—and numerous individual Australians served in RAF squadrons. These two squadrons differed from the other RAAF squadrons in the Mediterranean in that they were made up of predominantly Australian ground-staff and pilots; the other RAAF units had ground crews made up of mostly British RAF personnel.[30]
Greece, Crete and Lebanon
.jpg.webp)
In early 1941 the 6th Division and I Corps headquarters took part in the ill-fated Allied expedition to defend Greece from an anticipated German invasion. The corps' commander, Lieutenant-General Thomas Blamey, and Prime Minister Menzies both regarded the operation as risky, but agreed to Australian involvement after the British Government provided them with briefings which deliberately understated the chance of defeat. The Allied force deployed to Greece was much smaller than the German force in the region and inconsistencies between Greek and Allied plans compromised the defence of the country.[31]
Australian troops arrived in Greece during March 1941, and manned defensive positions in the north of the country alongside British, New Zealand and Greek units. HMAS Perth formed part of the naval force which protected the Allied troop convoys travelling to Greece and participated in the Battle of Cape Matapan in late March. The outnumbered Allied force, unable to halt the Germans when they invaded on 6 April, had to retreat. The Australians and other Allied units conducted a fighting withdrawal from their initial positions and naval ships evacuated them from southern Greece between 24 April and 1 May. Australian warships formed part of the force which protected the evacuation and embarked hundreds of soldiers from Greek ports. The 6th Division suffered heavy casualties in this campaign, with 320 men killed and 2,030 captured.[32]
While most of the 6th Division returned to Egypt, the 19th Brigade Group and two provisional infantry battalions landed on Crete, where they formed a key part of the island's defences. The 19th Brigade was initially successful in holding its positions when German paratroopers landed on 20 May, but was gradually forced to retreat. After several key airfields were lost the Allies evacuated the island's garrison. Approximately 3,000 Australians, including the entire 2/7th Infantry Battalion, could not be evacuated, and were taken prisoner.[33] As a result of its heavy casualties the 6th Division required substantial reinforcements and equipment before it was again ready for combat.[34] Perth and the new destroyers Napier and Nizam also took part in operations around Crete, with Perth embarking soldiers for evacuation to Egypt.[35]

The Allied defeat during the Greek Campaign indirectly contributed to a change of government in Australia. Prime Minister Menzies' leadership weakened during the lengthy period he spent in Britain during early 1941, and the high Australian losses in the Greek Campaign led many members of his United Australia Party (UAP) to conclude that he was not capable of leading the Australian war effort. Menzies resigned on 26 August, after losing the confidence of his party and Arthur Fadden from the Country Party (the UAP's coalition partner) became Prime Minister. Fadden's government collapsed on 3 October, and an Australian Labor Party government under the leadership of John Curtin took power.[36]
The 7th Division and the 17th Brigade from the 6th Division formed a key part of the Allied ground forces during the Syria–Lebanon Campaign, fought against Vichy French forces in June and July 1941. RAAF aircraft also joined the RAF in providing close air support. The Australian force entered Lebanon on 8 June, and advanced along the coast road and Litani River valley.[37] Although Allied planners had expected little resistance, the Vichy forces mounted a strong defence and counter-attacks which made good use of the mountainous terrain.[38] After the Allied attack became bogged down reinforcements were brought in and the Australian I Corps headquarters took command of the operation on 18 June.[39]
These changes enabled the Allies to overwhelm the French forces, and the 7th Division entered Beirut on 12 July. The loss of Beirut and a British breakthrough in Syria led the Vichy commander to seek an armistice and the campaign ended on 13 July 1941.[40]
El Alamein
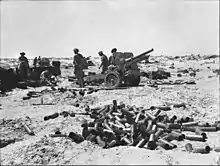
In the second half of 1941 the Australian I Corps was concentrated in Syria and Lebanon to rebuild its strength and to prepare for further operations in the Middle East. Following the outbreak of war in the Pacific most elements of the Corps, including the 6th and 7th Divisions, returned to Australia in early 1942 to counter the perceived Japanese threat to Australia. The Australian Government agreed to British and United States requests to temporarily retain the 9th Division in the Middle East in exchange for the deployment of additional US troops to Australia and Britain's support for a proposal to expand the RAAF to 73 squadrons.[41] The Australian Government did not intend that the 9th Division would play a major role in active fighting, and it was not sent any further reinforcements.[42] All of the RAN's ships in the Mediterranean also withdrew to the Pacific, but most RAAF units in the Middle East remained in the theatre.[43]
In June 1942 four Australian N-class destroyers transferred to the Mediterranean from the Indian Ocean to participate in Operation Vigorous (11 to 16 June 1942), which attempted to supply the besieged island of Malta from Egypt. This operation ended in failure, and Nestor had to be scuttled on 16 June, after being bombed the previous day. After this operation, the three surviving destroyers returned to the Indian Ocean.[44]
In mid-1942 the Axis forces defeated the Commonwealth force in Libya and advanced into north-west Egypt. In June, the British Eighth Army made a stand just over 100 kilometres (62 mi) west of Alexandria, at the railway siding of El Alamein, and the 9th Division was brought forward to reinforce this position. The lead elements of the Division arrived at El Alamein on 6 July, and the Division was assigned the most northerly section of the Commonwealth defensive line. The 9th Division played a significant role in the First Battle of El Alamein (1 to 27 July 1942), which halted the Axis advance, though at the cost of heavy casualties, including the entire 2/28th Infantry Battalion, which was forced to surrender on 27 July. Following this battle the division remained at the northern end of the El Alamein line and launched diversionary attacks during the Battle of Alam el Halfa in early September.[45]
In October 1942 the 9th Division and the RAAF squadrons in the area took part in the Second Battle of El Alamein (23 October to 11 November 1942). After a lengthy period of preparation, the Eighth Army launched its major offensive on 23 October. The 9th Division became involved in some of the heaviest fighting of the battle, and its advance in the coast area succeeded in drawing away enough German forces for the heavily reinforced 2nd New Zealand Division to decisively break through the Axis lines on the night of 1–2 November. The 9th Division suffered a high number of casualties during this battle and did not take part in the pursuit of the retreating Axis forces.[46] During the battle the Australian Government requested that the division be returned to Australia as it was not possible to provide enough reinforcements to sustain it, and the British and US governments agreed to this in late November. The 9th Division left Egypt for Australia in January 1943, ending the AIF's involvement in the war in North Africa.[47]
Tunisia, Sicily and Italy
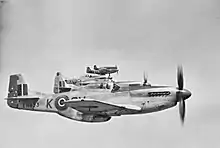
Although the Second Battle of El Alamein marked the end of a major Australian role in the Mediterranean, several RAAF units and hundreds of Australians attached to Commonwealth forces remained in the area until the end of the war. After the 9th Division was withdrawn Australia continued to be represented in North Africa by several RAAF squadrons which supported the 8th Army's advance through Libya and the subsequent Tunisia Campaign. Two Australian destroyers (Quiberon and Quickmatch) also participated in the Allied landings in North Africa in November 1942.[48]
Australia played a small role in the Italian Campaign. The RAN returned to the Mediterranean between May and November 1943, when eight Bathurst-class corvette were transferred from the British Eastern Fleet to the Mediterranean Fleet to protect the invasion force during the Allied invasion of Sicily. The corvettes also escorted convoys in the western Mediterranean before returning to the Eastern Fleet.[49] No. 239 Wing and four Australian Article XV squadrons also took part in the Sicilian Campaign, flying from bases in Tunisia, Malta, North Africa and Sicily.[50] No. 239 Wing subsequently provided air support for the Allied invasion of Italy in September 1943, and moved to the mainland in the middle of that month. The two Australian fighter bomber squadrons provided close air support to the Allied armies and attacked German supply lines until the end of the war. No. 454 Squadron was also deployed to Italy from August 1944, and hundreds of Australians served in RAF units during the campaign.[51]
The RAAF also took part in other Allied operations in the Mediterranean. Two RAAF squadrons, No. 451 Squadron (Spitfires) and No. 458 Squadron (Wellingtons), supported the Allied invasion of southern France in August 1944. No. 451 Squadron was based in southern France in late August and September, and when the operation ended both squadrons were moved to Italy, though No. 451 Squadron was transferred to Britain in December. No. 459 Squadron was based in the eastern Mediterranean until the last months of the war in Europe and attacked German targets in Greece and the Aegean Sea.[52] In addition, 150 Australians served with the Balkan Air Force, principally in No. 148 Squadron RAF. This special duties squadron dropped men and supplies to guerrillas in Yugoslavia and attempted to supply the Polish Home Army during the Warsaw Uprising in 1944.[53]
Britain and Western Europe
.jpg.webp)
While the majority of the Australian military fought on the Western Front in France during World War I, relatively few Australians fought in Europe during World War II. The RAAF, including thousands of Australians posted to British units, made a significant contribution to the strategic bombing of Germany and efforts to safeguard Allied shipping in the Atlantic. The other services made smaller contributions, with two Army brigades being briefly based in Britain in late 1940, and several of the RAN's warships serving in the Atlantic.[54]
Defence of Britain
Australians participated in the defence of Britain throughout the war. More than 100 Australian airmen fought with the RAF during the Battle of Britain in 1940, including over 30 fighter pilots.[55] Two AIF brigades (the 18th and 25th) were also stationed in Britain from June 1940 to January 1941, and formed part of the British mobile reserve which would have responded to any German landings. An Australian Army forestry group served in Britain between 1940 and 1943.[56] Several Australian fighter squadrons were also formed in Britain during 1941 and 1942, and contributed to defending the country from German air raids and, from mid-1944, V-1 flying bombs.[57]
The RAAF and RAN took part in the Battle of the Atlantic. No. 10 Squadron, based in Britain at the outbreak of war to take delivery of its Short Sunderland flying boats, remained there throughout the conflict as part of RAF Coastal Command. It was joined by No. 461 Squadron in April 1942, also equipped with Sunderlands. These squadrons escorted Allied convoys and sank 12 U-boats. No. 455 Squadron also formed part of Coastal Command from April 1942, as an anti-shipping squadron equipped with light bombers. In this role the squadron made an unusual deployment to Vaenga air base in the Soviet Union in September 1942, to protect Convoy PQ 18.[58] Hundreds of Australian airmen also served in RAF Coastal Command squadrons, of whom 652 died.[59] In addition to the RAAF's contribution, several of the RAN's cruisers and destroyers escorted shipping in the Atlantic and Caribbean and hundreds of RAN personnel served aboard Royal Navy ships in the Atlantic throughout the war.[12][60]
Air war over Europe
The RAAF's role in the strategic air offensive in Europe formed Australia's main contribution to the defeat of Germany.[61] Approximately 13,000 Australian airmen served in dozens of British and five Australian squadrons in RAF Bomber Command between 1940 and the end of the war.[61] There was not a distinctive Australian contribution to this campaign, however, as most Australians served in British squadrons and the Australian bomber squadrons were part of RAF units.[62]
.jpg.webp)
The great majority of Australian aircrew in Bomber Command were graduates of the Empire Air Training Scheme. These men were not concentrated in Australian units, and were instead often posted to the Commonwealth squadron with the greatest need for personnel where they became part of a multi-national bomber crew. Five Australian heavy bomber squadrons (No. 460, No. 462, No. 463, No. 466 and No. 467 squadrons) were formed within Bomber Command between 1941 and 1945, however, and the proportion of Australians in these units increased over time.[63] No. 464 Squadron, which was equipped with light bombers, was also formed as part of Bomber Command but was transferred to the Second Tactical Air Force in June 1943, where it continued to attack targets in Europe.[64] Unlike Canada, which concentrated its heavy bomber squadrons into No. 6 Group RCAF in 1943, the RAAF squadrons in Bomber Command were always part of British units, and the Australian Government had little control over how they were used.[65]
.jpeg.webp)
Australians took part in all of Bomber Command's major offensives and suffered heavy losses during raids on German cities and targets in France.[66] The Australian contribution to major raids was often substantial, and the Australian squadrons typically provided about 10 percent of the main bomber force during the winter of 1943–1944, including during the Battle of Berlin.[67] Overall, the Australian squadrons in Bomber Command dropped 6 percent of the total weight of bombs dropped by the command during the war.[68] Australian aircrew in Bomber Command had one of the highest casualty rates of any part of the Australian military during World War II. Although only two percent of Australians enlisted in the military served with Bomber Command, they incurred almost 20 percent of all Australian deaths in combat; 3,486 were killed and hundreds more were taken prisoner.[69]
Hundreds of Australians participated in the liberation of Western Europe during 1944 and 1945. Ten RAAF squadrons, hundreds of Australians in RAF units and about 500 Australian sailors serving with the Royal Navy formed part of the force assembled for the landing in Normandy on 6 June 1944; overall, it has been estimated that about 3,000 Australian personnel took part in this operation.[70] From 11 June until September 1944, the Spitfire-equipped No. 453 Squadron RAAF was often based at forward airfields in France and it and Australian light bomber and heavy bomber squadrons supported the liberation of France.[71] RAAF light bomber and fighter squadrons continued to support the Allied armies until the end of the war in Europe by attacking strategic targets and escorting bomber formations.[72] No. 451 and 453 Squadrons formed part of the British Army of Occupation in Germany from September 1945, and it was planned that there would be a long-term Australian presence in this force. Few RAAF personnel volunteered to remain in Europe, however, and both squadrons were disbanded in January 1946.[73]
War in the Pacific
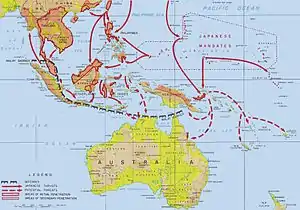
In the view of Paul Hasluck, Australia fought two wars between 1939 and 1945: one against Germany and Italy as part of the British Commonwealth and Empire and the other against Japan in alliance with the United States and Britain.[74]
Due to the emphasis placed on cooperation with Britain, relatively few Australian military units were stationed in Australia and the Asia-Pacific Region after 1940. Measures were taken to improve Australia's defences as war with Japan loomed in 1941, but these proved inadequate. In December 1941, the Australian Army in the Pacific comprised the 8th Division, most of which was stationed in Malaya, and eight partially trained and equipped divisions in Australia, including the 1st Armoured Division. The RAAF was equipped with 373 aircraft, most of which were obsolete trainers, and the RAN had three cruisers and two destroyers in Australian waters.[75]
In 1942, the Australian military was reinforced by units recalled from the Middle East and an expansion of the CMF and RAAF. United States military units also arrived in Australia in great numbers before being deployed to New Guinea. The Allies moved onto the offensive in late 1942, with the pace of advance accelerating in 1943. From 1944, the Australian military was mainly relegated to subsidiary roles, but continued to conduct large-scale operations until the end of the war.[76]
Malaya and Singapore
From the 1920s, Australia's defence planning was dominated by the so-called 'Singapore strategy'. This strategy involved the construction and defence of a major naval base at Singapore from which a large British fleet would respond to Japanese aggression in the region. To this end, a high proportion of Australian forces in Asia were concentrated in Malaya during 1940 and 1941, as the threat from Japan increased.[77] At the outbreak of war the Australian forces in Malaya comprised the 8t Division (less the 23rd Brigade) under the command of Major General Gordon Bennett, four RAAF squadrons and eight warships.[78] The RAAF became the first service to see action in the Pacific when Australian aircraft shadowing the Japanese invasion convoy bound for Malaya were fired at on 6 December 1941. Australian units participated in the unsuccessful Commonwealth attempts to defeat the Japanese landings, with RAAF aircraft attacking the beachheads and Vampire accompanying the British battleship Prince of Wales and battlecruiser Repulse during their failed attempt to attack the Japanese invasion fleet.[79]
.jpg.webp)
The 8th Division and its attached Indian Army units were assigned responsibility for the defence of Johor in the south of Malaya and did not see action until mid-January 1942, when Japanese spearheads first reached the state. The division's first engagement was the Battle of Muar, in which the Japanese Twenty-Fifth Army was able to outflank the Commonwealth positions due to Bennett misdeploying the forces under his command so that the weak Indian 45th Brigade was assigned the crucial coastal sector and the stronger Australian brigades were deployed in less threatened areas. While the Commonwealth forces in Johore achieved a number of local victories, they were unable to do more than slow the Japanese advance and suffered heavy casualties. After being outmanoeuvred by the Japanese, the remaining Commonwealth units withdrew to Singapore on the night of 30–31 January.[80]
Following the withdrawal to Singapore the 8th Division was deployed to defend the island's north-west coast. Due to the casualties suffered in Johore most of the division's units were at half-strength. The commander of the Singapore fortress, Lieutenant General Arthur Ernest Percival, believed that the Japanese would land on the north-east coast of the island and deployed the near full-strength British 18th Division to defend this sector. The Japanese landing on 8 February took part in the Australian sector, however, and the 8th Division was forced from its positions after just two days of heavy fighting. The division was also unable to turn back the Japanese landing at Kranji and withdrew to the centre of the island.[81] After further fighting in which the Commonwealth forces were pushed into a narrow perimeter around the urban area of Singapore, Percival surrendered his forces on 15 February. Following the surrender 14,972 Australians were taken prisoner,[82] though some escaped on ships. These escapees included Major General Bennett, who was found by two post-war inquiries to have been unjustified in leaving his command.[83] The loss of almost a quarter of Australia's overseas soldiers, and the failure of the Singapore Strategy that had permitted it to accept the sending of the AIF to aid Britain, stunned the country.[84]
Netherlands East Indies and Rabaul
While Australia's contribution to the pre-war plans to defend South East Asia from Japanese aggression was focused on the defence of Malaya and Singapore, small Australian forces were also deployed to defend several islands to the north of Australia. The role of these forces was to defend strategic airfields which could be used to launch attacks on the Australian mainland.[85] Detachments of coastwatchers were also stationed in the Bismarck Archipelago and Solomon Islands to report on any Japanese operations there.[86]

At the start of the Pacific War the strategic port town of Rabaul in New Britain was defended by 'Lark Force', which comprised the 2/22nd Infantry Battalion reinforced with coastal artillery and a poorly equipped RAAF bomber squadron. While Lark Force was regarded as inadequate by the Australian military,[87] it was not possible to reinforce it before the Japanese South Seas Force landed at Rabaul on 23 January 1942. The outnumbered Australian force was swiftly defeated and most of the survivors surrendered in the weeks after the battle. Few members of Lark Force survived the war, as at least 130 were murdered by the Japanese on 4 February, and 1,057 Australian soldiers and civilian prisoners from Rabaul were killed when the ship carrying them to Japan (Montevideo Maru) was sunk by the US submarine Sturgeon on 1 July 1942.[88]
AIF troops were also dispatched from Darwin to the Netherlands East Indies (NEI) in the first weeks of the Pacific War. Reinforced battalions from the 23rd Brigade were sent to Koepang in West Timor ('Sparrow Force') and the island of Ambon ('Gull Force') to defend these strategic locations from Japanese attack. The 2/2nd Independent Company was also sent to Dili in Portuguese Timor in violation of Portugal's neutrality.[87] The force at Ambon was defeated by the Japanese landing on 30 January, and surrendered on 3 February 1942. Over 300 Australian prisoners were subsequently killed by Japanese troops in a series of mass executions during February.[89] While the force at Koepang was defeated after the Japanese landed there on 20 February and also surrendered, Australian commandos waged a guerrilla campaign against the Japanese in Portuguese Timor until February 1943.[90] Voyager and Armidale were lost in September and December 1942, respectively, while operating in support of the commandos.[91]
In the lead-up to the Japanese invasion of Java a force of 242 carrier and land-based aircraft attacked Darwin on 19 February 1942. At the time Darwin was an important base for Allied warships and a staging point for shipping supplies and reinforcements into the NEI. The Japanese attack was successful, and resulted in the deaths of 235 military personnel and civilians, many of whom were non-Australian Allied seamen, and heavy damage to RAAF Base Darwin and the town's port facilities.[92]
Several Australian warships, a 3,000 strong Army unit and aircraft from several RAAF squadrons participated in the unsuccessful defence of Java when the Japanese invaded the island in March 1942. Perth formed part of the main American-British-Dutch-Australian Command (ABDACOM) naval force which was defeated in the Battle of the Java Sea on 27 February, during an attempt to intercept one of the Japanese invasion convoys. Perth was sunk on 1 March, when she and USS Houston encountered another Japanese invasion force while trying to escape to Tjilatjap on the south coast of Java. The sloop Yarra was also sunk off the south coast of Java when she was attacked by three Japanese cruisers while escorting a convoy on 4 March. Other Australian warships, including the light cruiser Hobart and several corvettes successfully escaped from NEI waters. An army force made up of elements from the 7th Division also formed part of the ABDACOM land forces on Java but saw little action before it surrendered at Bandung on 12 March, after the Dutch forces on the island began to capitulate. RAAF aircraft operating from bases in Java and Australia also participated in the fighting, and 160 ground crew from No. 1 Squadron RAAF were taken prisoner.[93]
Following the conquest of the NEI, the Japanese Navy's main aircraft carrier force raided the Indian Ocean. This force attacked Ceylon in early April, and Vampire was sunk off Trincomalee on 12 April, while escorting HMS Hermes, which was also lost. The Australian Army's 16th and 17th Brigades formed part of the island's garrison at the time of the raid but did not see action.[94]
Buildup of forces in Australia
After the fall of Singapore the Australian Government and many Australians feared that Japan would invade the Australian mainland. Australia was ill-prepared to counter such an attack as the RAAF lacked modern aircraft and the RAN was too small and unbalanced to counter the Imperial Japanese Navy. Additionally, the Army, although large, contained many inexperienced units and lacked mobility.[95] In response to this threat most of the AIF was brought back from the Middle East and the Government appealed to the United States for assistance. British Prime Minister Winston Churchill attempted to divert the 6th and 7th Divisions to Burma while they were en route to Australia, but Curtin refused to authorise this movement. As a compromise two brigades of the 6th Division disembarked at Ceylon and formed part of the island's garrison until they returned to Australia in August 1942.[96]
.jpg.webp)
The perceived threat of invasion led to a major expansion of the Australian military. By mid-1942 the Army had a strength of ten infantry divisions, three armoured divisions and hundreds of other units.[97] The RAAF and RAN were also greatly expanded, though it took years for these services to build up to their peak strengths.[98] Due to the increased need for manpower, the restrictions which prohibited non-Europeans from joining the military ceased to be enforced from late 1941, and about 3,000 Indigenous Australians eventually enlisted. Most of these personnel were integrated into existing formations, but a small number of racially segregated units such as the Torres Strait Light Infantry Battalion were formed. A number of small units made up of Indigenous Australians were also established to patrol northern Australia and harass any Japanese forces which landed there; the members of these units did not receive pay or awards for their service until 1992.[99] Thousands of Australians who were ineligible for service in the military responded to the threat of attack by joining auxiliary organisations such as the Volunteer Defence Corps and Volunteer Air Observers Corps, which were modelled on the British Home Guard and Royal Observer Corps respectively.[100] Australia's population and industrial base were not sufficient to maintain the expanded military after the threat of invasion had passed, and the Army was progressively reduced in size from 1943[101] while only 53 of the 73 RAAF squadrons approved by the government were ever raised.[102]
Despite Australian fears, the Japanese never intended to invade the Australian mainland. While an invasion was considered by the Japanese Imperial General Headquarters in February 1942, it was judged to be beyond the Japanese military's capabilities and no planning or other preparations were undertaken.[103] Instead, in March 1942, the Japanese military adopted a strategy of isolating Australia from the United States by capturing Port Moresby in New Guinea and the Solomon Islands, Fiji, Samoa and New Caledonia.[104] This plan was frustrated by the Japanese defeat in the Battle of the Coral Sea and was postponed indefinitely after the Battle of Midway.[105] While these battles ended the threat to Australia, the Australian government continued to warn that an invasion was possible until mid-1943.[103]
.jpg.webp)
The collapse of British power in the Pacific also led Australia to reorient its foreign and military policy towards the United States. Curtin stated in December 1941 "that Australia looks to America, free of any pangs as to our traditional links or kinship with the United Kingdom."[106] In February 1942 the US and British Governments agreed that Australia would become a strategic responsibility of the United States and the Allied ANZAC Force was created specifically to defend the Australian continent. In March, General Douglas MacArthur arrived in Australia after escaping from the Philippines and assumed command of the South West Pacific Area (SWPA). All of the Australian military's combat units in this area were placed under MacArthur's command, and MacArthur replaced the Australian Chiefs of Staff as the Australian Government's main source of military advice until the end of the war.[107] Australian General Thomas Blamey was appointed the Allied land force commander, but MacArthur did not permit him to command American forces.[108] MacArthur also rejected US Army Chief of Staff General George Marshall's request that he appoint Australians to senior posts in his General Headquarters. Nevertheless, the partnership between Curtin and MacArthur proved beneficial for Australia between 1942 and 1944, as MacArthur was able to communicate Australian requests for assistance to the US Government.[109]
Large numbers of United States military personnel were based in Australia during the first years of the Pacific War. The first US units arrived in Australia in early 1942 and almost 1 million US personnel passed through Australia during the war. Many US military bases were constructed in northern Australia during 1942 and 1943, and Australia remained an important source of supplies to US forces in the Pacific until the end of the war. Though relations between Australians and Americans were generally good, there was some conflict between US and Australian soldiers, such as the Battle of Brisbane,[110] and the Australian Government only reluctantly accepted the presence of African American troops.[111]
Papuan campaign
Japanese forces first landed on the mainland of New Guinea on 8 March 1942, when they invaded Lae and Salamaua to secure bases for the defence of the important base they were developing at Rabaul. Australian guerrillas from the New Guinea Volunteer Rifles established observation posts around the Japanese beachheads and the 2/5th Independent Company successfully raided Salamaua on 29 June.[112]
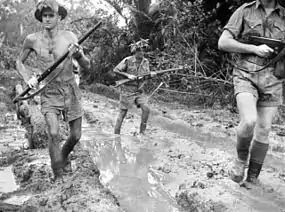
After the Battle of the Coral Sea frustrated the Japanese plan to capture Port Morseby via an amphibious landing, the Japanese attempted to capture the town by landing the South Seas Force at Buna on the north coast of Papua and advancing overland using the Kokoda Track to cross the rugged Owen Stanley Range. The Kokoda Track campaign began on 22 July, when the Japanese began their advance, opposed by an ill-prepared CMF brigade designated 'Maroubra Force'. This force was successful in delaying the South Seas Force but was unable to halt it. Two AIF battalions from the 7th Division reinforced the remnants of Maroubra Force on 26 August, but the Japanese continued to make ground and reached the village of Ioribaiwa near Port Moresby on 16 September.[113] The South Seas Force was forced to withdraw back along the track on this day, however, as supply problems made any further advance impossible and an Allied counter-landing at Buna was feared.[114] Australian forces pursued the Japanese along the Kokoda Track and forced them into a small bridgehead on the north coast of Papua in early November.[115] The Allied operations on the Kokoda Track were made possible by native Papuans who were recruited by the Australian New Guinea Administrative Unit, often forcibly, to carry supplies and evacuate wounded personnel.[116] The RAAF and USAAF also played an important role throughout the campaign by attacking the Japanese force's supply lines and airdropping supplies to Australian Army units.[117]
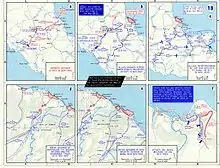
Australian forces also defeated an attempt to capture the strategic Milne Bay area in August 1942. During the Battle of Milne Bay two brigades of Australian troops, designated Milne Force, supported by two RAAF fighter squadrons and US Army engineers defeated a smaller Japanese invasion force made up of Japanese Special Naval Landing Forces units. This was the first notable Japanese land defeat and raised Allied morale across the Pacific Theatre.[118]
Australian and US forces attacked the Japanese bridgehead in Papua in late November 1942, but did not capture it until January 1943. The Allied force comprised the exhausted 7th Division and the inexperienced and ill-trained US 32nd Infantry Division and was short of artillery and supplies. Due to a lack of supporting weapons and MacArthur and Blamey's insistence on a rapid advance the Allied tactics during the battle were centred around infantry assaults on the Japanese fortifications. These resulted in heavy casualties and the area was not secured until 22 January 1943.[119] Throughout the fighting in Papua, most of the Australian personnel captured by Japanese troops were murdered. In response, Australian soldiers aggressively sought to kill their Japanese opponents for the remainder of the war. The Australians generally did not attempt to capture Japanese personnel, and some prisoners of war were murdered.[120]
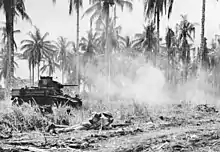
Following the defeats in Papua and Guadalcanal the Japanese withdrew to a defensive perimeter in the Territory of New Guinea. In order to secure their important bases at Lae and Salamaua they attempted to capture Wau in January 1943. Reinforcements were flown into the town and defeated the Japanese force in its outskirts following heavy fighting. The Japanese force began to withdraw towards the coast on 4 February. Following their defeat at Wau the Japanese attempted to reinforce Lae in preparation for an expected Allied offensive in the area. This ended in disaster when, during the Battle of the Bismarck Sea, a troop convoy was destroyed by USAAF and RAAF aircraft from the US Fifth Air Force and No. 9 Operational Group RAAF with the loss of about 3,000 troops.[121]
The Papuan campaign led to a significant reform in the composition of the Australian Army. During the campaign, the restriction banning CMF personnel from serving outside of Australian territory hampered military planning and caused tensions between the AIF and CMF. In late 1942 and early 1943, Curtin overcame opposition within the Labor Party to extending the geographic boundaries in which conscripts could serve to include most of the South West Pacific and the necessary legislation was passed in January 1943.[122] The 11th Brigade was the only CMF formation to serve outside of Australian territory, however, when it formed part of Merauke Force in the NEI during 1943 and 1944.[123]
Attacks on Australian shipping
.jpg.webp)
The Japanese efforts to secure New Guinea included a prolonged submarine offensive against the Allied lines of communication between the United States and Australia and Australia and New Guinea. These were not the first Axis naval attacks on Australia; during 1940 and 1941, five German surface raiders operated in Australian waters at various times. The German attacks were not successful in disrupting Australian merchant shipping, though Sydney was sunk with the loss her entire crew of 645 men in November 1941, in a battle with the German auxiliary cruiser Kormoran, off the coast of Western Australia.[124]
Following the defeat of the Japanese surface fleet the IJN deployed submarines to disrupt Allied supply lines by attacking shipping off the Australian east coast. This campaign began with an unsuccessful midget submarine raid on Sydney Harbour on the night of 31 May 1942. Following this attack, Japanese submarines operated along the Australian east coast until August 1942, sinking eight merchant ships.[125] The submarine offensive resumed in January 1943 and continued until June during which time a further 15 ships were sunk off the east coast. The 1943 sinkings included the hospital ship Centaur, which was torpedoed off Queensland on 14 May with the loss of 268 lives.[126] The Japanese did not conduct further submarine attacks against Australia after June 1943, as their submarines were needed to counter Allied offensives elsewhere in the Pacific.[127] A single German submarine, U-862, operated in the Pacific Ocean during the war, cruising off the Australian coast and New Zealand in December 1944 and January 1945. It sank two ships in Australian waters before returning to Batavia.[128]
Considerable Australian and other Allied military resources were devoted to protecting shipping and ports from Axis submarines and warships. For instance, the RAN escorted over 1,100 coastal convoys[129] the Army established coastal defences to protect important ports[130] and a high proportion of the RAAF's operational squadrons were used to protect shipping at various times.[131] Nevertheless, the use of these units for defensive tasks and the shipping casualties in Australian waters did not seriously affect the Australian economy or Allied war effort.[132]
New Guinea offensives
After halting the Japanese advance, Allied forces went on the offensive across the SWPA from mid 1943. Australian forces played a key role throughout this offensive, which was designated Operation Cartwheel. In particular, General Blamey oversaw a highly successful series of operations around the north-east tip of New Guinea which "was the high point of Australia's experience of operational level command" during the war.[133]
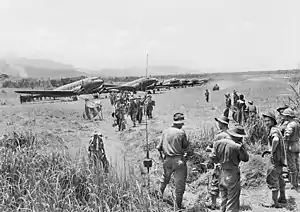
After the successful defence of Wau the 3rd Division began advancing towards Salamaua in April 1943. This advance was mounted to divert attention from Lae, which was one of the main objectives of Operation Cartwheel, and proceeded slowly. In late June, the 3rd Division was reinforced by the US 162nd Regimental Combat Team which staged an amphibious landing to the south of Salamaua. The town was eventually captured on 11 September 1943.[134]
In early September 1943, Australian-led forces mounted a pincer movement to capture Lae. On 4 September, 9th Division made an amphibious landing to the east of the town and began advancing to the west. The following day, the US 503rd Parachute Regiment made an unopposed parachute drop at Nadzab, just west of Lae. Once the airborne forces secured Nadzab Airfield the 7th Division was flown in and began advancing to the east in a race with the 9th Division to capture Lae. This race was won by the 7th Division, which captured the town on 15 September. The Japanese forces at Salamaua and Lae suffered heavy losses during this campaign, but were able to escape to the north.[135]

After the fall of Lae, the 9th Division was given the task of capturing the Huon Peninsula. The 20th Brigade landed near the strategic harbour of Finschhafen on 22 September 1943, and secured the area. The Japanese responded by dispatching the 20th Division overland to the area and the remainder of the 9th Division was gradually brought in to reinforce the 20th Brigade against the expected counter-attack. The Japanese mounted a strong attack in mid-October which was defeated by the 9th Division after heavy fighting. During the second half of November the 9th Division captured the hills inland of Finschhafen from well dug in Japanese forces. Following its defeat the 20th Division retreated along the coast with the 9th Division and 4th Brigade in pursuit.[136] The Allies scored a major intelligence victory towards the end of this campaign when Australian engineers found the 20th Division's entire cipher library, which had been buried by the retreating Japanese. These documents led to a code breaking breakthrough which enabled MacArthur to accelerate the Allied advance by bypassing Japanese defences.[137]
.jpg.webp)
While the 9th Division secured the coastal region of the Huon Peninsula the 7th Division drove the Japanese from the inland Finisterre Range. The Finisterre Range campaign began on 17 September, when the 2/6th Independent Company was air-landed in the Markham Valley. The company defeated a larger Japanese force at Kaiapit and secured an airstrip which was used to fly the Division's 21st and 25th Brigades in. Through aggressive patrolling the Australians forced the Japanese out of positions in extremely rugged terrain and in January 1944, the division began its attack on the key Shaggy Ridge position. The ridge was taken by the end of January, with the RAAF playing a key supporting role. Following this success the Japanese withdrew from the Finisterre Range and Australian troops linked up with American patrols from Saidor on 21 April, and secured Madang on 24 April.[138]
In addition to supporting the Army's operations on the New Guinea mainland, the RAN and RAAF took part in offensive operations in the Solomon Islands. This involvement had begun in August 1942, when both of the RAN's heavy cruisers, Australia and Canberra, supported the US Marine landing at Guadalcanal. On the night after the landing, Canberra was sunk during the Battle of Savo Island and the RAN played no further role in the Guadalcanal Campaign.[139] RAAF aircraft supported several US Army and Marine landings during 1943 and 1944 and an RAAF radar unit participated in the capture of Arawe. The Australian cruisers Australia and Shropshire and destroyers Arunta and Warramunga provided fire support for the US 1st Marine Division during the Battle of Cape Gloucester and the US 1st Cavalry Division during the Admiralty Islands campaign in late 1943 and early 1944. The landing at Cape Gloucester was also the first operation for the RAN amphibious transport Westralia.[140]
North Western Area Campaign
.jpg.webp)
The attack on Darwin in February 1942 marked the start of a prolonged aerial campaign over northern Australia and the Japanese-occupied Netherlands East Indies. Following the first attack on Darwin the Allies rapidly deployed fighter squadrons and reinforced the Army's Northern Territory Force to protect the town from a feared invasion.[142] These air units also attacked Japanese positions in the NEI and the Japanese responded by staging dozens of air raids on Darwin and nearby airfields during 1942 and 1943, few of which caused significant damage. These raids were opposed by US, Australian and British fighters and suffered increasingly heavy casualties as Darwin's defences were improved.[143] The Japanese also conducted a number of small and ineffective raids on towns and airfields in northern Queensland and Western Australia during 1942 and 1943.[144]
While the Japanese raids on northern Australia ceased in late 1943, the Allied air offensive continued until the end of the war. During late 1942, Allied aircraft conducted attacks on Timor in support of the Australian guerrillas operating there. From early 1943, US heavy bomber squadrons operated against Japanese targets in the eastern NEI from bases near Darwin. The Allied air offensive against the NEI intensified from June 1943, to divert Japanese forces away from New Guinea and the Solomons and involved Australian, Dutch and US bomber units. These attacks continued until the end of the war, with the US heavy bombers being replaced by Australian B-24 Liberator-equipped squadrons in late 1944. From 1944, several RAAF PBY Catalina squadrons were also based at Darwin and conducted highly effective mine-laying sorties across South East Asia.[145]
Advance to the Philippines
The Australian military's role in the South-West Pacific decreased during 1944. In the latter half of 1943, the Australian Government decided, with MacArthur's agreement, that the size of the military would be reduced to release manpower for war-related industries which were important to supplying Britain and the US forces in the Pacific. Australia's main role in the Allied war effort from this point forward was supplying the other Allied countries with food, materials and manufactured goods needed for the defeat of Japan.[146] As a result of this policy, the Army units available for offensive operations were set at six infantry divisions (the three AIF divisions and three CMF divisions) and two armoured brigades. The size of the RAAF was set at 53 squadrons and the RAN was limited to the ships which were in service or planned to be built at the time.[147] In early 1944, all but two of the Army's divisions were withdrawn to the Atherton Tableland in north Queensland for training and rehabilitation.[148] Several new battalions of Australian-led Papuan and New Guinea troops were formed during 1944, and organised into the Pacific Islands Regiment, however, and largely replaced the Australian Army battalions disbanded during the year. These troops had seen action alongside Australian units throughout the New Guinea campaign.[149]
.jpg.webp)
After the liberation of most of Australian New Guinea the RAAF and RAN participated in the US-led Western New Guinea campaign, which had the goal of securing bases to be used to mount the liberation of the Philippines. Australian warships and the fighter, bomber and airfield construction squadrons of No. 10 Operational Group RAAF participated in the capture of Hollandia, Biak, Noemfoor and Morotai.[150] After western New Guinea was secured No. 10 Operation Group was renamed the First Tactical Air Force (1TAF) and was used to protect the flank of the Allied advance by attacking Japanese positions in the NEI and performing other garrison tasks. The losses incurred whilst performing these relatively unimportant roles led to a decline in morale, and contributed to the 'Morotai Mutiny' in April 1945.[151]
Elements of the RAN and RAAF also took part in the liberation of the Philippines. Four Australian warships and the assault transports Kanimbla, Manoora and Westralia—along with a number of smaller warships and support ships—took part in the US landing at Leyte on 20 October 1944. Australian sources state that Australia became the first Allied ship to be struck by a kamikaze when she was attacked during this operation on 21 October, though this claim was disputed by US historian Samuel Eliot Morison.[152] Australian ships also participated in the Battle of Leyte Gulf, with Shropshire and Arunta engaging Japanese ships during the Battle of Surigao Strait on 25 October. The Australian naval force took part in the Invasion of Lingayen Gulf in January 1945; during this operation, Australia was struck by a further five Kamikazes which killed 44 of her crew and forced her to withdraw for major repairs. RAN ships also escorted US supply convoys bound for the Philippines.[153] The RAAF's No. 3 Airfield Construction Squadron and No. 1 Wireless Unit also landed in the Philippines and supported US operations there, and 1TAF raided targets in the southern Philippines from bases in the NEI and New Guinea.[154]
While the Australian Government offered MacArthur I Corps for service in Leyte and Luzon, nothing came of several proposals to utilise it in the liberation of these islands.[155] The Army's prolonged period of relative inactivity during 1944 led to public concern, and many Australians believed that the AIF should be demobilised if it could not be used for offensive operations.[156] This was politically embarrassing for the government, and helped motivate it to look for new areas where the military could be employed.[157]
Mopping up in New Guinea and the Solomons
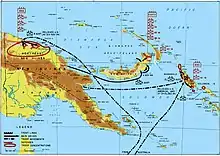
In late 1944, the Australian Government committed twelve Australian Army brigades to replace six US Army divisions which were conducting defensive roles in Bougainville, New Britain and the Aitape-Wewak area in New Guinea. While the US units had largely conducted a static defence of their positions, their Australian replacements mounted offensive operations designed to destroy the remaining Japanese forces in these areas.[158] The value of these campaigns was controversial at the time and remains so to this day. The Australian Government authorised these operations for primarily political reasons. It was believed that keeping the Army involved in the war would give Australia greater influence in any post-war peace conferences and that liberating Australian territories would enhance Australia's influence in its region.[159] Critics of these campaigns argue that they were unnecessary and wasteful of the lives of the Australian soldiers involved as the Japanese forces were already isolated and ineffective.[158]
.jpg.webp)
The 5th Division replaced the US 40th Infantry Division on New Britain during October and November 1944 and continued the New Britain Campaign with the goals of protecting Allied bases and confining the large Japanese force on the island to the area around Rabaul. In late November the 5th Division established bases closer to the Japanese perimeter and began aggressive patrols supported by the Allied Intelligence Bureau.[160] The division conducted amphibious landings at Open Bay and Wide Bay at the base of the Gazelle Peninsula in early 1945, and defeated the small Japanese garrisons in these areas. By April the Japanese had been confined to their fortified positions in the Gazelle Peninsula by the Australian force's aggressive patrolling. The 5th Division suffered 53 fatalities and 140 wounded during this campaign. After the war it was found that the Japanese force was 93,000 strong, which was much higher than the 38,000 which Allied intelligence had estimated remained on New Britain.[160]
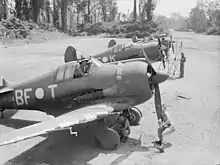
The II Corps continued the Bougainville Campaign after it replaced the US Army's XIV Corps between October and December 1944. The corps consisted of the 3rd Division, 11th Brigade and Fiji Infantry Regiment on Bougainville and the 23rd Brigade which garrisoned neighbouring islands and was supported by RAAF, RNZAF and USMC air units.[161] While the XIV Corps had maintained a defensive posture, the Australians conducted offensive operations aimed at destroying the Japanese force on Bougainville. As the Japanese were split into several enclaves the II Corps fought geographically separated campaigns in the north, centre and southern portions of the island. The main focus was against the Japanese base at Buin in the south, and the offensives in the north and centre of the island were largely suspended from May 1945. While Australian operations on Bougainville continued until the end of the war, large Japanese forces remained at Buin and in the north of the island.[162]
The 6th Division was assigned responsibility for completing the destruction of the Japanese Eighteenth Army, which was the last large Japanese force remaining in the Australian portion of New Guinea. The division was reinforced by CMF and armoured units and began arriving at Aitape in October 1944. The 6th Division was also supported by several RAAF squadrons and RAN warships.[163] In late 1944, the Australians launched a two-pronged offensive to the east towards Wewak. The 17th Brigade advanced through the inland Torricelli Mountains while the remainder of the division moved along the coast. Although the Eighteenth Army had suffered heavy casualties from previous fighting and disease, it mounted a strong resistance and inflicted significant casualties. The 6th Division's advance was also hampered by supply difficulties and bad weather. The Australians secured the coastal area by early May, with Wewak being captured on 10 May, after a small force was landed to the east of the town. By the end of the war, the Eighteenth Army had been forced into what it had designated its 'last stand' area which was under attack from the 6th Division. The Aitape-Wewak campaign cost Australia 442 lives while about 9,000 Japanese died and another 269 were taken prisoner.[164]
Borneo Campaign
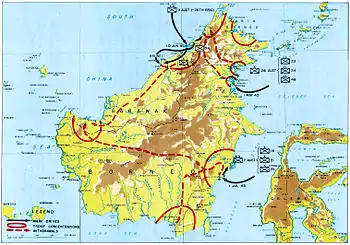
The Borneo Campaign of 1945 was the last major Allied campaign in the SWPA. In a series of amphibious assaults between 1 May and 21 July, the Australian I Corps, under Lieutenant General Leslie Morshead, attacked Japanese forces occupying the island. Allied naval and air forces, centred on the US 7th Fleet under Admiral Thomas Kinkaid, 1TAF and the US Thirteenth Air Force also played important roles in the campaign. The goals of this campaign were to capture Borneo's oilfields and Brunei Bay to support the US-led invasion of Japan and British-led liberation of Malaya which were planned to take place later in 1945.[165] The Australian Government did not agree to MacArthur's proposal to extend the offensive to include the liberation of Java in July 1945, however, and its decision to not release the 6th Division for this operation contributed to it not going ahead.[166]
The campaign opened on 1 May 1945, when the 26th Brigade Group landed on the small island of Tarakan off the east coast of Borneo. The goal of this operation was to secure the island's airstrip as a base to support the planned landings at Brunei and Balikpapan. While it had been expected that it would take only a few weeks to secure Tarakan and re-open the airstrip, intensive fighting on the island lasted until 19 June, and the airstrip was not opened until 28 June. As a result, the operation is generally considered to have not been worthwhile.[167]
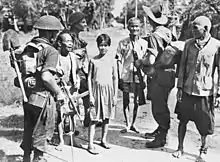
The second phase of the Borneo Campaign began on 10 June when the 9th Division conducted simultaneous assaults on the north-west on the island of Labuan and the coast of Brunei. While Brunei was quickly secured, the Japanese garrison on Labuan held out for over a week. After the Brunei Bay region was secured the 24th Brigade was landed in North Borneo and the 20th Brigade advanced along the western coast of Borneo south from Brunei. Both brigades rapidly advanced against weak Japanese resistance, and most of north-west Borneo was liberated by the end of the war.[168] During the campaign the 9th Division was assisted by indigenous fighters who were waging a guerrilla war against Japanese forces with the support of Australian special forces.[169]
The third and final stage of the Borneo Campaign was the capture of Balikpapan on the central east coast of the island. This operation had been opposed by General Blamey, who believed that it was unnecessary, but went ahead on the orders of Macarthur. After a 20-day preliminary air and naval bombardment the 7th Division landed near the town on 1 July. Balikpapan and its surrounds were secured after some heavy fighting on 21 July, but mopping up continued until the end of the war. The capture of Balikpapan was the last large-scale land operation conducted by the Western Allies during World War II.[170] Although the Borneo Campaign was criticised in Australia at the time, and in subsequent years, as pointless or a waste of the lives of soldiers, it did achieve a number of objectives, such as increasing the isolation of significant Japanese forces occupying the main part of the Dutch East Indies, capturing major oil supplies and freeing Allied prisoners of war, who were being held in deteriorating conditions.[171]
Australia's leadership changed again during the Borneo Campaign. Prime Minister Curtin suffered a heart attack in November 1944, and Deputy Prime Minister Frank Forde acted in his place until 22 January 1945. Curtin was hospitalised with another bout of illness in April 1945, and Treasurer Ben Chifley became acting Prime Minister as Forde was attending the San Francisco Conference. Curtin died on 5 July 1945, and Forde was sworn in as Prime Minister. Forde did not have the support of his party, however, and was replaced by Chifley after a leadership ballot was held on 13 July.[172]
Intelligence and special forces
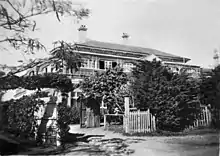
Australia developed large intelligence services during the war. Prior the outbreak of war the Australian military possessed almost no intelligence gathering facilities and was reliant on information passed on by the British intelligence services. Several small signals intelligence units were established in 1939 and 1940, which had some success intercepting and deciphering Japanese transmissions before the outbreak of the Pacific War.[173]
MacArthur began organising large scale intelligence services shortly after his arrival in Australia. On 15 April 1942, the joint Australian-US Central Bureau signals intelligence organisation was established at Melbourne. Central Bureau's headquarters moved to Brisbane in July 1942, and Manila in May 1945. Australians made up half the strength of Central Bureau, which was expanded to over 4,000 personnel by 1945.[174] The Australian Army and RAAF also provided most of the Allied radio interception capability in the SWPA, and the number of Australian radio interception units was greatly expanded between 1942 and 1945. Central Bureau broke a number of Japanese codes and the intelligence gained from these decryptions and radio direction finding greatly assisted Allied forces in the SWPA.[175]
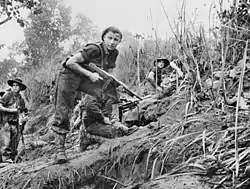
Australian special forces played a significant role in the Pacific War. Following the outbreak of war commando companies were deployed to Timor, the Solomon and Bismarck islands and New Caledonia. Although the 1st Independent Company was swiftly overwhelmed when the Japanese invaded the Solomon Islands in early 1942, the 2/2nd and 2/4th Independent Companies waged a successful guerrilla campaign on Timor which lasted from February 1942 to February 1943, when the Australian force was evacuated.[176] Other commando units also played an important role in the New Guinea, New Britain, Bougainville and Borneo campaigns throughout the war where they were used to collect intelligence, spearhead offensives and secure the flanks of operations conducted by conventional infantry.[177]
Australia also formed small-scale raiding and reconnaissance forces, most of which were grouped together as the Allied Intelligence Bureau. Z Special Unit conducted raids far behind the front line, including a successful raid on Singapore in September 1943. M Special Unit, coastwatchers and smaller AIB units also operated behind Japanese lines to collect intelligence.[178] AIB parties were often used to support Australian Army units and were assigned to inappropriate tasks such as tactical reconnaissance and liaison. AIB missions in Timor and Dutch New Guinea were also hampered by being placed under the command of unpopular Dutch colonial administrators.[179] The RAAF formed a specially equipped unit (No. 200 Flight) in 1945 to support these operations by transporting and supplying AIB parties in areas held by the Japanese.[180]
Operations against the Japanese home islands
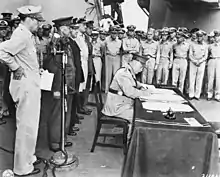
Australia played a minor role in the Japan campaign in the last months of the war and was preparing to participate in the invasion of Japan at the time the war ended. Several Australian warships operated with the British Pacific Fleet (BPF) during the Battle of Okinawa and Australian destroyers later escorted British aircraft carriers and battleships during attacks on targets in the Japanese home islands.[181] Despite its distance from Japan, Australia was the BPF's main base and a large number of facilities were built to support the fleet.[182]
Australia's participation in the planned invasion of Japan would have involved elements of all three services fighting as part of Commonwealth forces. It was planned to form a new 10th Division from existing AIF personnel which would form part of the Commonwealth Corps with British, Canadian and New Zealand units. The corps' organisation was to be identical to that of a US Army corps, and it would have participated in the invasion of the Japanese home island of Honshū which was scheduled for March 1946.[183] Australian ships would have operated with the BPF and US Pacific Fleet and two RAAF heavy bomber squadrons and a transport squadron were scheduled to be redeployed from Britain to Okinawa to join the strategic bombardment of Japan as part of Tiger Force.[184] Planning for operations against Japan ceased in August 1945, when Japan surrendered following the atomic bombings of Hiroshima and Nagasaki.[185]
General Blamey signed the Japanese Instrument of Surrender on behalf of Australia during the ceremony held on board USS Missouri on 2 September 1945.[186] Several RAN warships were among the Allied ships anchored in Tokyo Bay during the proceedings.[187] Following the main ceremony on board Missouri, Japanese field commanders surrendered to Allied forces across the Pacific Theatre. Australian forces accepted the surrender of their Japanese opponents at ceremonies conducted at Morotai, several locations in Borneo, Timor, Wewak, Rabaul, Bougainville and Nauru.[188]
Australians in other theatres
In addition to the major deployments, Australian military units and service men and women served in other theatres of the war, typically as part of British-led Commonwealth forces. About 14,000 Australians also served in the Merchant Navy and crewed ships in many areas of the world.[189]
.jpg.webp)
Australia played a minor role in the British-led campaigns against Vichy French colonial possessions in Africa. In late September 1940, the heavy cruiser Australia took part in the unsuccessful British and Free French attempt to capture Dakar in which she sank a Vichy French destroyer. The Australian Government was not informed of the cruiser's involvement in this operation prior to the battle and complained to the British Government.[190] Three Australian destroyers also took part in the invasion of Madagascar in September 1942.[44] Closer to home, Adelaide played a significant role in ensuring that New Caledonia came under Free French control in September 1940, by escorting a pro-Free French Governor to Nouméa and taking station off the city during the popular protests which resulted in the Governor replacing the pro-Vichy authorities.[190]
Australian warships served in the Red Sea and Persian Gulf through much of the war. From June to October 1940, HMAS Hobart took part in the East African Campaign, and played an important role in the successful evacuation of Berbera.[191] In May 1941, Yarra supported an operation in which Gurkha troops were landed near Basra during the Anglo-Iraqi War. In August 1941, Yarra and Kanimbla took part in the Anglo-Soviet invasion of Iran, with Yarra sinking the Iranian sloop Babr near Kohorramshahr and Kanimbla landing troops at Bandar Shapur.[192] A dozen Bathurst-class corvettes also escorted Allied shipping in the Persian Gulf during 1942.[193]
While most Australian units in the Pacific Theatre fought in the SWPA, hundreds of Australians were posted to British units in Burma and India. These included 45 men from the 8th Division who volunteered to train Chinese guerrillas with the British Mission 204 in southern China and served there from February to September 1942.[194] Hundreds of Australians also served with RAF units in India and Burma, though no RAAF units were deployed to this theatre. In May 1943, some 330 Australians were serving in forty-one squadrons in India, of which only nine had more than ten Australians.[60] In addition, many of the RAN's corvettes and destroyers served with the British Eastern Fleet where they were normally used to protect convoys in the Indian Ocean from attacks by Japanese and German submarines.[195]
Prisoners of war
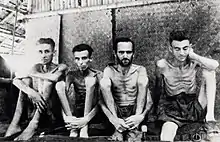
Just under 29,000 Australians were taken prisoner by the Axis during the war. Only 14,000 of the 21,467 Australian prisoners taken by the Japanese survived captivity. The majority of the deaths in captivity were due to malnutrition and disease.[196]
The 8,000 Australians captured by Germany and Italy were generally treated in accordance with the Geneva Conventions. The majority of these men were taken during the fighting in Greece and Crete in 1941, with the next largest group being 1,400 airmen shot down over Europe. Like other western Allied POWs, the Australians were held in permanent camps in Italy and Germany. As the war neared its end the Germans moved many prisoners towards the interior of the country to prevent them from being liberated by the advancing Allied armies. These movements were often made through forced marches in harsh weather and resulted in many deaths.[197] Four Australians were also executed following a mass escape from Stalag Luft III in March 1944.[198] While the Australian prisoners suffered a higher death rate in German and Italian captivity than their counterparts in World War I, it was much lower than the rate suffered under Japanese internment.[199]
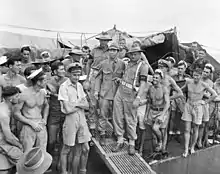
Like the other Allied personnel captured by the Japanese, most of the thousands of Australians captured in the first months of 1942, during the conquest of Malaya and Singapore, the NEI and New Britain were held in harsh conditions. Australians were held in camps across the Asia-Pacific region and many endured long voyages in grossly overcrowded ships. While most of the Australian POWs who died in Japanese captivity were the victim of deliberate malnutrition and disease, hundreds were deliberately killed by their guards. The Burma–Thai Railway was the most notorious of the prisoner of war experiences, as 13,000 Australians worked on it at various times during 1942 and 1943, alongside thousands of other Allied POWs and Asians conscripted by the Japanese; nearly 2,650 Australians died there.[200] Thousands of Australian POWs were also sent to the Japanese home islands where they worked in factories and mines in generally harsh conditions.[201] The POWs held in camps at Ambon and Borneo suffered the highest death rates; 77 percent of those at Ambon died and few of the 2,500 Australian and British prisoners in Borneo survived; almost all were killed by overwork and a series of death marches in 1945.[202]
The treatment of the POWs prompted many Australians to remain hostile towards Japan after the war.[203] Australian authorities investigated the abuses against Allied POWs in their country's zone of responsibility after the war, and guards who were believed to have mistreated prisoners were among those tried by Australian-administered war crimes trials.[204]
Thousands of Axis POWs were held in Australia during the war. A total of 25,720 POWs were held in Australia: 18,432 Italians, 5,637 Japanese and 1,651 Germans. These prisoners were housed in purpose-built camps and were treated in accordance with the Geneva Convention.[205] A total of 16,798 civilians were also interned. These included 8,921 Australian-resident "enemy aliens", while the remainder were civilians sent to Australia for internment by other Allied countries.[206] On the morning of 5 August 1944, approximately half of the 1,104 Japanese held at a camp near Cowra, New South Wales, attempted to escape. The prisoners overwhelmed their guards and over 400 broke through the wire fences; however, every escapee was either recaptured or killed within 10 days.[207]
Home front
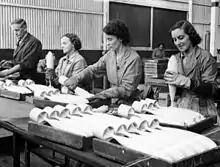
During the war the Australian Government greatly expanded its powers in order to better direct the war effort, and Australia's industrial and human resources were focused on supporting the Allied armed forces. The expansion of the government's powers began on 9 September 1939, when the National Security Act became law. This act enabled the government to introduce industrial conscription, and both men and women were ordered into essential industries. Rationing was first introduced in 1940, and was greatly expanded during 1942. The Government also strongly encouraged austerity and war bonds as a means of reducing demand for scarce resources.[208]
Government policies to develop war-related industries were successful in increasing the sophistication of Australia's industrial sector and self-sufficiency in most categories of weapons. In the decades leading up to the war successive Australian governments had provided subsidies, tariffs and other incentives encourage the development of military-related manufacturing sectors such as the production of aircraft, automobiles, electronics and chemicals.[209] These secondary industries were integrated into a war economy during 1940 and 1941, and were able to meet most of the Army's needs by 1942.[210] Government-led efforts to develop and manufacture advanced technology enjoyed some notable successes, including the development of lightweight radar sets, optical devices for artillery and equipment adapted for use in the tropics.[211] Australian industry also developed new weapons which were mass-produced for the military, including the Owen submachine gun and a shortened version of the Ordnance QF 25 pounder.[212] In addition, Australian scientists and pharmaceutical companies made important advances in the treatment of tropical diseases.[213] Not all development projects were successful though: efforts to develop an Australian tank (the Sentinel) did not cease until after it had been rendered obsolete and unnecessary,[214] and the development of Australian-designed advanced bomber and fighter aircraft—the CAC Woomera and CAC CA-15 respectively—were abandoned as the engines these aircraft required were not available and adequate US and British designs were produced under licence instead.[215]
.jpg.webp)
The massive expansion of the military led to a critical shortage of male workers and increased female participation in the labour force. The number of Australian women in paid employment increased from 644,000 in 1939, to 855,000 in 1944. While this was only a five percentage point increase in the proportion of all Australian women who were working, large numbers of women moved from traditionally "female" roles such as domestic servants into "male" roles in industry. Female branches of the armed forces were established in 1941, and by 1944 almost 50,000 women were serving in the Women's Royal Australian Naval Service, Australian Women's Army Service and Women's Auxiliary Australian Air Force. Thousands more served with the civilian Australian Women's Land Army or undertook voluntary war work. Manpower shortages became an increasingly significant economic issue towards the end of the war, and the Australian military was reduced in size from 1944, to free up personnel for war industries and the civilian economy.[216]
Industrial conscription and the drive to increase productivity led to an increasing degree of industrial unrest over time. Many workers were required to work long hours in poor conditions and were not able to change their employment due to the manpower laws. Poor work conditions were exacerbated by the Government's austerity measures reducing workers' standards of living. As a result, strikes and other forms of protest disrupted Australian production, especially from 1943 onwards. These protests attracted considerable criticism from other civilians and members of the military.[217] In May 1943, the Government introduced policies which enabled workers who were undertaking unlawful industrial action to be conscripted into the military, but this had little impact due to the shortage of skilled labour in the industries most prone to industrial disputes.[218]
World War II marked the beginning of a long period of Australian economic growth. The war greatly increased the size and importance of the Australian manufacturing sector and stimulated the development of more technologically advanced industries. As part of this trend many workers acquired relatively high skill levels and female labour force participation rates greatly increased. Many women were forced out of traditionally male-dominated industries after the war, however.[219]
After the war
.jpg.webp)
World War II cost thousands of Australian lives and consumed a large portion of the national income. During the war, 27,073 members of the Australian military were either killed, died of wounds or died while prisoners of war. Of these, 9,572 were killed in the war against Germany and Italy and 17,501 in the war against Japan. Prisoners of war held by the Japanese made up nearly half of Australia's deaths in the Pacific.[220] At least 386 Australian civilian seamen were killed during the war.[221] Total Australian war expenditure was £2,949,380,000 and at its peak in 1942–43, military costs accounted for 40.1 percent of national income.[220]
In the months after the war, Australian authorities were responsible for administering all of Borneo and the NEI east of Lombok until the British and Dutch colonial governments were re-established. While British and Indian forces in the west of the NEI became caught up in the Indonesian National Revolution, the Australians were able to avoid clashes with local nationalists.[222] Australian forces were also responsible for guarding the 344,000 remaining Japanese in the NEI and Australian territories and administering war crimes trials in these areas.[223] A volunteer force was formed as Australia's contribution to the British Commonwealth Occupation Force (BCOF) in Japan, and Australia provided the BCOF's headquarters and a high proportion of its personnel.[224] This force later formed the nucleus of the post-war Australian Army, which included permanent combat units for the first time.[225]
The Australian military was rapidly demobilised after the Japanese surrender. At the end of the war the military had a strength of nearly 600,000 personnel, of whom 224,000 were serving in the Pacific and 20,000 in Britain and other places. Demobilisation planning had begun at the end of 1942 with the final scheme being approved by the Government in March 1945. General demobilisation started on 1 October 1945, and was completed in February 1947. The process generally ran smoothly, though there were protests over delays at Morotai and Bougainville. Personnel were provided with training while they waited to be demobilised and the government provided post-demobilisation assistance with employment, loans, education and other benefits.[226] Service women were given similar assistance to their male counterparts, but were placed under pressure to return to 'traditional' family roles.[227]
World War II led to significant changes to Australian society. Economically, the war accelerated the development of Australia's manufacturing industry and led to a large fall in unemployment. The impact of World War II changed Australian society, and contributed to the development of a more cosmopolitan society in which women were able to play a larger role. The war also resulted in a greater maturity in Australia's approach to international affairs, as demonstrated by the development of a more independent foreign policy and the encouragement of mass immigration after the war.[228]
See also
Notes
- Cresciani (2013), pp. 97–98
- "Appendix 3: Proclamations and other legal instruments relating to Australia's involvement in war" (PDF). Parliamentary involvement in declaring war and deploying forces overseas. Department of Parliament Services for Australia. 22 March 2010. p. 31. Retrieved 9 December 2019.
- 27,073 Australians were killed and 23,477 were wounded by enemy action during the war; however, when non-battle casualties are included these figures are 39,767 killed and another 66,553 wounded. See "Australian War Casualties". Australian War Memorial. 15 December 2005. Archived from the original on 15 March 2009. Retrieved 4 April 2009.
- Macintyre (1986). p. 325.
- Hasluck (1970), pp. 6–7.
- Hasluck (1965). pp. 151–156.
- Beaumont (1996). pp. 1–3.
- Coates (2006). p. 116.
- Coates (2006). p. 118.
- Macintyre (1986). p. 326.
- McKernan (1983). p. 4.
- Stephens (2006). pp. 76–79.
- Long (1961). p. 39.
- Beaumont (1996). pp. 7–9.
- Dennis et al. (2008). p. 4.
- Palazzo (2001). pp. 139–140.
- Palazzo (2001). pp. 144–146.
- Stephens (2006). p. 75.
- Stephens (2006). pp. 60–64.
- Beaumont (1996). p. 18.
- Stephens (2006). p. 73.
- Grey (2008). pp. 156–164.
- Frame (2004). pp. 153–157.
- Long (1973). p. 54.
- Long (1973). pp. 55–58.
- Long (1973). pp. 60–62.
- Long (1973). p. 63.
- Coates (2006). p. 132.
- Coulthard-Clark (2001). pp. 183–186.
- Odgers (2000). pp. 185–186, 191–192.
- Dennis et al. (2008). pp. 241–242.
- Coates (2006). pp. 144–146.
- Coulthard-Clark (2001). p. 190.
- Kuring (2004). p. 127.
- Frame (2004). pp. 160–161.
- McKernan (2006). pp. 125–133.
- While attached to the Australian 7th Division, Moshe Dayan, the future Israeli general, lost the sight in his left eye when a Vichy French sniper hit his binoculars.
- Johnston (2007). pp. 18–19.
- Johnston, Mark (2013). "Syria and Lebanon (June–July 1941)". The Australian Army in World War II. Bloomsbury Publishing. ISBN 9781472805225. Retrieved 19 February 2019.
On 18 June, Gen Lavarack, now commanding I Australian Corps, took over the campaign from the British Gen Wilson.
- Coates (2006). pp. 154–159.
- Hasluck (1970), pp. 73–87, 177.
- Hasluck (1970), pp. 177, 197–198.
- Beaumont (1996), p. 17.
- Long (1973), p. 265.
- Coates (2006), pp. 168–172.
- Coates (2006), pp. 172–176.
- Long (1973), pp. 284–285.
- Odgers (2000). pp. 183–184.
- Coates (2006). pp. 192–195.
- Stanley (1987). pp. 118–124.
- Stanley (1987). pp. 126–139.
- Long, (1973), pp. 374–384.
- Stanley (1987). p. 135.
- Coates (2006). pp. 120, 180–191.
- Coulthard-Clark (2001). p. 173.
- Long (1973). pp. 41–43.
- "Air war Europe 1939–1945: Fighter Command". Australia's War 1939–1945. Government of Australia. Archived from the original on 11 March 2008. Retrieved 12 December 2007.
- "455 Squadron RAAF". Australian War Memorial. Retrieved 15 March 2008.
- Sutton (2019). p. 58.
- Long (1973). p. 369.
- Stephens(2006). p. 107.
- Stephens (2006). p. 99.
- Stanley (2003)
- "464 Squadron RAAF". Australian War Memorial. Retrieved 9 July 2008.
- Stephens (2006). pp. 65–67.
- Odgers (2000). pp. 187–191.
- Stephens (2006). pp. 102–103.
- Long (1973). p. 393.
- Stephens (2006). p. 96.
- Stanley (2004)
- "Australian Contribution to D-Day Operations" (PDF). Pathfinder. RAAF Air Power Development Centre (13). 2004. Archived from the original (PDF) on 3 September 2007. Retrieved 25 January 2009.
- Long (1973). pp. 379–393.
- Herington (1963). pp. 450–451.
- Hasluck (1970). p. 2.
- Horner (1993). pp. 2–3.
- Grey (2008). pp 165–196.
- Dennis et al. (2008). pp. 339–340.
- Coates (2006). p. 203.
- Coates (2006). pp. 210–212.
- Coates (2006). pp. 212–214.
- Coulthard-Clark (2001). pp. 202–204.
- Wigmore (1957). p. 511.
- Lodge (1993)
- Hasluck (1970), p. 71.
- Coates (2006). pp. 202–204.
- "The Coastwatchers 1941–1945". Australia's War 1939–1945. Archived from the original on 18 January 2009. Retrieved 26 January 2009.
- Hasluck (1970). p. 14.
- Moremon, John (2003). "Rabaul, 1942". Remembering the War in New Guinea. Australia-Japan Research Project. Retrieved 19 October 2010.
- Coulthard-Clark (2001). pp. 201–202.
- Coulthard-Clark (2001). pp. 207–208.
- Long (1973). p. 250.
- Lewis & Ingman (2013). Chapter 10–14.
- Coates (2006). pp. 224–227.
- Long (1973). pp. 186–187.
- Grey (1999). p. 171.
- Day (1999). pp. 452–457.
- Grey (2001). p. 140.
- Dennis et al. (2008). pp. 458, 468.
- Dennis et al. (2008). pp. 4–5.
- McKernan (1983). pp. 122–124.
- Palazzo (2001). p. 174.
- Stephens (2006). pp. 152–153.
- Stanley (2007). p. 29.
- Horner (1993). pp. 4–5.
- Horner (1993). p. 10.
- Curtin, John. "The Task Ahead Archived 25 March 2017 at the Wayback Machine." The Herald, 27 December 1941.
- Beaumont (1996a). pp. 34–36.
- Dennis et al. (2008). p. 92.
- Dennis et al. (2008). p. 332.
- "All in – 'over-sexed, over-paid and over here'". Australia's War 1939–1945. Archived from the original on 3 March 2008. Retrieved 2 March 2008.
- Day (1999). pp. 441–442.
- Moremon, John (2003). "New Guinea north coast, 1942". Remembering the War in New Guinea. Australia-Japan Research Project. Archived from the original on 31 August 2007. Retrieved 7 November 2007.
- Coates (2006). pp. 233–236.
- Bullard (2007). pp. 182–184.
- Moremon, John (2003). "Kokoda, 1942: Australian counter-attack". Remembering the War in New Guinea. Australia–Japan Research Project. Retrieved 13 July 2008.
- Dennis et al. (2008). p. 222.
- "The Air Campaign Over the Kokoda Trail" (PDF). Pathfinder. RAAF Air Power Development Centre. 2: 121–124. 2005. ISBN 978-1-920800-23-9. Retrieved 25 January 2009.
- Coates (2006). p. 232.
- Coates (2006). p. 240.
- Johnson (1996), pp. 38–40
- Long (1973). pp. 251–256.
- Beaumont (1996a). pp. 41–42.
- Johnston (2007). p. 8.
- Cooper (2001)
- Stevens (2005). pp. 192–201.
- Stevens (2005). pp. 218–248.
- Stevens (2005). p. 246.
- Jedrzejewski, Marcin. "The Monsun boats". uboat.net. Retrieved 3 June 2009.
- Straczek, J.H. "RAN in the Second World War". Royal Australian Navy. Archived from the original on 21 November 2008. Retrieved 13 March 2009.
- Palazzo (2001). pp. 155–158.
- Odgers (1968). p. 141.
- Stevens (2005). pp. 330–334.
- Horner (2002). pp. 15–16.
- "'Bloody ridges': Wau-Salamaua". Australia's War 1939–1945. Archived from the original on 16 January 2008. Retrieved 1 January 2008.
- Coates (2006). pp. 57–60.
- Long (1973). pp. 331–343.
- Coates (2006). p. 254.
- Coates (2006). pp. 254–257.
- Frame (2004). pp. 183–184.
- Long (1973). pp. 345–347.
- "No. 18 (NEI) Squadron, RAAF". Allies in adversity. Australian War Memorial. Retrieved 4 November 2007.
- Powell (1988). pp. 108–110.
- Coulthard-Clark (2001). p. 206.
- Dennis et al. (2008). pp. 288–289.
- Coates (2006). pp. 269–271.
- Hasluck (1970). p. 623.
- Palazzo (2001). pp 177–178.
- Horner (1982). p. 302.
- Long (1963). pp. 82–83.
- "'Island hopping'". Australia's War 1939–1945. Archived from the original on 19 November 2007. Retrieved 1 January 2008.
- Odgers (1968). p. 498.
- Nichols (2004)
- Coates (2006). pp. 266–268.
- Odgers (1968). pp. 374–379.
- Horner (1982). pp. 382–383.
- McKernan (2006). p. 445.
- Beaumont (1996a). p. 46.
- Grey (1999). pp. 184–185.
- Day (2003), pp. 623–624.
- Coates (2006). p. 276.
- Odgers (1968). p. 318.
- Coates (2006). pp. 273–275.
- Coates (2006). pp. 278–279.
- Coates (2006). pp. 278–280.
- Coates (2006). p. 282.
- Horner (1982). pp. 394–395.
- Long (1973). pp. 447–453.
- Coates (2006). pp. 286–288.
- Gin (2002)
- Coates (2006). pp. 288–292.
- Grey (1999). pp. 184–186.
- Hasluck (1970). pp. 489–591.
- Horner (1982). pp. 224–225.
- Horner (1982). p. 242.
- Clarke (2005). pp. 48–51.
- "Fall of Timor". Australia's War 1939–1945. Archived from the original on 27 July 2008. Retrieved 15 January 2008.
- Kuring (2004). pp. 140–141.
- Long (1963). pp. 617–622.
- Dennis et al. (2008). p. 508.
- Nelmes (1994). pp. 128–133.
- Gill (1968). pp. 603–607, 611–614, 663–665, 673–674.
- Horner (1982). pp. 377–381.
- Horner (1982). pp. 414–418.
- Day (2003). pp. 650, 671.
- Long (1963). p. 549.
- Long (1973). p. 468.
- "Allied Ships Present in Tokyo Bay During the Surrender Ceremony, 2 September 1945". United States Navy Naval Historical Center. Archived from the original on 14 August 2010. Retrieved 3 June 2009.
- "'Surrender'". Australia's War 1939–1945. Archived from the original on 17 February 2011. Retrieved 23 February 2008.
- McKernan (2006). pp. 393–394.
- Horner (1982). p. 40.
- "HMAS Hobart (I)". Royal Australian Navy. Retrieved 15 September 2008.
- Nash and Stephens(2006). pp. 9–10.
- Long (1973). p. 287.
- "Far Flung Australians". Australia's War 1939–1945. Archived from the original on 1 September 2007. Retrieved 2 December 2007. see also Andrews, Eric (1987). "Mission 204: Australian Commandos in China, 1942". Journal of the Australian War Memorial. Canberra: Australian War Memorial (10): 11–20. ISSN 0729-6274.
- "'The Far East'". Australia's War 1939–1945. Archived from the original on 4 August 2008. Retrieved 17 August 2008.
- Beaumont (2001). p. 345.
- "Forced marches". Australia's War 1939–1945. Archived from the original on 26 June 2008. Retrieved 22 March 2008.
- Herrington (1963). p. 495.
- Dennis et al. (2008). p. 429.
- Beaumont (1996a). p. 48.
- Dennis et al. (2008). p. 433.
- Dennis et al. (2008). p. 434.
- Macintyre (1999). pp. 192–193.
- "Fact sheet 61 – World War II war crimes". National Archives of Australia. 2003. Archived from the original on 11 December 2008. Retrieved 4 January 2009.
- Dennis et al. (2008). p. 435.
- Dennis et al. (2008). pp. 21–22.
- "Cowra Breakout". Australian War Memorial Encyclopedia. Australian War Memorial. Archived from the original on 27 July 2009. Retrieved 15 September 2008.
- "All in – 'living with war'". Australia's War 1939–1945. Archived from the original on 28 December 2015. Retrieved 2 March 2008.
- Ross (1999). pp. 26–28.
- Ross (1999). pp. 28–31.
- Ross (1999). pp. 32–34.
- Ross (1999). pp. 34–36.
- Dennis et al. (2008). p. 484.
- Mellor (1958). p. 320.
- Mellor (1958). pp. 411–412.
- Darian-Smith (1996). pp. 61–65.
- McKernan (1983). pp. 227–331.
- Butlin and Schedvin (1977). pp. 371–374.
- Haig-Muir and Hay (1996). pp. 130–132.
- Long (1973). p. 474.
- "Merchant Navy, Second World War". Australian War Memorial Online Encyclopedia. Australian War Memorial. Archived from the original on 22 July 2008. Retrieved 17 August 2008.
- Hasluck (1970). pp. 602–609.
- Long (1973). pp. 471–472.
- Dennis et al. (2008). pp. 110–112.
- Grey (2001). p. 164.
- James (2009). pp. 14–17.
- Adam-Smith (1984). pp. 362–363, 367.
- Grey (1999). p. 191.
References
- Adam-Smith, Patsy (1984). Australian Women at War. Melbourne: Thomas Nelson Australia. ISBN 0-17-006408-5.
- Beaumont, Joan (1996). "Australia's war: Europe and the Middle East". In Beaumont, Joan (ed.). Australia's War, 1939–1945. Sydney: Allen & Unwin. ISBN 1-86448-039-4.
- Beaumont, Joan (1996a). "Australia's war: Asia and the Pacific". In Beaumont, Joan (ed.). Australia's War, 1939–1945. Sydney: Allen & Unwin. ISBN 1-86448-039-4.
- Beaumont, Joan (2001). Australian Defence: Sources and Statistics. The Australian Centenary History of Defence. Volume VI. Melbourne: Oxford University Press. ISBN 0-19-554118-9.
- Bullard, Steven (translator) (2007). Japanese army operations in the South Pacific Area New Britain and Papua campaigns, 1942–43. Canberra: Australian War Memorial. ISBN 978-0-9751904-8-7.
- Butlin, S.J.; Schedvin, C. B. (1977). War Economy, 1942–1945. Australia in the War of 1939–1945. Series 4 – Civil. Canberra: Australian War Memorial. ISBN 0-642-99406-4.
- Clark, Chris (2003). "The Empire Air Training Scheme". Australian War Memorial 2003 History Conference - Air War Europe. Australian War Memorial. Archived from the original on 10 March 2008. Retrieved 22 December 2007.
- Clark, Chris (2005). "Code War". Wartime. Canberra: The Australian War Memorial (31).
- Coates, John (2006). An Atlas of Australia's Wars. Melbourne: Oxford University Press. ISBN 0-19-555914-2.
- Cooper, Alastair (2001). "Raiders and the Defence of Trade: The Royal Australian Navy in 1941". Remembering 1941. Australian War Memorial. Archived from the original on 20 May 2009. Retrieved 19 September 2008.
- Coulthard-Clark, Chris (2001). The Encyclopaedia of Australia's Battles. Sydney: Allen & Unwin. ISBN 1-86508-634-7.
- Cresciani, Gianfranco (2013). The Italians in Australia. Cambridge University Press. ISBN 978-0-5215-3778-0.
- Darian-Smith, Kate (1996). "War and Australian Society". In Beaumont, Joan (ed.). Australia's War, 1939–1945. Sydney: Allen & Unwin. ISBN 1-86448-039-4.
- Day, David (1992). Reluctant Nation: Australia and the Allied Defeat of Japan, 1942–1945. New York: Oxford University Press. ISBN 0-19-553242-2.
- Day, David (1999). John Curtin. A life. Sydney: HarperCollins Publishers. ISBN 0-7322-6413-8.
- Day, David (2003). The Politics of War. Sydney: HarperCollins Publishers. ISBN 0-7322-7881-3.
- Dennis, Peter; Grey, Jeffrey; Morris, Ewan; Prior, Robin; Bou, Jean (2008). The Oxford Companion to Australian Military History (Second ed.). Melbourne: Oxford University Press. ISBN 978-0-19-551784-2.
- Frame, Tom (2004). No Pleasure Cruise. The Story of the Royal Australian Navy. Sydney: Allen & Unwin. ISBN 1-74114-233-4.
- Gill, G. Hermon (1968). Royal Australian Navy 1942–1945. Australia in the War of 1939–1945. Series 2 – Navy. Canberra: Australian War Memorial. OCLC 65475.
- Gin, Ooi Keat (2002). "Prelude to invasion: covert operations before the re-occupation of Northwest Borneo, 1944–45". Journal of the Australian War Memorial. 37. Retrieved 4 June 2009.
- Grey, Jeffrey (1999). A Military History of Australia (Second ed.). Cambridge: Cambridge University Press. ISBN 0-521-64483-6.
- Grey, Jeffrey (2001). The Australian Army. The Australian centenary history of defence (First ed.). Melbourne: Oxford University Press. ISBN 0-19-554114-6.
- Grey, Jeffrey (2008). A Military History of Australia (Third ed.). Port Melbourne: Cambridge University Press. ISBN 978-0-521-69791-0.
- Haig-Muir, Marine; Hay, Roy (1996). "The economy at war". In Beaumont, Joan (ed.). Australia's War, 1939–1945. Sydney: Allen & Unwin. ISBN 1-86448-039-4.
- Hasluck, Paul (1965). The Government and the People 1939–1941. Australia in the War of 1939–1945. Series 4 – Civil (reprint ed.). Canberra: Australian War Memorial.
- Hasluck, Paul (1970). The Government and the People 1942–1945. Australia in the War of 1939–1945. Series 4 – Civil. Canberra: Australian War Memorial. 6429367X.
- Herington, John (1963). Air Power Over Europe, 1944–1945. Australia in the War of 1939–1945. Series 3 – Air. Canberra: Australian War Memorial.
- Horner, David (1982). High Command. Australia and Allied strategy 1939–1945. Sydney: Allen & Unwin with the assistance of the Australian War Memorial. ISBN 0-86861-076-3.
- Horner, David (May 1993). "Defending Australia in 1942". War & Society. Canberra: Department of History, Australian Defence Force Academy. 11 (1): 1–21. doi:10.1179/072924793791198886. ISSN 0729-2473.
- Horner, David (2002). "The Evolution of Australian Higher Command Arrangements". Command Papers. Centre for Defence Leadership Studies, Australian Defence College. Archived from the original (doc) on 9 November 2014. Retrieved 4 June 2009.
- James, Karl (2009). "Soldiers to citizens". Wartime. Canberra: Australian War Memorial (45). ISSN 1328-2727.
- Johnston, Mark (1996). At the Front Line : Experiences of Australian Soldiers in World War II. Cambridge: Cambridge University Press. ISBN 0-521-56037-3.
- Johnston, Mark (2007). The Australian Army in World War II. Elite. Martin Windrow (consultant editor). Oxford: Osprey Publishing. ISBN 978-1-84603-123-6.
- Kuring, Ian (2004). Red Coats to Cams. A History of Australian Infantry 1788 to 2001. Sydney: Australian Military History Publications. ISBN 1-876439-99-8.
- Lewis, Tom; Ingman, Peter (2013). Carrier Attack – Darwin 1942: The Complete Guide to Australia's Own Pearl Harbor. Kent Town, South Australia: Avonmore Books. ISBN 978-0-9871519-3-3.
- Lodge, A.B. (1993). "Bennett, Henry Gordon". Australian Dictionary of Biography. Melbourne University Press. ISSN 1833-7538. Retrieved 2 December 2007 – via National Centre of Biography, Australian National University.
- Long, Gavin (1961). To Benghazi. Australia in the War of 1939–1945. Series 1 – Army (reprint ed.). Canberra: Australian War Memorial.
- Long, Gavin (1953). Greece, Crete and Syria. Australia in the War of 1939–1945. Series 1 – Army. Canberra: Australian War Memorial. OCLC 570184876.
- Long, Gavin (1963). The Final Campaigns. Australia in the War of 1939–1945. Series 1 – Army. Canberra: Australian War Memorial.
- Long, Gavin (1973). The Six Years' War. A Concise History of Australia in the 1939–1945 War. Canberra: The Australian War Memorial and the Australian Government Printing Service. ISBN 0-642-99375-0.
- Macintyre, Stuart (1986). The Oxford History of Australia. Volume 4: 1901–1942 The Succeeding Age. Melbourne: Oxford University Press. ISBN 0-19-554612-1.
- Macintyre, Stuart (1999). A Concise History of Australia. Cambridge: Cambridge University Press. ISBN 0-521-62577-7.
- McKernan, Michael (1983). All In! Australia During the Second World War. Melbourne: Thomas Nelson Australia. ISBN 0-17-005946-4.
- McKernan, Michael (2006). The Strength of a Nation. Six years of Australians fighting for the nation and defending the homeland during WWII. Sydney: Allen & Unwin. ISBN 978-1-74114-714-8.
- Mellor, D.P. (1958). The Role of Science and Industry. Australia in the War of 1939–1945. Series 4 – Civil. Canberra: Australian War Memorial.
- Nash, Greg; Stevens, David (2006). Australia's Navy in the Gulf. From Countenance to Catalyst, 1941–2006. Sydney: Topmill.
- Nelmes, Michael V (1994). Tocumwal to Tarakan. Australians and the B-24 Liberator. Canberra: Banner Books. ISBN 1-875593-04-7.
- Nichols, Robert (2004). "The first kamikaze attack?". Wartime. Canberra: Australian War Memorial (28). Archived from the original on 2 October 2009. Retrieved 4 June 2009.
- Odgers, George (1968). Air War Against Japan 1943–1945. Australia in the War of 1939–1945. Series 3 – Air (reprint ed.). Canberra: Australian War Memorial.
- Odgers, George (2000). 100 Years of Australians at War. Melbourne: Ken Fin Books. ISBN 1-86302-669-X.
- Palazzo, Albert (2001). The Australian Army. A History of its Organisation 1901–2001. Melbourne: Oxford University Press. ISBN 0-19-551507-2.
- Powell, Alan (1988). The Shadow's Edge. Australia's Northern War. Melbourne: Melbourne University Press. ISBN 0-522-84371-9.
- Ross, Andrew (1999). "The Rise of Australian Defence Industry and Science 1901–1945". In Frank Cain (ed.). Arming the Nation. A History of Defence Science and Technology in Australia. Canberra: Australian Defence Studies Centre. ISBN 0-7317-0433-9.
- Stanley, Peter (1987). Air Battle Europe 1939–1945. Australians at War. Sydney: Time-Life Books (Australia). ISBN 0-949118-05-2.
- Stanley, Peter (2003). "The roundel: concentric identities among Australian airmen in Bomber Command". Australian War Memorial 2003 History Conference - Air War Europe. Australian War Memorial. Archived from the original on 13 June 2007. Retrieved 26 June 2008.
- Stanley, Peter (2004). "Australians and D-Day". Australian War Memorial. Archived from the original on 10 June 2008. Retrieved 6 July 2008.
- Stanley, Peter (2007). "What is the Battle for Australia?" (PDF). Australian Army Journal. 4 (2, Winter 2007). Archived from the original (PDF) on 12 February 2014. Retrieved 24 February 2008.
- Stanley, Peter (2008). Invading Australia. Japan and the Battle for Australia, 1942. Melbourne: Penguin Group (Australia). ISBN 978-0-670-02925-9.
- Stephens, Alan (2006) [2001]. The Royal Australian Air Force: A History. London: Oxford University Press. ISBN 0-19-555541-4.
- Stevens, David (2005). A Critical Vulnerability: The Impact of the Submarine Threat on Australia's Maritime Defence 1915–1954. Papers in Australian Maritime Affairs (No. 15). Canberra: Sea Power Centre - Australia. ISBN 0-642-29625-1. Archived from the original on 9 January 2009.
- Sutton, David (2019). "Coastal Sacrifice". Wartime. Canberra: The Australian War Memorial (85). ISSN 1328-2727.
- Wigmore, Lionel (1957). The Japanese Thrust. Australia in the War of 1939–1945. Series 1 – Army. Canberra: Australian War Memorial.
Further reading
- Arnold, Anthony (2013). "A Slim Barrier: The Defence of Mainland Australia 1939–1945". PhD Thesis. University of New South Wales.
External links
| Wikimedia Commons has media related to Military history of Australia during World War II. |
- "Second World War". Australian War Memorial. Archived from the original on 17 January 2008.
- "Remembering the War in New Guinea". Australia-Japan Research Project. Australian War Memorial. 2003.
- "Australia's War 1939–1945". Department of Veterans' Affairs. Archived from the original on 21 April 2017.
.jpg.webp)