Battle of Remagen
The Battle of Remagen during the Allied invasion of Germany resulted in the unexpected capture of the Ludendorff Bridge over the Rhine. After capturing the Siegfried Line, the 9th Armored Division of the U.S. First Army had advanced unexpectedly quickly towards the Rhine. They were very surprised to see one of the last bridges across the Rhine still standing.[6]:263–264 The Germans had wired the bridge with about 2,800 kilograms (6,200 lb) of demolition charges. When they tried to blow it up, only a portion of the explosives detonated. U.S. forces captured the bridge and rapidly expanded their first bridgehead across the Rhine, two weeks before Field Marshal Bernard Montgomery's meticulously planned Operation Plunder. The GIs' actions prevented the Germans from regrouping east of the Rhine and consolidating their positions.
| Battle of Remagen | |||||||
|---|---|---|---|---|---|---|---|
| Part of Operation Lumberjack during the Western Allied invasion of Germany in the Western Front of the European theatre of World War II | |||||||
 American forces cross the Ludendorff Bridge at Remagen on 8 March 1945 | |||||||
| |||||||
| Belligerents | |||||||
|
|
| ||||||
| Commanders and leaders | |||||||
|
|
| ||||||
| Strength | |||||||
| 1st Army |
7th Army Volkssturm | ||||||
| Casualties and losses | |||||||
|
At least 990 casualties, 30+ tanks[1][2][3][4] |
Unknown, 19,000 captured[5] | ||||||
The battle for control of the Ludendorff Bridge caused both the American and German forces to employ new weapons and tactics in combat for the first time. Over the next 10 days, after its capture on 7 March 1945 and until its failure on 17 March, the Germans used virtually every weapon at their disposal to try to destroy the bridge. This included infantry and armor, howitzers, mortars, floating mines, mined boats, a railroad gun, and the giant 600 mm Karl-Gerät super-heavy mortar. They also attacked the bridge using the newly developed Arado Ar 234B-2 turbojet bombers. To protect the bridge against aircraft, the Americans positioned the largest concentration of anti-aircraft weapons during World War II[7]:189 leading to "the greatest antiaircraft artillery battles in American history". The Americans counted 367 different German Luftwaffe aircraft attacking the bridge over the next 10 days. The Americans claimed to have shot down nearly 30% of the aircraft dispatched against them. The German air offensive failed.[8][9]
On 14 March, German Reich Chancellor Adolf Hitler ordered Schutzstaffel (SS) General Hans Kammler to fire V2 rockets to destroy the bridge. This marked the first time the missiles had been used against a tactical objective and the only time they were fired on a German target. The 11 missiles launched killed six Americans and a number of German citizens in nearby towns, but none landed closer than some 500 metres (1⁄4 mi) from the bridge.[2] When the Germans sent a squad of seven naval demolition swimmers wearing Italian underwater breathing apparatus, the Americans were ready. For the first time in combat, they had deployed the top-secret Canal Defence Lights[10][11]:410 which successfully detected the frogmen in the dark, who were all killed or captured.[12]
The sudden capture of a bridge across the Rhine was front-page news in American newspapers. The unexpected availability of a bridgehead on the eastern side of the Rhine more than two weeks in advance of Operation Plunder allowed Allied high commander Dwight Eisenhower to alter his plans to end the war. The Allies were able to rapidly transport five divisions across the Rhine into the Ruhr, Germany's industrial heartland. The bridge had endured months of aircraft bombing, direct artillery hits, near misses, and deliberate demolition attempts. It finally collapsed at 3:00 pm on 17 March, killing 33 American engineers and wounding 63. But by then U.S. Army combat engineers had finished building a tactical steel treadway bridge and a heavy duty pontoon bridge followed by a Bailey bridge across the Rhine. Over 25,000 troops crossed into Germany before the Americans broke out of the bridgehead on 25 March 1945. This was 18 days after the bridge had been captured. Some German and American military authorities agreed that capturing the bridge shortened the war, although one German general disputed this. The Ludendorff Bridge was not rebuilt following World War II.
Background
Romans originally built a settlement at Remagen in the first century AD.[13] Over that long period of time, it had been destroyed multiple times by invading armies from several nations. The town was rebuilt each time. In March 1945 about 5,000 people lived in the small resort town. The Rhine near Remagen was about 270 meters (890 ft) wide.[2] The Ludendorff Bridge had been built by Russian prisoners of war during World War I to help transport supplies from Germany to France.
Bridge construction and design
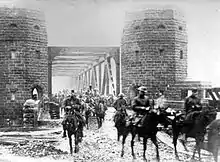
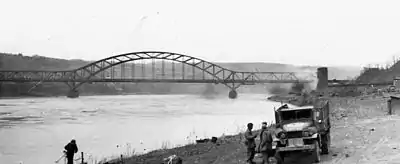
The bridge connected the village of Erpel on the eastern side with Remagen on the west bank. It had been named after the World War I German General Erich Ludendorff, who had been a key proponent for building this bridge. It carried two rail lines and pedestrian catwalks on either side across the Rhine. The total length was 400 metres (1,300 ft), while the main steel structure was 325 metres (1,066 ft) long. The arch spanned 156 metres (512 ft) and at its highest measured 28 metres (92 ft) above the water. Two trusses on either side of the central arch were both 85 metres (279 ft). An elevated overpass on each end of the span connected the approach to the bridge and allowed a rail line or roads to pass underneath, parallel to the river. The bridge was normally about 15 metres (49 ft) above the Rhine. Since it was built for military purposes, it had solidly built stone towers on either side of the rails on both banks, equipped with fighting loopholes and accommodations for up to a battalion of troops.[2] On the eastern side, a 1,299-foot-long (396 m) tunnel was cut at almost 90° through Erpeler Ley, a steeply sided hill that overlooks the Rhine.[14]
Demolition charges
The designers built cavities into the piers where demolition charges could be placed, but when the French occupied the Rhineland after World War I, they filled these cavities with concrete.[7]:68 After the Germans reacquired the Rhineland and control of the bridge, in 1938 they attached 60 zinc-lined boxes to the bridge girders, each capable of containing 3.66 kilograms (8.1 lb) of explosives. The system was designed to detonate all 60 charges at once, though by 7 March 1945, the charges had been removed and were stored nearby.[15][7]:69[16] They placed additional charges on the two piers. Within an inspection shaft in the west pier, the Germans placed 2,000 kilograms (4,400 lb) of explosives, and on the east pier they attached two charges of 300 kilograms (660 lb) to the girders connecting the bridge to the pier. The approximately 2,800 kilograms (6,200 lb) of charges were attached to an electric fuse and connected by electrical cables run through protective steel pipes to a control circuit located in the entrance to the tunnel under Erpeler Ley. As a backup, the Germans attached a primer cord to the charges under the eastern pier that could be manually ignited.[17]
Allied Rhineland campaign
During the fall of 1944, the Allies had repeatedly attempted to destroy the bridge to disrupt German efforts to reinforce their forces to the west. On 9 October 1944, a raid by 33 bombers damaged the bridge and it was reported as destroyed, but the bridge was back in use again on 9 November. A few weeks later on 28 December 1944, 71 B-24 Liberator bombers were dispatched to strike the bridge. They hit it with four bombs but the Germans quickly repaired it.[18] The 446th Bombardment Group attacked the bridge again on the next four consecutive days from 28 to 31 December 1944.[19] More bombers struck at the bridge during raids in January and February 1945.[14] On 5 March 1945, B-24 bombers from the 491st Bombardment Group attempted one more time to destroy the bridge, but failed.[20]
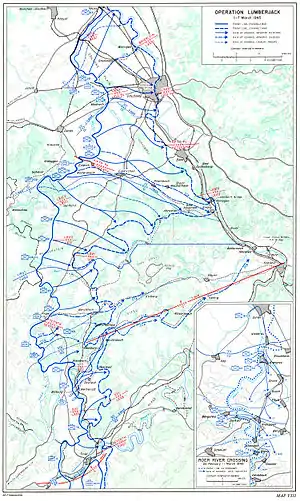
Operation Lumberjack was planned to prepare the way for Field Marshal Montgomery's massive Operation Plunder, an operation that rivaled the Normandy landings in size and complexity,[21][22]:558 eventually involving over a million troops and more than 30 divisions.[23]:88 Montgomery's typically cautious plan was to cross the Rhine in late March and invade central Germany. It included a large array of transport aircraft to ferry paratroopers and glider-borne infantry across the Rhine to set up the river crossing.[24]
Montgomery's ground assault plan included the British 21st Army Group, consisting of the British Second Army, First Canadian Army and the attached US 9th Army. They were charged with crossing the Rhine north of the Ruhr following the airborne assault. To the south, Montgomery would be supported by Lt. Gen. Omar Bradley's 12th Army Group, including the First Army under the command of Lt. Gen. Courtney Hodges. Hodges was given the objective of capturing dams on the Rur River and then trapping the Germans in a pincer move west of the Rhine. Plans for Operation Plunder had begun in England in August 1944,[25] almost since Operation Market Garden failed.[21]
After pushing the Germans back during the Battle of the Bulge, the Allies quickly advanced into western Germany. General Eisenhower established a twofold mission. The first was to prevent German forces defending the west bank of the Rhine River from escaping to the east bank. The second was to allow the Allied forces to select a river crossing where they could concentrate the attack leaving minimum forces defending the remainder of the front. The Allies held little hope they would be able to capture a Rhine River bridge intact. Instead, they brought up huge amounts of bridging equipment to the front.[15] But Eisenhower left a standing order that if any unit found a bridge intact, they were to "exploit its use to the fullest, and establish a bridgehead on the other side".[26]
Battle west of the Rhine

On 1 March 1945, of the 22 road and 25 railroad bridges across the Rhine, only four remained standing: the Hohenzollern Bridge in Cologne (destroyed by the Germans on 6 March); the Rhine Bridge at Bonn (blown up by the Germans on the evening of 8 March); and the Crown Prince Wilhelm Bridge at Urmitz (destroyed by the Germans on 9 March); the Americans would capture the Ludendorff Bridge at Remagen on 7 March.[27][28][29][30]:509 In early March, units assigned to Operation Lumberjack, including the U.S. Army's 9th Armored Division, were tasked with mopping up elements of the German Army trapped on the west bank of the Rhine and to prevent a counterattack against the Ninth Army's flank.[31]
To the south of the First Army, Lieutenant General George Patton's Third Army would also support Montgomery's advance across the Rhine. But the First Army had been delayed by two weeks when the Germans released water from the Rur river dams, flooding the valley below and slowing down the advance of Hodges' units.[23]
During the two weeks that the valley was flooded, Hitler refused to allow Gerd von Rundstedt, Commander-in-Chief of the Western Front, to withdraw German forces to the east side of the Rhine. Hitler believed that this move would only delay the inevitable fight and ordered Von Rundstedt to fight where his forces stood. By the time the flooding subsided and the U.S. Ninth Army was able to cross the Rur on 23 February, other Allied forces were also close to the Rhine's west bank. The German divisions on the Rhine's west bank were cut to pieces. About 280,000 German troops were captured and another 120,000 were killed, wounded, or missing in action.[23]:88
Capture of Cologne
Major General John W. Leonard, commanding officer of the 9th Armored Division, later recalled that on 6 March, III Corps commander Major General John Millikin, referring to the Ludendorff Bridge, told him over the phone, "You see that black line on the map. If you can seize that your name will go down in history."[32] In the last week of February, Colonel Charles G. Patterson, the anti-aircraft artillery officer for III Corps, led a meeting for brigade and group commanders during which they discussed what they would do if they were lucky enough to capture a bridge intact.[8]
On 2 March, Millikin assigned the 14th Tank Battalion commanded by Lieutenant Colonel Leonard E. Engemann to the north flank and attached it to the 1st Division. The 9th Armored's Combat Command B attacked towards the Erft river, and Combat Command A advanced towards the Ahr river. They were to then move south to capture Remagen and Sinzig before linking up with the flanks of Patton's Third Army.[6]
On the right flank of the First Army south of Bonn, the 9th Armored Division moved swiftly, and the closer they got to the Rhine, the more quickly they advanced. The speed of their movement towards the Rhine surprised the Germans.[33][34][35]
When the First Army captured Cologne and reached the west bank of the Rhine, it was greeted as a major success of the Allied campaign, but German engineers dropped the Hohenzollern Bridge on 6 March, shortly before the 3rd Armored Division arrived.[34]

Bridgehead location
General Eisenhower offered his generals some latitude in choosing the exact points for crossing the Rhine, though two areas where the Rhine valley was relatively broad were generally considered favorable. The first was between Cologne and Bonn in the north, and the other was between Andernach and Koblenz in the south. Both had some challenges, but offered relatively rapid access to the autobahn and into the Lahn river valley connecting to the Frankfurt–Kassel corridor. The least favored crossing points were in the area around the railroad bridge at Remagen. The upstream confluence of the Ahr River south of Remagen added considerable speed and turbulence to the 270-metre-wide (890 ft) Rhine at Remagen.[15] The Americans in the area around Remagen were not even supposed to cross the Rhine.[7]:14[6]
Geographically, the northwest shoulder of the bridge was situated on a shallow salient exposed to the eastern bank of the Rhine. There was only one primary road into the town of Remagen from the west, and that road did not parallel the normal Allied axis of supply. From a logistical viewpoint, the location of the bridge was badly situated near the southern boundary of the First US Army.[32]
The ground on the eastern side of the bridge rose steeply from the river. Inland, the steeply sloped terrain and gullies provided natural tank traps against advancing armor.[15] The rough, wooded Westerwald forest rose from the Rhine to elevations ranging from 200 to 400 metres (660 to 1,310 ft) about 500 metres (1,600 ft) inland. The primary road network on the eastern side was severely limited, consisting of only a river road and two narrow mountain roads, any of which could be easily blocked by the Germans.[32]
German defenses
General Gustav von Zangen's Fifteenth Army staff believed that the Allies would cross the Rhine using the open terrain of the Rheinbach Valley near the Ahr River. Zangen thought that the Rheinbach Valley offered the Allies a natural funnel for military operations. He argued with German Army Group B commander Field Marshal Walter Model, "The Americans would have to be stupid not to take advantage of this hole and push tanks toward the Rhine. I think they will use this valley—like water flowing downhill".[36]
Zangen believed that the Rhine River towns of Sinzig and Remagen were likely targets of Hodges' First Army. Zangen tried and failed to persuade Model to block the Americans by withdrawing two corps from the West Wall defenses along the German frontier and placing them at Remagen to protect the Ludendorff Bridge.
- German command confusion
A number of command changes in February and early March complicated German command of the Rhine crossings. Before the U.S. advance on the Rhine, the 22 road and 25 railroad bridges across the Rhine were the responsibility of the German Wehrkreis, or military districts. These soldiers did not report to an Army command but to the military arm of the Nazi Party, the Waffen-SS. During February, responsibility for the Ludendorff Bridge was transferred from Wehrkreis VI to Wehrkreis XII. In late February, German forces were reeling backwards and they had instituted a number of command changes to try to stem the Allied advance. Responsibility for the bridges, including the Ludendorff Bridge, was shifted to the Army, although the Wehrkreis officers tried to retain their command authority. The anti-aircraft units around the bridges did not report to the army, the Wehrkreis or the Waffen SS, but to the Luftwaffe.[6]
On 1 March during U.S. Operation Grenade, the Fifth Panzer and Fifteenth Armies switched zones and responsibility for the bridges.[6] Lt. Gen. Walter Botsch, Commander of LIII Armeekorps, was assigned to defend the Bonn-Remagen area.[10] He visited the Rhineland to inspect the troops and on 5 March found that the Ludendorff Bridge was defended by only 36 men, most of them convalescents recovering from injuries, along with a few engineers and anti-aircraft gun crews.[7] Botsch promised Captain Willi Bratge, the combat commander for the bridge, that he would send a battalion of men to help defend the bridge, but his request was turned down. He also requested without success laborers, additional explosives, radios, and signal equipment. He was promised a heavy anti-aircraft battalion, but it never arrived.[10]
- Command changes

By 6 March, the 9th Armored was already just 14 kilometers (8.7 mi) from the Rhine.[2] On the same day, Botsch was so quickly transferred that he did not have time to brief his replacement, Generalmajor Richard von Bothmer. Bothmer was unable to visit Remagen, as he was concentrating on defending Bonn.[10] Instead, he dispatched a liaison officer to Remagen the evening of 6 March, but he was caught up by the American's rapid advance and was captured when he accidentally entered their lines. When retreating Germans informed Bratge on the evening of 6 March that the Americans were nearing Remagen, Bratge tried to contact Botsch, unaware that he had been reassigned.[10]
Hitler had issued orders that the Siegfried Line was to be held at all costs. The rapid Allied penetration of the border fortifications had disrupted German communications, command structure, and their entire defense of the west bank of the Rhine. It would have been logical to fall back to the east side of the Rhine and regroup, but Hitler absolutely refused to allow a retreat and irrationally demanded that his Army recapture the territory it had lost. Units that were threatened with the possibility of being overrun or surrounded could not fall back to a more defensible position. To protect themselves from Hitler's wrath, a court-martial and a firing squad, commanders falsified reports to cover actual losses. To shift the blame to someone else, they issued orders that could not be realistically fulfilled. The German troops, thoroughly routed by the beating they had been receiving, could not hold on to the area they controlled, much less retake ground. As a result, the Americans advanced even more rapidly towards the Rhine. An unintended consequence was that German forces paid less attention to the bridges across the Rhine.[10]

On 6 March, General of the Cavalry Edwin Rothkirch, commanding officer of LIII Armeekorps with responsibility for the Remagen area, wandered into U.S. lines and was captured. In the midst of this confusion, General der Infanterie Otto Hitzfeld, the new commanding officer of LXVII Corps, was told at 1:00 am on 7 March that he was now responsible for defending the Ludendorff Bridge. Hitzfeld dispatched his adjutant, Major Hans Scheller, to take command of Remagen. Scheller left at 3:00 am and took a radio unit of eight men but during their 64-kilometer (40 mi) trip they had to route around American tanks and ran low on gas, forcing them to detour further so they could refuel. The radio unit got separated and Scheller didn't arrive until 11:15 am, less than two hours before the Americans.[10] The German commandant at Remagen, Captain Willi Bratge was at first relieved when Scheller announced he was assuming command, but then learned that Scheller had not brought the battalion of reinforcements with him that Botsch had promised to send.[2]
- Bridge defenses
During 6 March, the III Flak Korps anti-aircraft gun crews emplaced on top of the 180-meter-high (590 ft) Erpeler Ley, strategically overlooking the Ludendorff Bridge, had been ordered by the Luftwaffe to help defend Koblenz. The replacement unit was not motorized and was placed on the outskirts of Remagen. As the Americans advanced towards the Rhine on the night of 6–7 March, 14 men from the anti-aircraft gun crews deserted. Bratge only learned about the replacement unit's presence on 7 March when he saw what was left of the unit manhandling its guns across the bridge. Aware of the Americans' impending arrival, he angrily ordered the unit's Luftwaffe commander to get the weapons moved to the top of Erpeler Ley as quickly as possible, but the units were not yet in place at 2:00 pm when the first Americans arrived.[10]
Bratge commanded only 36 convalescing soldiers, some of whom could not even fire a weapon. The bridge was also defended by an engineer company of 125 men commanded by Captain Karl Friesenhahn, 180 Hitlerjugend, a Luftwaffe antiaircraft unit of 200 men, 20 men from Company 3./FlakLehruVersAbt 900 (rocket battery), 120 Eastern "volunteers," and roughly 500 civilian Volksturm, totalling about 1000 troops.[37] Most of these were ill-equipped and poorly trained.[15]
On 6 March, the last 800 troops of the 277th Volksgrenadier Division crossed the bridge. On the morning of 7 March, German engineers put down wood planks to allow vehicles to use the bridge. Captain Bratge attempted to persuade the soldiers crossing the bridge to stay and defend it, but most were leaderless stragglers and their only concern was to get across the Rhine.[38]
The German defensive doctrine called for positioning the majority of forces at the front lines, leaving minimal troops to reinforce rear areas.[37]
Americans find bridge intact
On the afternoon of 7 March 1945, Lt. Col. Leonard Engemann led Task Force Engemann towards Remagen, a small village of about 5,000 residents on the Rhine with the objective of capturing the town. The task force, part of Combat Command B, consisted of C Troop of the 89th Reconnaissance Squadron manning M8 Light Armored Cars and M3 Half-tracks; Company A of 27th Armored Infantry Battalion (27th AIB) equipped with M3 Half-tracks, commanded by Major Murray Deevers; one platoon of Company B, 9th Armored Engineer Battalion (9th AEB) led by Lt. Hugh Mott; and three companies of the 14th Tank Battalion (14th TB): Company A (led by 22-year-old Lt. Karl H. Timmermann); Company B (led by Lt. Jack Liedke); and Company C (led by Lt. William E. McMaster).[23]:54–56
The three tank companies of the 14th TB each consisted of three platoons. 1st Platoon of Company A, 14th TB, led by Lt. John Grimball, had been assigned five of the newest heavy-duty T26E3 Pershing tanks, although only four were operational on 7 March. The other platoons were each equipped with five M4A3 Sherman tanks, and the company also had a command unit of three more Sherman tanks.[32] Their orders were to capture the town of Remagen, and then continue south to link up with Patton's Third Army, but were not given any specific instructions regarding the Ludendorff Bridge.[39]
At 12:56, scouts from 89th Reconnaissance Squadron arrived on a hill on the north side of Remagen overlooking the village and were astonished to see that the Ludendorff Bridge was still standing.[32][40] It was one of three remaining bridges across the Rhine that the Germans had not yet blown up in advance of the Allied armies' advance.[41][42] Lt. Timmermann and Grimball followed the scouts on the rise to see for themselves and radioed the surprising news to Task Force Commander Engemann. Arriving on the rise, Engemann could see retreating German vehicles and forces filling Remagen's streets, all heading over the bridge, which was full of soldiers, civilians, vehicles and even livestock.[2] Previous attacks by Allied aircraft had destroyed the vessels used to ferry civilians and workers across the Rhine. All were now forced to use the bridge.[37]
Captain Bratge was in Remagen on the western approach to the bridge directing traffic onto the bridge.[2][34] Timmermann called for artillery to fire on the bridge using proximity fuses to slow down the German retreat, but the artillery commander refused because he could not be sure that U.S. troops would not be hit by the shells.[2][6]
Battle for the bridge
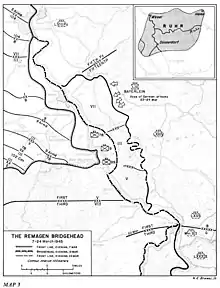
When Operations Officer of Combat Command B Maj. Ben Cothran arrived and saw that the bridge was still standing, he radioed Brig. General William M. Hoge, commanding officer of the Combat Command B, 9th Armored Division. Hoge joined them as quickly as he could. Engemann was cautiously considering his options when Hoge ordered him to immediately move into town and to capture the bridge as quickly as possible. Timmermann had been promoted only the night before to commander of Company A, and Engemann ordered him and his company of dismounted infantry into Remagen supported by A Company/14th Tank Battalion.[7] Hoge had no intelligence on the number and size of German forces on the east bank. The standing bridge could have been a trap. Hoge risked losing men if the Germans allowed U.S. forces to cross before destroying it and isolating the American troops on the east bank. But the opportunity was too great to pass up.[34]
Battalion Commander Major Murray Deevers asked Timmermann, "Do you think you can get your company across the bridge?" Timmermann replied, "Well, we can try it, sir." Deevers answered, "Go ahead." "What if the bridge blows up in my face?" Timmermann asked, but Deevers did not answer.[21]
At 1:50 pm, the troops of A/27/9 AIB set out for the town. Thirty minutes later, Engemann led the 17 tanks of A/14/9 AIB forward. The troops and tanks arrived at about the same time and advanced quickly through Remagen against light resistance. The Germans relied for local defense on Volksturm, citizens who were conscripted close to their homes in the belief that they would defend their towns and villages. German defensive policy did not include planning for defending rear areas in depth. There were no antitank ditches or mines, barbed wire, or trenches on the route to Remagen. The few defensive obstacles that had been constructed were too weak to block tanks or had been placed in open terrain, and the roadblocks they had built usually allowed plenty of room for vehicles to pass.[37][42] The only defense that slowed the Americans down was a machine gun manned by infantry over the town square, which two of the Pershings quickly dispatched. Relatively unmolested, the Americans arrived in strength at the western end of the bridge and the tanks began covering the bridge and the east shore with tank rounds, destroying a locomotive attached to a string of freight cars on the rail line parallel to the river.[32][34]
At about 3:00 pm, U.S. soldiers learned from a German soldier captured on the edge of Remagen that the bridge was scheduled to be destroyed at 4:00 pm.[6]:214[34] Timmermann called for artillery to fire on Erpel with burning white phosphorus shells to create a smoke screen.[43]
Germans blow up the approach
Soon after the American troops arrived on the ridge overlooking Remagen, German forces on the west bank near the town were alerted to the approaching enemy armor and raced back across the bridge. Bratge wanted to demolish the bridge as early as possible to avoid capture, but he had to first get written authorization from Major Hans Scheller, who had only assumed command at 11:15 am.[39] By the time the Americans arrived, most of the civilian Volkssturm had melted away, leaving the main German force on the eastern side of the Rhine.[37]
Written permission was required because on 14–15 October 1944, an American bomb had struck the chamber containing the demolition charges on the Mulheim Bridge in Cologne, prematurely destroying the bridge. Hitler was angered by this incident and ordered those "responsible" for the destruction of the Mulheim Bridge to be court-martialed. He also ordered that demolition explosives should not be laid in place until the very last moment, when the Allies were within 5 miles (8.0 km) of the bridge.[22]:548 The bridges should only be demolished following an order in writing from the officer in charge, and only as a last resort and at the last possible moment.[44] This order left officers responsible for destroying bridges nervous about both the consequences if they blew up the bridge too soon and if they failed to blow it up at all.[10][37]
When Major Scheller saw how inadequately the bridge was defended, he attempted to commandeer passing German troops including a vehicle carrying five men and a machine gun, but the driver simply accelerated the vehicle across the bridge. Scheller concluded the bridge could not be defended and was ready to destroy it when Lieutenant Karl Peters pleaded for extra time to get his unit across the bridge. Peters, commanding Group 3./FlakLehruVersAbt 900 (a rocket battery of "3rd Anti-Aircraft Training and Testing Division"), was in charge of the new, top secret Henschel Hs 297 rocket launcher system. It could fire 24 high-velocity anti-aircraft rockets with tremendous accuracy and he could not allow them to fall into enemy hands.[7]:214[45] Scheller knew artillery was in short supply and held up blowing the charges.[6]:215[46]
Captain Karl Friesenhahn was the technical or bridge commander and in charge of the demolition charges.[6] Captain Willi Bratge had requested 600 kg (1,300 lb) of military explosives, but at 11:00 am on 7 March he received only half the amount requested, 300 kg (660 lb).[47] Worse, he found he had been sent "Donarit", a much weaker ammonium nitrate-based industrial explosive used in mining.[39] With no other option, he placed all 300 kg (660 lb) on the southeastern pier of the bridge. At 2:00 pm, as the first elements of the U.S. forces came close to the western approach, he detonated a charge under the stone archway that connected the approach embankment with the bridge, blowing a 9.1-meter (30 ft) crater in the road bed, hoping it would slow down tanks and infantry.[31]:1642 Scheller and Bratge entered the railroad tunnel where the electric switch controlling the detonators was located. Friesenhahn followed them, but before he could get to the tunnel, the concussion from an exploding shell knocked him unconscious. He regained his senses 15 minutes later and continued towards the tunnel. Bratge yelled at Friesenhahn to blow up the bridge. Friesenhahn replied they had to get the order in writing from Scheller, who was at the other end of the 1,200-foot-long (370 m) tunnel that curved at almost 90° under Erpeler Ley.[2] Bratge ran to find Scheller, got the order in writing, and when he returned to tell Friesenhahn to detonate the charges, Friesenhahn in turn required Bratge to give him the order in writing.[6]:215
U.S. forces cross bridge

German machine gun crews in the towers that guarded the western approach to the bridge opened up on the advancing American troops. At 3:20 pm, Friesenhahn made the last connections to the detonator and twisted the handle, but nothing happened. He tried again and all they heard was the sound of American shells hitting the area around them.[2] Both Friesenhahn and Bratge knew the dire consequences to them personally and to the German defensive situation if they failed to destroy the bridge.[39]
Friesenhahn decided that the electrical circuit must have been broken by the shelling and sought volunteers to repair it, but machine gun and tank fire persuaded him there was insufficient time. Corporal Anton Faust volunteered to leave the tunnel under Erpeler Ley to manually light the primer cord to the explosives attached to the eastern pier that had been placed earlier in the day. He ran 90 yd (82 m) through the small arms fire, exploding tank shells, smoke, and haze, lit the primer, and ran back to the tunnel.[2][6]:216

At 3:50 pm, 10 minutes before they believed the Germans were scheduled to blow the bridge up, the guns of Company A, 14th Tank Battalion, drove the German defenders from the bridge road surface and from the stone piers of the bridge. In addition, the tanks engaged the flak guns on the east bank which were opposing the crossing.[32]
Company commander 2d Lt. Timmermann led an under-strength squad of men from the 27 AIB onto the west side of the bridge, despite the risk that the bridge could be destroyed with them on it.[42] Just as the Americans approached, Corporal Faust set off the secondary explosives.[17] Both the Germans and the Americans watched the smoke and haze clear from the explosion and were shocked to see the bridge was still standing. Only the charge on the southeast pier, two-thirds of the way across, had exploded, but the weak industrial explosive had failed to bring down the well-built steel bridge.[34]
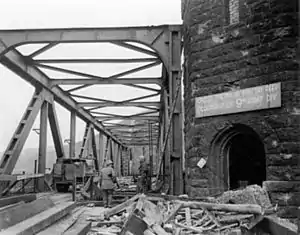
The explosion blew large holes in the planking covering the rails above the pier, twisted some of the steel supporting girders, and cut a 9.1 meters (30 ft) gap in the truss supporting the southern side of the bridge. Timmermann saw Germans running around and assumed they were preparing a second blast.[2] Members of the first platoon gained control of the two bridge towers on the west bank and captured two German machine gun crews. They then used the towers to provide covering fire for the troops crossing the bridge.[34][42]
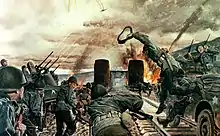
Timmermann deployed half of his men to the south side where German machine gun fire from the stone tower on the far right end was most intense to provide covering fire. He ordered the other half of his men to remove the demolition charges from the western half of the bridge.[48] Sgt. Mike Chinchar led an infantry platoon down the catwalk on the left side of the bridge, dodging from one bridge pillar to the next.
Timmermann was unexpectedly joined by a three-man detachment from 2/B/9 AEB led by Lt. Hugh Mott, accompanied by Sgt. Eugene Dorland and Sgt. John Reynolds, who climbed under the bridge and began cutting the wires leading to the remaining demolition charges.[42]
The railroad tracks on the bridge were covered with wood planks, allowing vehicles to pass.[34] Once on the bridge, the American infantry came under fire from German snipers on a partially submerged boat on the east bank and MG 42 machine gun fire from the eastern towers of the bridge, as well as from houses in Erpel. A 14th Battalion Sherman tank destroyed the boat.[40]:11 All the tanks joined in shelling the opposite side of the river and the infantry covered the bridge and eastern side with machine gun fire, enabling ground troops to get on the bridge. The tanks successfully provided fire support to the infantry and suppressed fire from the German positions.[40]:11[49]
American capture of the bridge

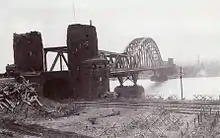
The U.S. troops dodged German machine gun and small arms fire on top of and under the bridge, moving from bridge girder to girder, cutting demolition wires and tossing explosive charges into the river, not knowing if the Germans would detonate the rest of them at any second.[50][51]
Lt. Timmermann was among those removing the charges. CBS Radio war correspondent Everett Holles wrote about Timmermann removing the charges in his book, Unconditional Surrender.
As they crossed the bridge, they found that the catwalk near the eastern pier on the upstream side of the bridge was gone.
Traffic was still moving across the Ludendorff Bridge. On the other side locomotives puffed, awaiting orders to pull out. Lt. Col. Leonard Engemann of Minneapolis, in command of a reconnaissance party, was determined to save this bridge if it was at all possible. So, at 3:50 o’clock, a platoon led by Lieut. Emmett Burrows of New York City, sped down the slope to the bridge entrance. There was a flurry of shooting as the Germans, taken completely by surprise, scurried about trying to organize a defense. Sgt. Alexander A. Drabik, a tall, lanky former butcher from Holland, Ohio, was the first American across the Rhine, the first invader to reach its east bank since the time of Napoleon. But he wanted all the honors passed on to a young lieutenant of the engineers, John W. Mitchell of Pittsburgh. "While we were running across the bridge—and, man, it may have been only 250 yards but it seemed like 250 miles to us—I spotted this lieutenant, standing out there completely exposed to the machine gun fire that was pretty heavy by this time. He was cutting wires and kicking the German demolition charges off the bridge with his feet! Boy that took plenty of guts. He’s the one who saved the bridge and made the whole thing possible."[51]
Drabik ran the entire 117-meter-long (384 ft) bridge with only one pause as the Germans tried to blow up the bridge. His squad, with other soldiers, secured the eastern side of the bridge by running through the settling dust and smoke from the explosion. The American troops got across the bridge to the east bank in less than fifteen minutes. Drabik was the first American soldier to cross this bridge, and the first enemy since the Napoleonic Wars to cross the Rhine and capture German territory.[52] Drabik and his entire squad made it across the bridge without injury.[7][8][51][53] Drabik later said:
We ran down the middle of the bridge, shouting as we went. I didn't stop because I knew that if I kept moving they couldn't hit me. My men were in squad column and not one of them was hit. We took cover in some bomb craters. Then we just sat and waited for others to come. That's the way it was.[54]

Sergeant Joe DeLisio ran through the intense German gunfire and Lt. Karl H. Timmermann and the others followed him.[2] Bratge tried to organize a counterattack to throw the Americans back across the bridge, but the American tanks' shell fire stopped him. He looked for Scheller and found he had already escaped out the far end of the tunnel.[2]
Lt. Timmermann, who had been born in Frankfurt am Main about 160 kilometres (99 mi) from their position, was the first American officer to cross the bridge.[7][21] Following him, Sgt. Dorland reached the far shore and destroyed the main demolition switch box. Sgt. DeLisio captured a German machine gun team in the eastern tower.[2] The rest of A/27 AIB followed them, and after the eastern shore was initially secured, Lt. Mott led B Company, 9th Engineers, in finding and eliminating more live demolition charges on the bridge. A platoon led by Lt. Emmett Burrows climbed Erpeler Ley and cleared out the snipers, after which he and his men were hit by concentrated artillery and mortar fire. They then climbed down the hill towards the town to the far entrance of the railroad tunnel.
Inside the tunnel, Bratge tried to round up all available men and organize an escape towards Osberg where they could form a counterattack, but were surprised to find the Americans had already gained control of both tunnel entrances. The Americans fired machine guns and threw hand grenades into the tunnel, killing a young boy and wounding several civilians. They begged Bratge to tell the Americans to stop firing, and then on their own fashioned a white flag and surrendered. The remaining sappers and convalescing troops followed them out, and Friesenhahn and Bratge were the last two captured within the tunnel.[2]
Lt. Mott and his two sergeants found about 160 kilograms (350 lb) of unexploded charges on top of one of the piers. They discovered that one of the steel pipes containing the wires connecting to the main charge had been severed, possibly by artillery.[34] Combat engineers also found a 230 kilograms (510 lb) demolition charge of TNT had not exploded when the blasting cap failed.[42] A Polish worker later said another worker had tampered with the blasting caps, though his claims could not be verified.[7]:226 The Americans later conducted an intensive search for additional German demolitions and found another 1,400 pounds (640 kg) in wells inside the piers.
Conflicting orders
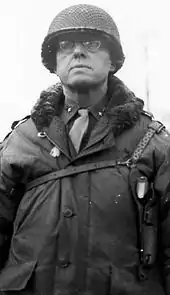

Major General John Millikin, commanding officer of III Corps, had previously ordered Leonard to direct Combat Command A of the 9th AID south on the west bank of the Rhine, across the Ahr River, and connect with Patton's Third Army. Hoge did not have orders to cross or capture the bridge, but he decided to disobey his orders and reroute those forces across the bridge to reinforce the bridgehead instead. With some forces already on the bridge, Hoge got new orders to stop what he was doing and move his unit south to Koblenz. Hoge waited for a platoon to reach the far bank, hoping the bridge would stand, and then called 9th Armored Division commander Maj. Gen. John W. Leonard to inform him the bridge had been captured. If his gamble failed, Hoge risked a court-martial. He later described his feelings in that moment:[21]
I felt inside me that I could never live with the knowledge that I had given up that opportunity without making a try for it. I couldn’t have spent the rest of my life—and I knew it was, well, a dangerous thing, unheard of; but I just had the feeling that here was the opportunity of a lifetime and it must be grasped immediately. It couldn’t wait. If you had waited, the opportunity [would be] gone. That was probably the greatest turning point in my whole career as a soldier—to capture Remagen.[55]
Colonel Harry Johnson, Leonard's chief of staff, relayed the news up the chain of command to Colonel James H. Phillips, Chief of Staff of the U.S. Army III Corps at about 5:00 pm. Milliken ordered that the 47th Infantry Regiment be motorized and dispatched to Remagen as soon as possible.[32] Millikin attached the 7th Armored Division to III Corps so they could relieve the 9th Infantry Division who were already crossing the Rhine. He also ordered the 2nd Infantry Division to relieve the 78th Infantry Division so it too could cross the Rhine and defend the bridgehead.[32] First Army commander Courtney Hodges confirmed Millikin's decision to continue to enlarge the bridgehead.
Hodges relayed the news to General Omar Bradley's 12th US Army Group headquarters at 8:15 pm. General Harold "Pinky" Bull, Eisenhower's G-3, was at Bradley's 12th Army Group headquarters when they learned the bridge had been captured. Bull was skeptical of any plans to use the Remagen crossing, and he told Bradley, "You're not going anywhere down there at Remagen. You've got a bridge, but it's in the wrong place. It just doesn't fit in with the plan." Bradley replied, "What the hell do you want us to do, pull back and blow it up?"[21]
Bradley contacted SHAEF commander Dwight Eisenhower at his forward headquarters in Reims, France, where Eisenhower was having dinner with several airborne commanders. Eisenhower's aide called him to the phone, where he learned of the bridge's capture. He told his guests, "That was Brad. He's got a bridge across the Rhine. And he apologized for it, said it was badly located at Remagen."[22] Eisenhower told Bradley to redirect five divisions to Remagen since they were no longer needed to seize Cologne because it had already surrendered. Eisenhower then tactfully called Montgomery to relay the news, since it affected Montgomery's huge Operation Plunder.[56]
Official orders were passed to Hoge to seize the bridge.[56] By dusk, the combat engineers had partially filled the crater in the approach ramp with a tank dozer and once the sun went down, used the darkness to begin hasty repairs of the bridge.[11]:504[34][55] Until midnight of 7 March, the east bank was secured by only about 120 troops from Company A, 27th Armored Infantry Battalion and 1st Platoon, Company B, 9th Armored Infantry Battalion.[39] If the Germans had mounted an effective counterattack against this small force, they might have prevented the Americans from establishing the bridgehead.[37]
Stars and Stripes combat correspondent Andy Rooney was 32 kilometers (20 mi) away when he heard the bridge had been captured. He was the first reporter at the bridgehead, followed shortly afterward by Howard Cowan of the Associated Press.[57][58][59] Forty years after the event, he wrote about his luck: "It was a reporter's dream. One of the great stories of the war had fallen into my lap."[60] Cowan was the first reporter across the bridge.[57] When news of the bridge capture reached American newspapers, it was front-page news.[61][62] Rooney rated the capture of the bridge as one of the top five events of the entire European war, alongside D-Day.[57]
Soon after its capture, a large sign was erected at the bridges entrance which read "Cross the Rhine with dry feet-courtesy of the 9th Armored Division."
Bridgehead established
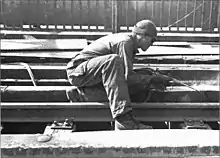
After the bridge was captured, U.S. Army military engineers and technicians from the U.S. Army engineers from the 276th Engineer Combat Battalion and specialized welders and steel workers from 1058th Bridge Construction and Repair Group immediately started work to repair battle damage, fill holes in the deck, and reinforce the bridge.[34] At 4:30 am on 8 March, the 1st Battalion/310th Infantry Regiment/78th crossed the Ludendorff Bridge, followed in the next two days by the rest of the division. The 78th were joined by the 79th and the 99th Infantry Divisions.[34]
The commanding officer of 7th Armored Division, Major General Robert W. Hasbrouck, was instructed to immediately move a combat command, reinforced by one battalion of infantry, to an area near Remagen where it would relieve the 60th Infantry Regiment/9th Infantry Division. The 310th Infantry Regiment, 78th Infantry Division, was the first unit to follow the 9th Armored Division across the Rhine. To maximize effective command and control, Milliken decided to initially attach all units as they crossed the river to Combat Command B, 9th Armored Division. Before long, Hoge was effectively in command of all or a portion of three divisions: the 9th, 27th, and the 78th.[55]
III Corps had previously attached a treadway bridge company to the 9th Armored Division's column, but the 9th needed more bridge-building resources. Over the next two days, First Army headquarters rounded up three heavy pontoon battalions, the 51st and 291st Engineer Combat Battalions, two treadway companies, and a DUKW amphibious truck company. All were assigned to III Corps and given the task of building two tactical bridges across the Rhine.[63]:252 The two small roads leading into Remagen from the west and south[63]:252 were rapidly choked for miles with hundreds of amphibious trucks, bridging equipment, anti-aircraft batteries, tanks, supply vehicles, trucks with trailers, and thousands of troops who were diverted to take advantage of the unexpected bridgehead. The approaches to the bridge were frequently backed up with troops waiting for their turn to cross the bridge.[34][55]
First Lieutenant Jack Hyde of the 9th Military Police Company was the 9th Division's officer in charge of the flow of men and materials across the bridge. He established a rigid traffic control and holding patterns that his unit enforced. Only four months before while a second lieutenant during the Battle of the Bulge, he had refused General Patton access to a restricted area. Patton demanded to be let through, and when Hyde refused, Patton asked for Hyde's name. Given Patton's penchant for a violent temper, Hyde expected a dressing down, but Patton instead made sure that Hyde was promoted to first lieutenant. Hyde was awarded the Silver Star later in March for his bravery and gallantry under fire on the approach to the bridge.[64]
Allies gain eastern shore
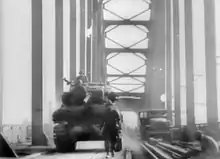
When they initially captured the bridge, the American engineers were not sure it could support the weight of the tanks, but they only had about 120 troops on the east side and they needed to reinforce them immediately. At about midnight the engineers opened the bridge to armor. At 12:15 am on 8 March, two platoons of nine Sherman tanks from Company A, 14th Tank Battalion, gingerly crept across the bridge in close formation following white tape left by the engineers outlining the holes. When they successfully reached the east bank, they moved into blocking positions to secure the bridgehead.[11]:504[39] Immediately behind the Shermans, an M10 Tank Destroyer from the 656th Tank Destroyer Battalion fell part way into the hole in the bridge deck left by the German demolition charge. The engineers briefly considered pushing the tank destroyer into the river, but decided they might further damage the bridge. They worked all night to jack the tank up and at 5:30 am finally got a tank on the east side to come back and pull the tank destroyer across the hole.[55]
While the bridge was blocked to vehicles, the remaining troops in Combat Command B crossed on foot. The east side of the bridge and the town of Erpel was secured overnight by the nine Sherman tanks and the troops of Combat Command B.[65]:246 Although the Americans had crossed the bridge successfully, their toehold on the eastern bank was tenuous. The Germans still maintained control of the heights overlooking the bridge and the area around the slim bridgehead. If the Germans had been able to organize a coordinated, concentrated counterattack within the first 48 hours, it is entirely possible they could have pushed the Americans back across the Rhine.[65]:253[66]
American order of battle
During the first 36 hours after capturing the bridge, the Americans moved additional units across the bridge.[8][67]
When the 1st Battalion, 310th Infantry Regiment crossed the bridge at 5:00 am, they turned south. They immediately ran into a strong German force that prevented them from advancing, leaving the Germans in position on the heights overlooking the bridgehead.[65]:246 Although the Ludendorff railroad Bridge was not well situated due to the poor road network around it,[31] by the evening of 8 March, over 8,000 soldiers had crossed the bridge[11]:504 and the U.S. had expanded its bridgehead to 1 mile (1.6 km) deep and 2 miles (3.2 km) wide.[22] On the morning of 9 March, the first ferry was crossing the Rhine carrying troops and vehicles.[22]
Anti-aircraft defense
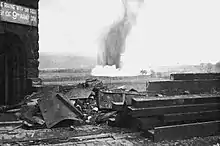
After the U.S. Army captured the bridge, during the next week they lined up anti-aircraft artillery of every description, virtually bumper to bumper to protect the bridgehead. On the afternoon of Wednesday, 7 March, Captain Carlton G. "Pappy" Denton, Commander, Battery D, squeezed his 482nd anti-aircraft Artillery Automatic Weapons Battalion to the head of Combat Command B. They arrived at the bridgehead at 3:00 am on 8 March.[32] The Army called on all of the automatic weapons battalion-sized units from each division in III Corps. Colonel James Madison, in charge of III Corps' 16th Antiaircraft Artillery Group, dispatched two batteries.[8]
By 6:00 am on 9 March, there were five U.S. anti-aircraft battalions watching for aircraft. Each battalion was equipped with four batteries of M3 halftracks, each armed with a M45 Quadmount anti-aircraft weapon system, each utilizing a quartet of Browning M2HB machine guns,[8] with a total of upwards of eighty Browning machine guns defending the captured Ludendorff Bridge. During the day, the 109th Antiaircraft Artillery Gun Battalion was positioned on the west bank and the 634th Antiaircraft Artillery Automatic Weapons Battalion occupied the east side. By noon, they had their SHF-band (3 GHz) SCR-584 radar and directors aligned and ready to fire on German aircraft.[8]
Colonel Patterson, in charge of the anti-aircraft artillery for III Corps, described the anti-aircraft defenses as the "million dollar show," because "it cost the American taxpayers a million dollars in antiaircraft ammunition" every time a German aircraft dared attack the bridge. "We had anti-aircraft from water level all the way to the top of the mountain where the railroad bridge went across. My instructions to the gunners were, "Don't worry about identification. If anything approaches Remagen Bridge, shoot it down."[26]:183
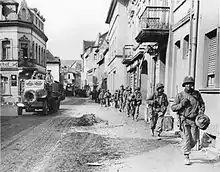
U.S. Army Air Forces fighter aircraft from the 404th Fighter-Bomber Group and 359th Fighter Group maintained a strong defensive umbrella over the bridge to try to stop Luftwaffe attacks.[69][70] They also conducted numerous raids on German vehicles, armor, railroad lines, and marshalling yards in the vicinity of Remagen, knocking out trains, transports, tanks, supply trucks, and reinforcements headed towards the bridgehead. On 14 March, they destroyed 21 aircraft, mostly Ju 87D Stuka dive-bombers and twin-engine Junkers Ju 88s, and damaged 21 more. On 15 March, they destroyed 256 motor transports and damaged 35 tanks and 12 armored vehicles.[69]
On the evening of 9 March, the troops on the east bank were bolstered by the 309th Infantry Regiment, the remainder of the 310th Infantry Regiment, and the 60th Infantry Regiment. On 10 March, the 311th Infantry Regiment attacked north towards Bad Honnef, while the 309th Infantry Regiment advanced northwest, encountering very strong resistance near Bruchhausen. The 47th Infantry Regiment to the east encountered significant resistance, forcing a slight withdrawal, but assisted by 310th Infantry Regiment, they again moved forward. To the southeast, the 60th Infantry Regiment advanced, and in the south, Combat Command B, 9th Armored Division, moved forward south of Linz. The Allies encountered heavy resistance in places and received fire from small arms, self-propelled weapons, mortars, and artillery.[32] The remainder of the 9th Infantry Division crossed the Rhine on the evening of 10 March.
German counterattack
When the Ludendorff Bridge was captured on 7 March, Major Scheller tried to reach his superiors by radio and telephone, but neither was operational.[37] He set off on a bicycle, the only available means of transportation, to report in person and got to the 67th Corps Headquarters around midnight. Hauptmanns Bratge and Friesenhahn, along with the other Germans inside the tunnel, were captured by U.S. soldiers who had climbed over to the far side of Erpeler Ley.[6]:216 Due to the inability to communicate with other forces, the Germans in the immediate area were left to counterattack with whatever local forces they could gather. There weren't any reserves readily available and most of the essential combat units that were in the area were still on the west bank, trying to get across the Rhine.[32][37]
Command unaware
For most of the first day, Army Group B commander Field Marshal Walter Model was unaware the bridge had been captured. Like most of the German leadership in the area, he was on the move, in his case trying to save portions of the LXVI and LXVII Armeekorps which had been pushed up against the west bank of the Rhine by the 4th Armored Division above Andernach. On the night of 7 March, Model finally learned that the Allies had crossed the bridge and put General Joachim von Kortzfleisch, commander of Wehrkreis III, in charge until General der Infanterie Gustav-Adolf von Zangen could extricate the Fifteenth Army from the west bank of the Rhine. Kortzfleisch cobbled together about a hundred Luftwaffe anti-aircraft forces, Hitler Jugend, Volkssturm, and police units who attacked through the night, trying to blow the bridge up without success.[6]
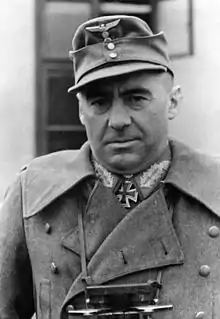
Conflicting orders
On the morning on 8 March, Maj. Herbert Strobel, in charge of the engineers, received conflicting orders. Generalleutnant Richard Wirtz, his engineering officer, ordered him to continue ferrying operations to rescue German troops isolated on the west bank. Generalleutnant Kurt von Berg, in charge of Combat Area XII North, ordered him to gather every man available and counterattack. Strobel chose the latter course of action and assembled his engineers, including those manning ferries, to attack and blow the bridge. Wirtz countermanded him and ordered the ferries back into operation. When Berg found out, he was furious. Strobel managed to assemble about 100 engineers and attacked early that morning. Some of the engineers carrying explosives reached the bridge but were immediately captured.[56]
Counterattack ordered and delayed
The Germans were determined to eliminate the bridge and isolate the American units on the eastern shore.[32] General of the Cavalry Edwin Rothkirch, commanding officer of LIII Armeekorps, had been captured on 6 March. On 9 March his superior, General Hans Felber, 7th Army commander, appointed Fritz Bayerlein in his place. Bayerlein, who had served as Gen. Erwin Rommel's chief of staff in Africa, was the former commander of the Panzer Lehr Division during the Battle of the Bulge.[71] The Panzer Lehr, filled with some of the best instructors pulled from Germany's tank schools, had developed a reputation as the toughest and most feared Panzer division of the Wehrmacht, and Bayerlein had a reputation for promptness and efficiency.
Model gave Bayerlein 24 hours to come up with a plan. He gave Bayerlein command of the 11th Panzer Division, a force of 4,000 men, 25 tanks, and 18 artillery pieces led by General Wend von Wietersheim; the 9th Panzer Division, totaling about 600 men, 15 tanks, and 12 artillery units; the 106th Feldherrenhalle Panzer Brigade with five tanks; and a regiment of the formerly highly regarded Panzer Lehr Division, which was a shadow of its former self, comprising only about 300 men and 15 tanks.[72] But the 11th Panzer was 100 kilometres (62 mi) to the north in Düsseldorf. The lack of fuel made moving forces difficult and the route to Remagen was jammed with traffic and subject to attack by American aircraft.[6]
Bayerlein wanted to wait for all of the units to arrive and attack in force, but Model countermanded him and required him to counterattack immediately with what units he had on hand. On 9 March, the 67th Infantry Regiment tried to stop the American progress, but their attacks were too weak and piecemeal to ensure success. Once the 11th Panzer arrived, their armored units broke down frequently, making an effective defense more difficult.[23]:61[73]
German order of battle
Based on intelligence received through Ultra intercepts, the U.S. III Corps G-2 intelligence officer believed that the Germans were assembling a large force to wipe out the bridgehead,[63]:253 but unknown to the Allies, the units that the Germans called on to push the Americans back were only "impressive on paper". None of the sizable German units attacking the bridgehead were cohesive and many were severely understrength after being reduced during the Battle of the Bulge.[32]:68[6][73] From 10 to 13 March, the German forces included mostly the remains of 11 divisions.
Reinforcements included the 3rd Panzer Division and about 200 men from the 340th Volksgrenadier Division, but they were largely untrained and composed of mostly inexperienced replacements found from among the Wehrkreis units up and down the Rhine.[32]:70
Illustrating the difficulties German forces faced in getting their armor to the front, it took ten days to bring the first five Jagdtigers of the 2nd company 512th Heavy Panzerjäger Battalion to the front due to communications breakdowns and the threat from fighter-bombers. The 1st Company lost four Jagdtigers in rearguard actions, three due to mechanical breakdowns. When they finally engaged the American armor around Herborn, Jagdtigers began to attack U.S. tanks at long range and claimed it destroyed 30 U.S. tanks, but no strategic victory was gained.[3]
Bayerlein could not muster the forces at his disposal into an effective counterattack. The Panzer Lehr Division was composed of three replacement formations, but their resources were much greater on paper than in reality. For example, the 653rd Heavy Panzerjäger Battalion should have been able to deploy two dozen Jagdpanther tank destroyers, but could seldom get more than a third of them into the field at any time.[23]:62 Along with the 9th and 11th Panzer Divisions, they were tasked with stopping the Allies, but Model held back the 11th Panzer on 10 March when the Panzer Lehr did not arrive. When the 9th and 11th Panzer finally attacked the American 311th Regiment at Bad Honnef 4 miles (6.4 km) downstream from Remagen on 11 March, they were ineffective and consumed dwindling supplies of gasoline without result.[6][74]
On 13 March, Beyerlein planned to attack the Americans near Bruchhausen with three battalions containing about 1500 effective troops, facing five American battalions in reserve numbering about 3000 GIs.
Aircraft attack bridge
On 8 March Alfred Jodl told Hitler that the Allies had captured the Ludendorff Bridge intact. Hitler was furious.
German Minister of Propaganda Joseph Goebbels wrote frequently in his diary about the bridgehead at Remagen.[6]
It is quite devastating that the Americans should have succeeded in capturing the Rhine bridge at Remagen intact and forming a bridgehead...
The Remagen bridgehead causes the Führer much anxiety. On the other hand he is of the opinion that it offers us certain advantages. Had the Americans not found a weak spot enabling them to cross the Rhine they probably would have swung forthwith against the Moselle. ... Nevertheless it must be assumed that the failure to blow the Remagen Bridge may well be due to sabotage, or at least serious negligence. The Fuhrer has ordered an inquiry and will impose a death sentence on anyone found guilty. The Fuhrer considers the bridgehead a definite thorn in the flesh of the Americans. He has now ringed the bridgehead with heavy weapons whose job it is to inflict the greatest possible casualties to American forces concentrated in the bridgehead. It may well be, therefore, that the bridgehead will not be all joy for the Americans.[6]
In the evening comes the news that it has still not been possible to eliminate the Remagen bridgehead. On the contrary the Americans have reinforced it and are trying to extend it. The result is a very unpleasant situation for us. ... However we must succeed, for if the Americans continue to hold out on the right bank of the Rhine they have a base for a further advance and from the small beginning of a bridgehead such as we now see, a running sore will develop—as so often before—the poison from which will soon spread to the Reich's vitals.[6]
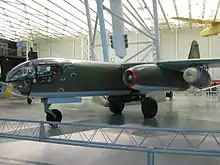
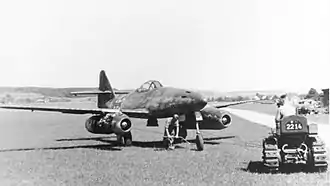
.jpg.webp)
Hitler ordered the bridge destroyed at all costs.[75] Over the next ten days, the German High Command tried nearly every weapon at their disposal to destroy the bridge. In an indication of their dire military situation, Hermann Göring initially sought volunteers from among Messerschmitt 262A pilots for suicide missions to attack the bridge, but the aircraft's bomb targeting sight prevented their use in this way. To supplement the propeller-driven aircraft, Göring formed Gefechtsverband Kowalewski, which included about 40 Arado Ar 234 B-2 turbojet bombers of III./Kampfgeschwader 76 (76th Bomber Wing), normally based in Norway. The bombers were escorted by about 30 Messerschmitt Me 262A-2a jet fighter-bombers from II./Kampfgeschwader 51 led by Hansgeorg Bätcher—formerly the commanding officer of III./KG 76—on their 7 March mission. This was the first time they were used to attack a tactical target.[8][9][76] When fully loaded with external bombs, the bombers were capable of flying at over 660 km/h (410 mph), faster than almost all Allied aircraft except the latest Tempest Mark V,[77] and so fast that the American anti-aircraft units had trouble tracking them.[8] Over six days, III Gruppe./KG 76 flew nine sorties against the bridges. While extremely fast for their time, they were not accurate and dropped their 1,000-kilogram (2,200 lb) bombs without success. The Germans lost seven jet aircraft, including two shot down by Allied aircraft.[10]
The Luftwaffe's 14th Flieger Division under Oberst Lothar von Heinemann attacked the bridge with a variety of propeller-driven aircraft, including Messerschmitt Bf 109s, Focke-Wulf Fw 190s, and even the antiquated Ju 87D "Stuka" dive-bombers.[10] The Stuka was able to approach the bridge at high altitude and dive almost perpendicular on the bridge.[8] Although accurate, it was slow. The Eifel hills around the river, about 460 meters (1,510 ft) high,[70] required the pilots to either dive on the bridge from high altitude, avoiding the hills, or fly at low altitude from up or down river. The heavy U.S. anti-aircraft defenses required the German pilots to take violent evasive action, reducing their accuracy. On Thursday, 8 March 10 Ju 87s from Nachtschlachtgruppe 1 (Night Attack Group 1) attempted an attack, but lost six of their number.[8]
Later that day at 4:44 pm, eight Stuka dive bombers[12] and one Bf 109 fighter made a low-level attack straight up the river to attack the bridge, and the U.S. 482d AW shot eight aircraft down.[12] Thirty minutes later, eight more Stukas attacked, this time straight along the river at 3,000 feet (910 m), without evasive action, and the anti-aircraft fire of the 90mm guns of 413th AAA Gun Battalion again brought down all of the aircraft.[8][38]:133 The intense, concentrated anti-aircraft fire repeatedly prevented the Germans from knocking out the bridge.[10][78] The American anti-aircraft fire was so intense as the tracer bullets concentrated on the aircraft that the air around the planes was lit up with a pink glow.[78]:92
On Friday 9 March, the Germans sent 17 aircraft to attack the bridge, but their bombs missed. The American forces reported that they had probably downed 13 of the 17 German aircraft.[8] The aircraft also attacked the many vehicles and troops crowding the roads around the bridge with some success.[65] The Luftwaffe also utilized Kampfgeschwader 200 (200th Bomber Wing), a special purpose unit, that among other tasks, was quite experienced operating jet aircraft and captured Allied machines. On 9 and 10 March, nine Fw 190G-1 fighter-bombers from 11 Staffel./KG 200 were dispatched from Twente to Frankfurt to operate against the bridge by night. They duly attacked, but scored no hits.[79][80] The Americans estimated that from 7 to 17 March they shot down 109 planes, and probably destroyed 36 others, out of a total of 367 sent to attack the bridge.[6]:228
Continued attacks
Between 7–14 March, while under attack by 11 weakened German divisions, the five U.S. divisions of the U.S. V and VII Corps captured 11,200 German prisoners of war and lost only 863 soldiers.[1]
V2 Rockets used
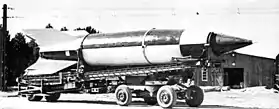
On 14 March Hitler ordered SS General Hans Kammler to attack the bridge with V2 ballistic missiles. The German General Staff was shocked that Hitler would order the use of the inaccurate weapons on German soil when they would very likely kill German citizens and troops.[2] On 17 March, Batterie SS Abt. 500 at Hellendoorn in the Netherlands, about 200 kilometers (120 mi) to the north, fired eleven V2 rockets at the bridge. It was their first and only use against a tactical target[2][22]:553 and the only time they were fired on a German target during the war.[81] The inaccurate missiles landed as far away as Cologne, 64 kilometers (40 mi) to the north. One struck the town of Oedingen, destroying a number of buildings, killing three U.S. GIs and a number of German residents, and wounding many others. One missile struck the 284th Combat Engineers Command Post in Remagen at 12:20 pm, missing the bridge by about 270 meters (890 ft). Those present said it felt like an earthquake. The blast damaged or destroyed buildings in a 300 metres (980 ft) radius, killing three soldiers and wounding 30 more.[2]
Frogmen dispatched
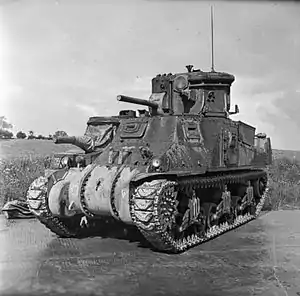
The Germans floated a barge down the river carrying explosives but the U.S. forces captured it. They floated mines down the river, but they were intercepted by a series of log and net booms that the 164th Engineer Combat Battalion had built upstream to protect the tactical bridges.[34] Hitler summoned special operations commander Otto Skorzeny, who on 17 March sent a special naval demolitions squad using Italian underwater breathing apparatus to plant mines.[6][82][83][84] Before they could set out, they learned that the Ludendorff Bridge had collapsed, and Skorzeny ordered the seven SS frogmen to instead attack the pontoon bridge between Kripp and Linz. The water was extremely cold, about 7 °C (45 °F). The Americans had by then advanced so far up the Rhine that the swimmers had to enter the river 17 kilometers (11 mi) upstream from the bridge. They floated downstream using oil drums for support,[12] but they were discovered by the 738th Tank Battalion who operated the top-secret, 13 million candlepower M3 Lee tank-mount Canal Defence Lights (tanks mounting an armored searchlight), employed for the first time in combat during World War II.[10][11]:410 Two frogmen died of hypothermia, two were killed, and the other three were captured.[85][86]:336–337
German artillery
Of all the weapons used by the Germans to attack the bridge, only artillery did much damage.[63] The Germans had more than 100 artillery pieces in the area around the bridge, including 50 105 mm light howitzers, 50 150 mm heavy howitzers and 12 210 mm heavy howitzers. Targeting the bridge's eastern approach was complicated by the steep slopes of Erpeler Ley close to the eastern shore, but the German artillery were easily able to hit the Ludendorff Bridge itself and the western shore and approaches to it and the tactical bridges. A German forward artillery observer had infiltrated Remagen, enhancing their artillery's accuracy. On 8–9 March, they successfully hit the bridge 24 times.[87] On 9 March, they hit an ammunition truck on the bridge, leaving a 15 feet (4.6 m) hole in the deck and putting the bridge out of operation for several hours.[22]:553 On 10 March at noon, they struck a gasoline truck. For the next two days, the Americans diverted all gasoline and ammunition convoys to ferries. The falling shells killed troops, destroyed many buildings in Remagen and large numbers of vehicles, and made the jobs of the combat engineers very hazardous.[6]
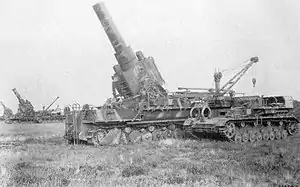
On Sunday, 11 March, the Germans rerouted Karl-Batterie 628, a two-gun section operating the 130 short tons (120 t), Karl Howitzer 60 cm super-heavy mortar towards Remagen. The weapon itself weighed 124 t (137 short tons; 122 long tons) and fired a shell weighing up to 2,170 kg (4,780 lb). Karl-Batterie 628 arrived on 20 March. The range for its lightest shell of 1,250 kg (2,760 lb) was just over 10 km (6.2 mi), but after only 14 rounds that missed all of the bridges and only damaged a handful of random houses, the weapon had to be moved to the rear for repairs. Karl-Batterie 428 was also ordered towards Remagen on 11 March, but was rerouted to the 1st Army sector instead.[88]
Bayerlein loses command
Bayerlein's ground offensive was completely ineffective. Field Marshal Model was so unhappy with his performance that he transferred all of the LIII Armeekorps' armor to Carl Püchler's LXXIV Armeekorps.[71]
Allies expand bridgehead
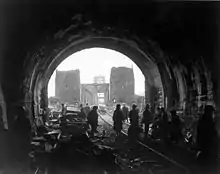
In early 1945, SHAEF commander Eisenhower gave Field Marshal Bernard Montgomery and the British 21st Army Group the responsibility to be the first to cross the Rhine and capture Germany's Ruhr industrial heartland.[6] Montgomery meticulously planned Operation Plunder through February and into early March with the offensive set to begin on 23 March.[89] Mindful of Montgomery's plans, General Eisenhower ordered Omar Bradley to secure the Remagen bridgehead but to limit the expansion to an area that could be held by five divisions. On 9 March Bradley told General Hodges to attack to a maximum width of 40 km (25 mi) and a depth of 16 km (9.9 mi). Bradley also told Hodges to limit the First Army's advance to 1,000 yards (910 m) per day with the goal of limiting the U.S. advance while preventing the German forces from consolidating their positions. The 9th Armored had captured a bridge and established a bridgehead with less than a battalion of men. Now they and the rest of First Army were instructed to hold once they reached the Ruhr-Frankfurt autobahn, about 11 kilometers (6.8 mi) from the bridge.
On the morning of 10 March, the 276th Engineer Combat Battalion, one of the III Corps units sent to Remagen, relieved Company C. Before it was relieved, Company C placed a large sign on the north tower on the western side of the bridge that welcomed soldiers: "CROSS THE RHINE WITH DRY FEET, COURTESY OF 9TH ARM'D DIV".[2] The Pershing T26E3s that had been instrumental in capturing the bridge were too heavy to risk moving across the weakened bridge and too wide to use the pontoon bridges. They had to wait five days before they were transported across the river by pontoon ferry on Monday, 12 March.[40][90]
On the same day, the Belgian army's 16th Fusilier Battalion (16e Bataillon de Fusiliers) came under American command and one company crossed the Rhine at Remagen on 15 March.[91]
"Dead Man's Corner"


On the night of Saturday, 10 March, the 394th Infantry Regiment of the 99th Infantry Division were given the job of relieving the 9th Infantry Division on the east bank of the Rhine after they captured Linz am Rhein. They were trucked from Meckenheim, 21.8 kilometers (13.5 mi) to the northwest, into Remagen along roads jammed with hundreds of jeeps, trucks, ambulances, and tanks. Driving on both sides of the road, the trucks crawled past tanks burning by the side of the road and dead bodies everywhere. Trucks struck by artillery were just pushed to the side with dead GIs still inside them. As the sun went down, the 394th IR/99 ID emerged from the woods on the ridge overlooking the town and could see that the bridge was being shelled by artillery. They hiked the last 8 kilometers (5.0 mi) and as they moved spasmodically through Remagen, the streets were lit by burning buildings and vehicles. One street was marked by a sign: "This street subject to enemy shell fire," and dead GIs proved it was true. Artillery shells struck the western shore of the Rhine at the rate of one every 30 seconds that night.[92]
A platoon sheltered in the basement of a house just as the building next door was struck and destroyed by a shell. When another soldier crouched behind a trailer, a shell exploded nearby, sending a large fragment through the trailer immediately over his back. One GI witnessed a jeep and its driver take a direct hit by artillery and literally disappear. Boyd McCune described the artillery fire as "the most intense" he had experienced.[66][67]:162–164 Medic James Johnson described his efforts to save lives.
The war is moving plenty fast and furious; my hands have been literally steeped in the blood from the wounded. It is pitiful to hear four or five wounded men screaming, 'Medic! Medic! I’m bleeding to death!’... There may be a hell in another world, but this one is sure putting up some stiff competition."[92]
The western approach to the bridge was managed by a platoon of the 9th Military Police Company. The foot soldiers dodged around discarded equipment, weapons, helmets, and packs. One soldier said it was "hard to walk without tripping over the wounded and dead". Every time a shell came down, the soldiers on the approaches and on the bridge itself were forced to drop where they were with no place to take shelter. The 200 yards (180 m) long approach ramp to the bridge was so exposed to German artillery, who successfully and repeatedly killed soldiers and destroyed equipment lined up to cross the bridge, that the GIs nicknamed it "Dead Man's Corner". Medics normally removed bodies as quickly as possible because of the negative impact it had on morale. But bodies accumulated so quickly on the approach to the bridge, and there were so many wounded for the medics to tend to, that corpses were stacked head high.[67]:162–164[93][94]
When the orders were given to go, it meant don’t stop for anything or anybody; we could not even assist the wounded. This seemed cold and inhuman, as our buddies were our life. When we reached the ramp it was more understandable why we could not stop. That ramp became known as 'Dead Man’s Corner' for good reason. As we ran toward the bridge, we stepped and jumped over the dead and wounded. It was obvious why we could not clog the traffic. —B.C. Henderson, 99th Infantry Division"[93]
The 99th Infantry Division was the first complete division to cross the Rhine.[95] When its regiments were all across, they all were returned to control of their commanding general. They then pushed through to the Wied River and crossed it on the 23rd, advancing east on the Koln-Frankfurt highway to Giessen.
Additional bridges

Once the Ludendorff Bridge was captured, the Americans needed additional bridges as backups to the structurally weakened Ludendorff Bridge, and to get more troops and armor across the Rhine so they could expand and defend the bridgehead. On 8 March at 3:00 pm, they began constructing the first bridge. To procure the necessary bridge-building supplies, the First Army's 1111th Engineer Combat Group sent a man into Antwerp, where the supplies were dispatched by train to the front. He surreptitiously marked all of the bridge materials, including those destined for Patton's Third Army, as being destined for the First Army at Remagen.[65]:236
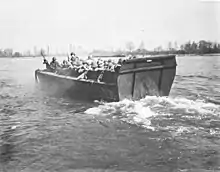
While the bridges were being prepared and constructed, a large fleet of vessels were employed. Within the next few days, the 819th Amphibian Truck Company arrived with DUKW amphibious trucks that were used to carry ammunition, gasoline, and rations across the river. The 86th Engineer Heavy Pontoon Battalion and the 291st Engineer Combat Battalion were assigned the mission to build three pontoon ferries.[52]:465 U.S. Naval Unit 1 brought up 24 U.S. Navy LCVP landing craft. The LCVPs were especially useful because they could ferry 32 men across the river in seven minutes, faster than they could walk across the bridge. All of these constantly shuttled across the river, delivering vehicles, equipment, and troops to one side and ferrying wounded to the other.
The Germans targeted the pontoon bridges as soon as the U.S. troops began building them. Directed by forward artillery observers positioned on the steep hills overlooking the river, the Germans continually pounded the engineers, soldiers, and vehicles on the bridges and the roads leading to them.[96]

The 291st Engineer Combat Battalion commanded by David E. Pergrin began constructing at 10:30 am on 9 March a Class 40 M2 steel treadway bridge about .40 kilometers (0.25 mi) down river of the bridge.[32][97] They were supported by the 988th and 998th Engineer Treadway Bridge Companies.[98] The crews and the bridge were repeatedly struck by artillery, suffering several direct hits that destroyed equipment and killed and wounded troops, and slowing work on the bridge. During one barrage, seventeen engineers were killed or wounded and 19 pontoon floats were destroyed.[22] On 10 March, a direct hit from an artillery shell killed the battalion executive officer of the 276th Engineer Combat Battalion and injured 19 others. One engineer commented, "While working on that bridge, we were just fugitives from the law of averages."[32] On the same day, the Luftwaffe attacked the bridge for six and a half hours; American anti-aircraft gunners claimed credit for about 28 of the 47 aircraft. When the engineers finished the heavy-duty 1,032-foot-long (315 m) bridge 32 hours later at 5:10 am on Saturday, 11 March, it was the first Allied bridge across the Rhine. A German forward artillery observer with a radio was captured in Remagen, and artillery fire decreased markedly over the next 24 hours.[11]

The 51st Engineer Combat Battalion, commanded by Lieutenant Colonel Harvey Fraser, built a Class 40, 25 Ton 969-foot (295 m) reinforced heavy pontoon bridge 3.2 kilometers (2.0 mi) upstream on the bank of the Rhine between Kripp to Linz. Assisted by the 181st and 552nd Engineer Heavy Pontoon Battalions, they began construction at 4:00 pm on 10 March, while the far shore had not yet been captured. German planes bombed and strafed the bridges during construction, killing three men and injuring two others. On 11 March, the 9th AIB captured Linz and at 7:00 pm, 27 hours after beginning construction, the engineers completed the second bridge, the fastest built floating bridge ever completed by the engineers while under fire. It opened for traffic at 11:00 pm that night,[21][65][82] and was reinforced the next day to carry heavier traffic. Once the second tactical bridge was open, the treadway bridge was used for eastbound traffic and the pontoon bridge for westbound traffic.[83] Tracked vehicles were limited to 5 mph (8.0 km/h) and wheeled vehicles to 15 mph (24 km/h). One vehicle crossed every two minutes, and within seven days, 2,500 vehicles had used it to reach the far bank. They named the bridge after the commanding officer of the 552nd Battalion, Major William F. Tompkins, Jr., who had been killed by enemy shelling during its construction.[98]

When the treadway and pontoon bridges were operational, the engineers closed the Ludendorff Bridge for repairs on Monday, 12 March. Its steel framework was more resistant to artillery and bombs and allowed it to carry heavier loads like the heavy M26 Pershing tanks, making it worth repairing.[32] By 14 March, the Americans had 16 gun batteries and 33 Automatic Weapon batteries, totaling 672 anti-aircraft weapons, arrayed for miles around the bridgehead. It was the largest concentration of anti-aircraft weapons during World War II. Colonel E. Paul Semmens, Assistant Professor of History at the U.S. Air Force Academy, said it ranked among "the greatest antiaircraft artillery battles in American history".[7]:189[8][17][22]:553 The anti-aircraft fire was so intense that shells falling back to earth caused 200 casualties to their own side. Of the 367 aircraft that attacked the bridge, the Americans shot down 109 (almost 30%) of them.[67]:173 Gefechtsverband Kowalewski lost 18 jet aircraft in combat, plus several more that were damaged on landing, about a third of its strength.
On 15 March, engineers determined that the Ludendorff Bridge had sagged about 6 to 12 in (15 to 30 cm) and decided that extensive work would be needed before it would be ready for use. Meanwhile, the pontoon ferries, DUKWs and LCVPs continued to supplement the two tactical bridges.[32] By 23 March, the LCVPs had carried 13,800 troops and 406 vehicles.[66]
The 78th expanded the bridgehead, taking Bad Honnef and cutting part of the Ruhr-Frankfurt autobahn on 16 March.[32]
Milliken relieved
From the day the bridge had been captured until the middle of March, III Corps Commander Milliken had never visited the eastern bank of the Rhine. Hodges and some of his staff had complained about the poor control of forces on both sides of the bridge and the lack of information on troop dispositions. Hodges also complained later that Milliken repeatedly disobeyed his orders including a directive to drive his forces north along the east bank and open a crossing for VII Corps, and that he failed to attach enough infantry support to the 9th Armored Division. First Army commander General Hodges relieved Milliken ten days after the bridge was captured, on 17 March, and promoted General James Van Fleet to the command instead.[63] The Chief of Staff of the 9th ID, William Westmoreland later commented that, "So irresolute was the III Corps Commander, so lacking in confidence, that I feared for the safety of the bridgehead."[99]
Bridge fails

After months of aircraft bombing, direct artillery hits, near misses, and deliberate demolition attempts, the Ludendorff Bridge finally collapsed on 17 March at about 3:00 pm. From its capture 10 days before, over 25,000 troops and thousands of vehicles had crossed the bridge and the other two newly built tactical bridges.[100]
The engineers working on the bridge first heard a long bang, like steel snapping, and then accompanied by the shrieking of broken metal, the center portion of bridge suddenly tipped into the Rhine, and the two end sections slumped off their piers.[20][101] About 200 engineers and welders were working on the span when it fell.[2][20]
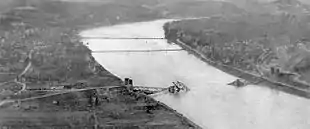
Lieutenant Colonel Clayton A. Rust, battalion commander of the 276th ECB, was on the bridge when it collapsed. He fell into the Rhine, was briefly pinned underwater, and then floated downstream to the pontoon bridge, where he was pulled out of the water. He later reported:
The bridge was rotten throughout, many members not cut had internal fractures from our own bombing, German artillery, and from the German demolitions. The bridge was extremely weak. The upstream truss was actually useless. The entire load of traffic, equipment and dead load were supported by the good downstream truss...it buckled completely under a load which of course it was not designed to carry.[7]:200
Seven soldiers were killed, 23 went missing, and three died later from injuries; 63 others were injured.[7]:201[4]
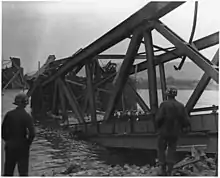
Before it collapsed, five U.S. divisions had already used it and two adjacent tactical bridges to cross into Germany, creating a well-established bridgehead almost 40 kilometers (25 mi) long, extending from Bonn in the north almost to Koblenz in the south, and 10 to 15 kilometers (6.2 to 9.3 mi) deep.
Three hours after the bridge collapsed, the 148th Engineer Combat Battalion was ordered by the First Army to build a Class 40 floating Bailey bridge at Remagen to help carry critical traffic across the Rhine. A floating Bailey typically replaced a treadway or pontoon bridges and required substantially more time to build. The company had expected to start building their bridge on 25 March, after the start of Operation Plunder. But they had been practicing for weeks and all of the materials were on hand. The 148th ECB were assigned extra help from Company C, 291st Engineer Combat Battalion, and sixty men from the 501st Light Pontoon Company. At 7:30 pm on 18 March, they began replacing the heavy pontoon bridge downstream from the Remagen Bridge. They finished the 1,258 ft (383 m) bridge a day earlier than ordered at 7:15 am on 20 March.[102]
Another tactical bridge was constructed by the 254th Engineer Combat Battalion on 22 March, 9 kilometers (5.6 mi) upstream at Honningen. The 990th, 988th and 998th Treadway Bridge Companies and Detachment 1 of the 508th Engineer Light Pontoon Company supported them.[103] Later nicknamed the "Victor Bridge", it was—at 1,370 feet (420 m) in length—the longest tactical bridge built in the First Army's area of operations.[104] Engineers built additional tactical bridges later in March at Bad Godesberg, Rolandseck, Rheinberg, Worms, Bonn, Wallach, Oppenheim, Mainz and other locations.[23]:88[98] They also built a two-way Bailey Bridge on barges across the Rhine at Bonn.[52]:468
Breakout
When the Americans captured the Ludendorff Bridge on Wednesday 7 March, the Germans were caught completely by surprise and were unprepared to defend against it. The seizure of the bridge created a sudden added burden on German defenses and multiplied their confusion. They had been expecting a large build-up along the Rhine before a thrust across the river, and the breakthrough at Remagen meant that the beleaguered German forces lost a much-needed chance to regroup east of the Rhine. By the time the bridge collapsed 10 days later, more than 25,000 Allied troops had crossed the Ludendorff Bridge and three tactical bridges in the area above and below Remagen. By then the Remagen bridgehead was 8 miles (13 km) deep and 25 miles (40 km) wide, including 11 kilometers (6.8 mi) of the vital Ruhr-Frankfurt autobahn.[22][69] The unexpected attack across the Rhine allowed Eisenhower to change his plans to end the war.[17][25][105]
In the north, Montgomery's intelligence staff preparing for Operation Plunder estimated that their million-plus troops faced a seriously weakened Army Group H comprising about 85,000[106]:385 troops and 35 tanks, but the actual numbers were likely much less.[6]:301 Army Group B commanded 27 seriously weakened divisions under the 5th Panzer Army (without significant armor), the 7th Army, and 15th Army,[23] but many of its forces had been sent south to help contain the Remagen bridgehead, which made the other crossings during Operation Plunder in late March easier.[10]

On Monday, 19 March, Eisenhower ordered nine First Army divisions already across the river to prepare to join General George Patton's Third Army after it crossed the Rhine. Patton was determined to get his Third Army across the Rhine before his archrival Montgomery, whom he loathed and despised.[107][5]
On 22 March 1945 at 10:00 pm, the night before Montgomery's Operation Plunder began, Patton sent the 11th Infantry Regiment, 5th Infantry Division quietly across the Rhine, at Nierstein, without the aid of aircraft, artillery, or airborne troops. They used DUKW amphibious trucks, U.S. Navy landing craft, and a ferry for tanks. Patton's headquarters boasted to Omar Bradley that, "Without benefit of aerial bombing, ground smoke, artillery preparation, and airborne assistance, the Third Army at 2200 hours, Thursday evening, 22 March, crossed the Rhine River."[108] By late afternoon on 23 March engineers completed a 40-ton treadway bridge. They quickly established a 6-mile-deep (9.7 km) bridgehead and captured 19,000 German soldiers. Bradley, who also disliked Montgomery, gladly tweaked him and his Operation Plunder when he announced Patton's success, being sure to tell the press that Patton had crossed the Rhine without aerial bombardment, airborne assault, or even artillery fire.[22]:558[23]:71[5]
By 24 March, the U.S. First Army had "three corps, six infantry divisions, and three armored divisions across the Rhine River".[109] It faced Model's Army Group B totaling about 325,000 men.[108] The Allied breakout ended any hope the Germans had to reassert control of the area east of Remagen.[42] After capturing Limburg, the 9th Armored Division's Combat Command B covered 108 kilometers (67 mi) in one day during the drive to the north, and Combat Command A advanced 110 kilometers (68 mi) in 11 hours. On 29 March, Combat Command A captured more than 1,200 Germans.[34] By 31 March, three weeks after capturing the Ludendorff Bridge, all four American armies were across the Rhine River.[52]:475
Aftermath
Crossing the Ruhr River had held the Allies up for four months. Crossing the Rhine in a single day undoubtedly shortened the war in Europe.[110]
Shortened war in Europe
Eisenhower described capturing the bridge as "one of those rare and fleeting opportunities which occasionally arise in war and which, if grasped, have incalculable effects on determining future success".[1]:160[111][112] Later on, he commented, "We were across the Rhine, on a permanent bridge; the traditional defensive barrier to the heart of Germany was pierced. The final defeat of the enemy, which we had long calculated would be accomplished in the spring and summer campaigning of 1945, was suddenly now, in our minds, just around the corner." General George C. Marshall commented, "The bridgehead provided a serious threat to the heart of Germany, a diversion of incalculable value. It became a springboard for the final offensive to come."[7]
Various sources credit the capture of the Ludendorff Bridge with shortening the war in Europe by weeks to months and reducing the number of casualties that the Allies might otherwise have incurred. Pulitzer Prize-winning journalist Hal Boyle wrote that capturing the bridge had "saved the American nation 5,000 dead and 10,000 wounded".[7][78]:90 War correspondent Wes Gallagher of the Associated Press exulted that the event had shortened the war by months.[110] Historian and author Ken Hechler concluded that "the capture of the Ludendorff Bridge materially hastened the ending of the war".[113] John Thompson, a reporter for the Chicago Tribune, said seizing the bridge shortened the war against Germany by "several weeks".[114] Another author credited the operation with shortening the war in Europe by approximately six months.[64] Col. F. Russel Lyons, the III Corps engineer, said after the war that the Allies' ability to use the bridge saved the Allies two months and 35,000 casualties.[115]
General Albert Kesselring described the battle as the "Crime of Remagen. It broke the front along the Rhine." Hermann Göring said that the capture of the bridge "made a long defense impossible". Major General Carl Wagener, Chief of staff to Field Marshall Walter Model, said that capturing the bridge signaled the end of the war for the Germans:
The Remagen affair caused a great stir in the German Supreme Command. Remagen should have been considered a basis for termination of the war. Remagen created a dangerous and unpleasant abscess within the last German defenses, and it provided an ideal springboard for the coming offensive east of the Rhine. The Remagen bridgehead made the other crossing of the Rhine a much easier task for the enemy. Furthermore, it tired German forces which should have been resting to withstand the next major assault.[113]

Dissenting voices include that of German general Friedrich von Mellenthin, who said:[116]
The importance of this incident has been unduly magnified; the American High Command made no immediate attempt to exploit success here, and at first was content to put four divisions into the bridgehead and tell them to hang on. Moreover, at this stage it would have been easy for the Ninth U.S. Army to force a crossing north of Dusseldorf; however, Montgomery forbade it and Eisenhower supported him.
The official history "U.S. Army in World War II - European Theatre of Operations" states:[117]
The capture of the Ludendorff railroad bridge and its subsequent exploitation was one of those coups de théâtre that sometimes happen in warfare and never fail to capture the imagination. Just how much it speeded the end of the war is another question. The bridgehead dealt a serious blow to German morale that may well have been partly responsible for lackluster resistance at other points, and it served as a magnet to draw a measure of fighting strength from other sites. On the other hand, the German Army clearly would have been beaten without it, perhaps just as quickly.
German courts-martial
Adolf Hitler was incensed by the loss of the bridge. He summoned the "fanatical and reliable Nazi"[6] Generalleutnant Rudolf Hübner from the Eastern Front and personally appointed him Commander of Fliegendes Sonder-Standgericht West ("Flying Special Court-Martial West").[118] He directed him to court-martial and execute the officers who failed to destroy the bridge.[7]:204[42] Hübner was accompanied by Lt. Colonel Anton Ernst Berger and Lt. Colonel Paul Penth. None of them had legal experience and they traveled to Army Group B headquarters with two military police who acted as the execution squad. On 11 March, in violation of German military rules of justice, Hübner was both prosecutor and judge. Col. Richter Janert, Army Group B's legal officer, offered Hübner a copy of the German military code of justice, but Hübner waved it aside, insisting that the only authority he needed was Hitler's. Hübner tried Captain Bratge in absentia, since he had been captured by the Americans. Hübner sentenced Bratge to death for delaying the order to blow the bridge, but since Bratge was a prisoner of war, the sentence could not be carried out.[119][120]
Hübner then tried Maj. Scheller and after him Lt. Karl Heinz Peters. Scheller had only arrived at 11:15 am, two hours before the Americans attacked the bridge. Peters was a passerby trying to get his experimental anti-aircraft system back across the Rhine. But the outcome of the trial was predetermined. Scheller was convicted of failing to blow up the bridge and Peters of allowing his secret anti-aircraft weapon to fall into American hands. The men were executed the next day with a shot to the back of the neck in Rimbac and buried where they fell in shallow graves.[121]
On the day Scheller and Peters were sentenced, Maj. Herbert Strobel and Maj. August Kraft were summoned to Field Marshal Model's office in Oberirsen, unaware of the charges pending against them. Kraft and his commanding officer Strobel were in charge of the combat engineers in the Koblenz-Remagen sector covering 60 kilometres (37 mi) of the Rhine. Kraft, commander of III Landes Pi Battalion, had laid the charges on the Remagen bridge. Kraft was 40 kilometers (25 mi) away at the time the bridge was captured. Strobel had ordered Kraft to counterattack which had completely failed. On 17 March Hübner conducted a 20-minute trial for the two men at 11:00 am. He quickly found them guilty and sentenced them to be executed immediately.[121] The two men were given about 45 minutes to write to their families before they were escorted to a wooded site and executed at 1:00 pm with a bullet to the back of the head. The executioners emptied their pockets, tore up the family letters, covered their bodies with a few shovel-fulls of dirt, and left them where they fell. A sixth officer, 12th Regiment Engineer Commander Capt. Friesenhahn, had been captured but not convicted, as he was found by the court to have done everything within his power to destroy the bridge.[7][34]
Hitler disciplined four other generals.[122] Generalmajor Richard von Bothmer, commander of Bonn and Remagen, was prosecuted because he gave up Bonn without a fight. He was demoted to private and sentenced to five years in prison. His wife was already dead and his son had been killed in the war. Bothmer grabbed a pistol belonging to a court official and committed suicide in the courtroom on 10 March.[119] Hitler replaced him with Field Marshal Albert Kesselring from the Italian Front. Kesselring rebuked the troops for their costly failure. "We have suffered unnecessary losses and our present military situation has become nearly catastrophic."[34]
Kesselring and Model sent out a special dispatch on 18 March to every unit in the German military describing the executions.[6]
...an important bridge across the Rhine had fallen into enemy hands without being damaged, despite the fact that all preparations for its demolition had been made. This has happened because the responsible leaders have abandoned the bridgehead. They have acted in an irresponsible and cowardly way. The five guilty officers were condemned to death by court martial, one of them, a captain, in absentia. The sentence was executed against three majors and one lieutenant. The above information is to be communicated to all troops as rapidly as possible and should be considered a warning to everyone. Who does not live in honor will die in shame.[7]:217
Kesselring's new position lasted almost exactly two months from the day the Ludendorff Bridge was seized, to 8 May—the day the remaining German forces surrendered.[34]
An unintended consequence of the executions was that German officers of all grades spent a disproportionate amount of time, energy, and explosives in blowing all sorts of bridges, even senselessly. In many instances, bridges were blown in rear areas by high-ranking officers, thereby crippling the German war effort, but clearing the individual of responsibility for an unblown bridge.[32]
Awards for valor

Maj. Gen. John W. Leonard awarded Brig. General Hoge the Oak Leaf Cluster to his Distinguished Service Medal for his unit's actions in capturing the bridge and establishing the bridgehead. On 21 March 1945 Hoge was transferred to assume command of the Fourth Infantry Division under General Patton.[55] Leonard also awarded 13 soldiers Distinguished Service Crosses and 152 Silver Star medals for their success in capturing the bridge and related action.[2]
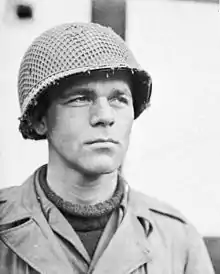
From Company A, 27th Armored Infantry Battalion, Sergeant Alexander A. Drabik, the first American enlisted man to cross this bridge, and German-born Lieutenant Timmermann, the first American officer to cross the bridge, were both recognized for their actions with the Distinguished Service Cross. Sergeant Joseph DeLisio, Sergeant Michael Chinchar, Sergeant Joseph S. Petrencsik and Sergeant Anthony Samele from Company A also received the DSC.[113]
Lt. Hugh Mott of the 2nd Platoon, Company B, 9th Armored Engineer Battalion, led Sergeant Eugene Dorland and Sergeant John A. Reynolds onto the bridge to remove live demolition charges while under fire. All three were awarded the DSC for their actions in taking the bridge.[113][123]
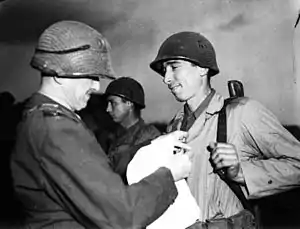
Company A, 14th Tank Battalion, the first tank company to cross the Rhine, were instrumental in helping seize the railroad bridge and establishing the first Allied bridgehead over the Rhine. Once across, they established fighting positions on the eastern side, repelling multiple German counterattacks by armor and infantry. For their actions, Captain George P. Soumas, First Lieutenant C. Windsor Miller, Sergeant William J. Goodson, and 1st Lieutenant John Grimball were awarded the DSC. The entire battalion was awarded its second Presidential Unit Citation.[40][90][113]
From 9 to 17 March members of the 9th Military Police Company were positioned at both ends and all along the bridge to guide a steady stream of POWs, vehicles, and troops. Other MPs were detailed as snipers to watch for German frogmen who might attempt to blow up the bridge. When a vehicle was hit or the driver wounded, they helped get the vehicle off the bridge, even if it meant driving it. They manned aid stations and POW cages on both shores, and they installed and maintained wire communications across the bridge, all while under artillery fire.[124] The 9th Military Police Platoon was recognized with the Meritorious Unit Citation, the Belgian Fourragère, and the Presidential Unit Citation for its performance at the Ludendorff Bridge.[125][126]:44 1st LT John Hyde of the 9th Military Police Company was Bridge Control Officer. Hyde had famously denied General George Patton passage through a roadblock over the general's vigorous objections earlier in the war.[127][128] Hyde implemented established rigid traffic patterns to maintain a constant flow of vehicles and troops for more than 15 days. Hyde received a Silver Star for his bravery and gallantry under fire at the Ludendorff Bridge.[64]
The 47th Infantry Regiment, which was the first to cross the Rhine on 8 March, bore the brunt of the aggressive German counterattack. For its actions in helping protect the bridgehead, it was recognized with a Presidential Unit Citation.[7]
All units of CCB/9 AIB of the 9th Armored Division were awarded the Presidential Unit Citation for their actions in taking and defending the bridge.
The "Miracle at Remagen"
Allied journalists called the capture of this bridge the "Miracle of Remagen". American military historian and biographer Carlo D'Este described capturing the "Remagen bridge as one of the great sagas of the war and an example of inspired leadership".[129] The New York Sun reported:
The Germans misjudged by a fateful ten minutes the speed at which the 9th Armored Division was moving... The men who in the face of scattered fire and the great threat of the bridge blowing up under them, raced across and cut the wires have materially shortened a struggle in which every minute means lost lives. To all who utilized that ten minutes so advantageously goes the deepest gratitude this country can bestow.[7]
When the news of the bridge's capture was announced in the United States Senate, the leadership suspended its rule against hand clapping.[110] The House of Representatives took a time out from their regular business to celebrate the good news.[7][113] The Associated Press published a report on 8 March that stated, "The swift, sensational crossing was the biggest military triumph since the Normandy landings, and was a battle feat without parallel since Napoleon's conquering legions crossed the Rhine early in the last century."[7] Time magazine called it a "moment in history".[110]
General Dwight D. Eisenhower described the First Army's success: "The whole Allied force is delighted to cheer the First Army whose speed and boldness have won the race to establish the first bridgehead over the Rhine. Please tell all ranks how proud I am of them." He later praised the actions of the individual soldiers who captured it:
The action of the people was beyond praise. Every man in the whole command approaching that bridge knew it was mined. Yet without a moment's hesitation they rushed the bridge. We had losses but they were minor compared to the great prize we won.[7]
Eisenhower's Chief of Staff, Lt. Gen. Walter B. Smith, said the capture of Ludendorff Bridge was "worth its weight in gold".[7][34][111][113] General Omar N. Bradley praised the capture of the bridge. It was "... a bold advance, characterized by a willingness to chance great risks for great rewards".[43]
In 1954, Captain Karl Friesenhahn, the German engineer in charge of the explosives on the bridge, commented that the soldiers who were awarded medals for capturing the bridge "... deserved them—and then some. They saw us trying to blow that bridge and by all odds it should have blown up while they were crossing it. In my mind they were the greatest heroes in the whole war."[7]
Later history
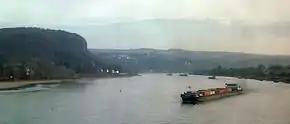
The bridge was not rebuilt after the war but the standing towers were preserved. The towers on the western side of the Rhine have been converted into a memorial museum and are open to the public.[130] Remagen and Erpel were re-built after the war, restoring much of their historic character. Reconstruction was completed in Erpel during 1968 during the same year the village celebrated its 1500-year anniversary.[14]
On the 17th anniversary of the capture of the bridge on 7 March 1962, a few veterans of both sides of the battle commemorated the event, attended by about 400 townspeople and students.[131] On the fortieth anniversary of the battle, 130 U.S. veterans visited the bridge for a memorial service. On 12 September 1991, veterans of the American and German units were added to the "Golden Book" of the community of Erpel during a commemorative ceremony.[14] On 7 March 1995, about 600 veterans and family members from the Allied and German forces observed the 50th anniversary of the bridge's capture. During the gathering, German residents thanked the U.S. service members present for winning the war. Gerd Scheller, whose father Hans Scheller had been executed by a drumhead court-martial, told attendees, "In the name of two postwar generations, I want to thank the Americans for acting as resolutely as they did on 7 March 1945."[132]
In interviews after the war, Captain Karl Friesenhahn, who had been in charge of the demolition charges on the bridge, stated that he had successfully tested the electrical circuits controlling the charges shortly before the Americans attacked. He ruled out sabotage and stated that the circuit had definitely been cut by American artillery.[133]
When the Ruhr Pocket was captured, the Allies had over 660,000 prisoners-of-war to care for, including as of 8 May 252,592 POWs in the Golden Mile (German: Goldene Meile) camp between Remagen and Niederbreisig. The prisoners were forced to sleep on the ground. They had no sanitation and little food or water. The camp was taken over by the French on 11 July 1945, but by the time they closed it 9 days later, a total of 1,247 inmates had died of dysentery, malnutrition and exhaustion.[134]
The son of Maj. August Kraft, who had been executed after a show trial for his alleged responsibility in allowing the Americans to capture the bridge, sued after the war to clear his father's name.[133]
Memorials
In the cemetery at Birnbach, Germany, a memorial was created for the four German officers executed for their "responsibility" in the capture of the bridge.[120]
(German:) Im Gedenken an Major Hans Scheller, Major Herbert Strobel, Major August Kraft, Oberleutnant Karl-Heinz Peters, gekämpft um die Brücke von Remagen, unschuldig zum Tode verurteilt in Rimbach und Oberirsen, standrechtlich erschossen am 13. und 14.3.1945. (English:) In memory of Major Hans Scheller, Major Herbert Strobel, Major August Kraft, Lieutenant Karl-Heinz Peters, fought for the Bridge at Remagen, innocently sentenced to death in Rimbach and Oberirsen, summarily shot on 13 and 14 March 1945.
In Fort Jackson, South Carolina, a stone from the pier supporting the bridge has been erected as a memorial to the 60th Infantry Regiment, part of the 9th Infantry Division during the capture of the Ludendorff Bridge.[135] An M-26 Pershing Tank used by Company A's second platoon is also permanently displayed on the fort.[136]
.JPG.webp)
Plaques commemorating the battle for the bridge have been placed by the Belgian 12th Fusilier Battalion, U.S. 9th Armored Division Association, U.S. 99th Infantry Division, and the U.S. 78th Infantry Division on the wall of the towers on the western side of the Rhine.[137]
The 9th Infantry Division retained a foot-long piece of railroad track from the bridge as a memorial to what the division accomplished in its capture of the bridge. It is used in ceremonial activities to inspire current "Gila Battalion" engineers to "go out and perform the mission of the engineer".[130][138]
The sign that C/9th AIB placed on the north tower of the bridge is permanently displayed at the George Patton Museum at Fort Knox, Kentucky, above an M26 Pershing tank like that used to capture the bridge.[2]
Remagen Bridge Peace Museum
In 1978, Remagen Mayor Hans Peter Kürten formulated a plan to raise money to fund a museum. When the German government decided to remove the piers because they were a navigation hazard, he persuaded the government to allow him to cast pieces of the piers into resin, which he sold. The town was able to raise more than 100.000 DM in profits.[130]
Kürten opened the "Friedensmuseum Brücke von Remagen" (Remagen Bridge Peace Museum) on 7 March 1980 in one of the western towers.[130][139] Exhibits include a history of the bridge, a video documentary, information on the bridge's construction, and documentation about more than 200 wars in the region.[130] In 2003, more than 200 German, American, and Belgian veterans of the World War II battle attended a commemorative event during the 35th anniversary of the museum.[138] As of 2014, an American flag flies from one of the west towers and a German flag flies from the other.[140]
Erpeler performance space
The local art and cultural company "Ad Erpelle", founded in 2006, purchased the east bridge towers and the tunnel under Erpeler Ley in 2011 for use as a performance space, preserving it for public access. The prior owner DB Netz AG had decided to permanently close the tunnels.[141]
Cross on Erpeler Ley
A cross to commemorate the victims of the battle for the Ludendorff Bridge was built on the top of Erpeler Ley.[142]
(German:) Errichtet im Gedenken an die Opfer des Brückenkopfes Remagen-Erpel in den Jahren 1944/45 Gemeinde Erpel. (English:) Built in Memory of the Victims of the Remagen Bridgehead-Erpel in Year 1944/45 Erpel community
Peace plaque
On 20 March 2005, sixty years after the battle, a plaque commemorating the event was placed near the bridge by Heinz Schwarz, Minister of the Interior to the State of Rhineland-Palatinate. As a 16-year-old boy, he had been assigned to the top floor of a stone tower on the east shore as a telephone messenger to the bridge commander. When the bridge was captured, he escaped out the basement of the tunnel and ran home.[143]
(German:) Friede Ohne Freiheit Ist Kein Friede —Konrad Adenauer. Gestiftet von Staatsminister A.D. Heinz Schwarz M d b 1945 Luftwaffenhelfer an der ehemaligen Ludendorffbrucke 1972–76 Innenminister des Landes Rheinland-Pfalz (English:) Peace Without Freedom Is Not Peace —Konrad Adenauer. Donated by Minister of State A.D. Heinz Schwarz M d b 1945 Luftwaffe auxiliary at the former Ludendorff Bridge 1972–76 Minister of the Interior of Rhineland-Palatinate
In popular culture
Postcards
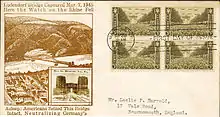
On 8 September 1945, the U.S. Post Office issued a three-cent stamp commemorating the Liberation of Paris from the Germans. First day covers were illustrated with images of the Ludendorff Bridge illustrating its capture. Other countries have issued stamps commemorating the bridge's capture, including Nicaragua, Guyana, Micronesia, and Republic of the Marshall Islands.[144]
Books, film, and games
Ken Hechler was a combat historian during World War II. He was at III Corps headquarters, 16 kilometers (9.9 mi) from Remagen, when the bridge was captured. He arrived there shortly afterward and interviewed participants. He returned after the war twice to interview Germans who took part in the battle. He found Captain Willi Bratge, one of two officers who had not been executed at Hitler's orders because he had been captured, and spent a week with him in the Remagen area learning about details of the battle. Hechler published the book The Bridge at Remagen in 1957. The book was adapted into a Hollywood film produced by David L. Wolper in 1967.[145]
Other works that have depicted the battle include:
- Those Damned Engineers, a non-fiction book by Janice Holt Giles.
- ''Kane and Abel'', a fiction book by Jeffrey Archer, includes a scene in which Kane is inadvertently saved by Abel.
- Die Brücke von Remagen, Rolf Palm (German)
- Tun Für Andere (Do Unto Others), A short film directed by Ryan Russo in 2016.
- Panzer Leader, a tactical board game, contains a stock scenario named "Remagen Bridge".
- Panzer Front, a 1999 tank simulation game, requires the player to destroy enemy forces on the other side of the Rhine before crossing the bridge.
- Call of Duty: Finest Hour, a 2004 video game. In the final mission, the player is required to cross and capture the Ludendorff Bridge.
- Battlefield 2142: Northern Strike, a 2007 video game booster pack, features the Ludendorff Bridge as a suspension bridge.
- Call of Duty: WWII, a 2017 video game. In the final mission of the campaign, the player is required to capture the Ludendorff bridge from German control.
References
- Winters, Harold A.; Reynolds, William J.; Rhyne, David W. (1998). Battling the Elements Weather and Terrain in the Conduct of War. Baltimore: Johns Hopkins University Press. ISBN 978-0801866487.
- "V-2s on Remagen; Attacks on the Ludendorff Bridge". V2Rocket.com. Archived from the original on 14 November 2014. Retrieved 14 November 2014.
- Ankerstjerne, Christian (25 October 2014). "Jagdtiger". panzerworld.com. Archived from the original on 9 December 2014.
- Charles B. MacDonald A Rhine Bridge at Remagen p. 230 gives casualties as 28 killed/93 injured Archived 26 April 2015 at the Wayback Machine
- Harding, Andrew S. "Two General Apart: Patton and Eisenhower". Archived from the original on 23 March 2016. Retrieved 17 March 2016.
- MacDonald, Charles B. (1973). "A Rhine Bridge at Remagen" (PDF). US Army in WW II: The Last Offensive (CMH Pub 7-9-1 ed.). Washington D.C.: Center for Military History, Government Printing Office. pp. 208–235. Archived (PDF) from the original on 24 September 2015. Retrieved 19 November 2014.
- Hechler, Ken (25 March 2009). The Bridge at Remagen: A Story of World War II (First ed.). Presidio Press. ISBN 978-0891418603. Archived from the original on 24 April 2016.
- Semmens, E. Paul. "The Remagen Bridgehead: A Decisive Victory for AAA Soldiers". The Hammer of Hell. Air Defense Artillery. Archived from the original on 13 August 2014. Retrieved 24 November 2014.
- Bredow, Wolfgang. "Arado Ar 234 B-2 Blitz" (in German). Archived from the original on 29 November 2014. Retrieved 20 November 2014.
- McMullen, Emerson Thomas; Rogers, George. "George Rogers and the Bridge at Remagen". Archived from the original on 28 February 2003. Retrieved 19 November 2014.
- Beck, Alfred M. (1985). United States Army in World War 2, Technical Services, The Corps of Engineers: The War Against Germany. Defense Department, Army, Center of Military History. p. 626. ISBN 9780160019388.
- Saak, Robert. "Remagen". Archived from the original on 24 September 2015. Retrieved 28 August 2015.
- "The Roman Occupation of Southwest Germany". Archived from the original on 11 November 2014. Retrieved 16 November 2014.
- "The Ludendorff Bridge Erpel – Remagen". Archived from the original on 24 September 2015. Retrieved 14 November 2014.
- Keck, Michael B. (27 November 1972). "The Remagen Bridgehead: The Significance of Actions Taken by United States and German Forces Between 7 and 17 March 1945 (Research)" (PDF). Fort Benning, Georgia: United States Army Infantry School. Archived from the original (PDF) on 25 October 2015. Retrieved 28 October 2015.
- "De Brug Bij Remagen" (in Dutch). Archived from the original on 29 November 2014. Retrieved 21 November 2014.
- Papadopoulos, Andy (2014). Hitler's Last Bridge (documentary). WWIIs Greatest Raids. Archived from the original on 28 April 2016. Retrieved 12 November 2014.
- "WWII 8th AAF Combat Chronology". Archived from the original on 23 September 2015. Retrieved 17 November 2014.
- "Mission Reports: Mission 772". Eight Air Force Historical Society. Archived from the original on 29 November 2014. Retrieved 17 November 2014.
- "The Bridge at Remagen The Ludendorff Bridge". Archived from the original on 29 November 2014. Retrieved 17 November 2014.
- Ambrose, Stephen (24 September 1998). Citizen Soldiers: The U. S. Army from the Normandy Beaches to the Bulge to the Surrender of Germany. Simon & Schuster. p. 443. ISBN 978-0684848013. Archived from the original on 26 January 2018.
- Atkinson, Rick (2014). Guns at Last Light: The War in Western Europe, 1944–1945. Picador. p. 928. ISBN 978-1250037817. Archived from the original on 26 January 2018.
- Zaloga, Steven J. (2006). Remagen 1945: Endgame Against the Third Reich (illustrated by Peter Dennis ed.). Oxford, UK: Osprey Publishing. ISBN 1-84603-249-0. Retrieved 1 December 2014.
- Mercatante, Steve. "Crossing the Rhine River: March 1945". Globe at War. Archived from the original on 28 November 2014. Retrieved 14 November 2014.
- Liddell, Robert (22 June 1984), CSI Battlebook Rhine River Crossing, Ft. Levenworth, Kansas: Combat Studies Institute.
- Wishnevsky, Stephan T. (2006). Courtney Hicks Hodges: from Private to Four-star General in the United States Army. Jefferson, North Carolina: McFarland & Company. ISBN 978-0786424344.
- Sundin, Sarah (6 March 2015). "Today in World War II History – March 6, 1945". www.sarahsundin.com. Archived from the original on 31 October 2016. Retrieved 30 October 2016.
- MacDonald, Charles B. (15 August 2014). United States Army in WWII – Europe – the Last Offensive. Pickle Partners Publishing. ISBN 9781782894193. Archived from the original on 26 January 2018. Retrieved 30 October 2016.
- Traister, Brandon. "The World War II Lecture Institute". www.wwiilectureinstitute.com. Archived from the original on 22 August 2016. Retrieved 30 October 2016.
- Cosmos, Graham A.; Cowdery, Albert E. (1992), "Medical Service in the European Theater of Operations", The United States in World War II. The Technical Series (CMH Pub 20-23 ed.), Center of Military History.
- Zabecki, David T. (1999). World War II in Europe: An Encyclopedia. New York: Garland Publications. p. 1644. ISBN 978-0824070298. Archived from the original on 26 January 2018.
- Leonard, John W. "The Remagen Bridgehead, March 7–17, 1945". Research And Evaluation Division, The Armored School, United States Army. Archived from the original on 7 July 2011. Retrieved 18 November 2014.
- "The Hohenzollern Bridge". 5 November 2014. Archived from the original on 11 November 2014. Retrieved 10 December 2014.
- "The 9th: The Story of the 9th Armored Division". Archived from the original on 14 June 2006. Retrieved 3 June 2006.
- "Spearhead in the West". 3rd Armored Division. 1946. Retrieved 10 December 2014.
- Assault on Ludendorff Bridge: The First Allied Crossing of the Rhine
- Halloran, Michael J. "The Bridge at Remagen" (PDF). Archived from the original (PDF) on 4 March 2016. Retrieved 13 December 2014.
- Rawson, Andrew (2004). Remagen Bridge 9th Armored Division. Barnsley, S. Yorkshire: L. Cooper. p. 49. ISBN 9781783460250. Archived from the original on 26 January 2018.
- The Bridge at Remagen – WW2 – What Really Happened. The Big Picture (documentary). United States Army Pictorial Department. 1965. Archived from the original on 26 January 2018. Retrieved 1 December 2014.
- Hunnicutt, R. P. (1971). Pershing, A History of the Medium Tank T20 Series (first ed.). Feist Publications. pp. 9–12. ISBN 1112954503.
- "The Crossing of the Rhine River". Archived from the original on 15 June 2015. Retrieved 22 November 2014.
- Hickman, Kennedy. "World War II: The Bridge at Remagen". about.com. Archived from the original on 29 November 2014. Retrieved 13 November 2014.
- Learned, George E. (18 March 1951). "The Remagen bridge, six years after". Stars and Stripes. Archived from the original on 29 November 2014. Retrieved 23 November 2014.
- Bull, Stephen (2011). D-day to Victory: With the Men and Machines that Won the War. Long Island City, NY: Osprey Publishing. p. 260. ISBN 978-1849088381.
- Lothar, Bruene; Weiler, Jacob (1993). Remagen im März 1945 – Eine Dokumentation zur Schlussphase des 2 (in German). Remagen: Weltkrieges, Friedens-Museum. pp. 68 ff. ISBN 3-9803385-9-2.
- Parfitt, Allen. "A Path Across the Rhine: The Ludendorff Bridge at Remagen March 1945". Archived from the original on 9 October 2014. Retrieved 21 November 2014.
- Hansen, Ken. "What finished the bridge at Remagen?". Stars and Stripes. Retrieved 29 July 2018.
- "Information about the actual M26 Pershing". 1/16 R/C Tank Series No.16. Tamiya.com. Archived from the original on 24 September 2015. Retrieved 13 November 2014.
- Hickman, Kennedy. "World War II: M26 Pershing". About.com. Archived from the original on 29 November 2014. Retrieved 13 November 2014.
- Lewis Betty (14 July 2001). "Interview with Ken Hechler, WWII Historian, Author of The Bridge at Remagen". Archived from the original on 11 June 2009. Retrieved 7 March 2008.
- Eye Witness to History (2008). "Capturing the Bridge at Remagen, 1945 – Crossing the Rhine River". Eyewitness to History. Archived from the original on 20 September 2012. Retrieved 16 September 2012.
- Fowle, Barry W. (1992), "The Rhine River Crossings", Builders and Fighters: U.S. Army Engineers in World War II, Fort Belvoir, VA: Office of History, US Army Corps of Engineers
- Maiden, Lorelei. "First GI to Cross Rhine Unterrified", Stars & Stripes. London Edition, 12 March 1945, p. 1
- Langer, Howard J. (1999). World War II: An Encyclopedia of Quotations. Westport, Conn.: Greenwood Press. ISBN 0313300186.
- "Engineer Memoirs General William M. Hoge" (PDF) (EP 870-1-25 ed.). U.S. Army Corps of Engineers. January 1993. Archived (PDF) from the original on 15 July 2014.
- Toland, John (2014). The Last 100 Days: The Tumultuous and Controversial Story of the Final Days of World War II in Europe. Random House Publishing Group. p. 344. ISBN 978-0804180948. Archived from the original on 18 January 2017.
- Rooney, Andy (15 October 2002). My War. New York: Public Affairs. pp. 251–253. ISBN 978-1586481599.
- Gay, Timothy (17 May 2012). "Writing for Stripes defined Rooney's life". Stars and Stripes. Archived from the original on 29 November 2014.
- Rooney, Andy (13 March 1945). "Bridge a Blow to Jerry". Stars & Stripes (London ed.).
- Rooney, Andy (7 March 1985). "Recalling The Ludendorff Bridge". Chicago Tribune. Archived from the original on 26 June 2015.
- "Yanks Open Bridgehead Drive" (PDF). The Charlotte News. 12 March 1945. Archived (PDF) from the original on 5 December 2014.
- Long, James. "First Bolsters Bridgehead Across Rhine" (PDF). The Leader-Republican. Retrieved 26 November 2014.
- Hogan, David W., Jr. (13 December 2000). Command Post at War: First Army Headquarters in Europe, 1943–1945 (CMH Pub 70-60 ed.). Defense Department, Army Center of Military History. p. 253. ISBN 0-16-061328-0.
- Higeons, Rebecca (Spring 2008). "Farewell to a Hero" (PDF). Military Police. Fort Leonard Wood. Archived from the original (PDF) on 7 May 2016.
- Pergrin, David E.; Hammel, Eric (1989). First Across the Rhine: The 291st Engineer Combat Battalion in France, Belgium, and Germany. New York: Atheneum. ISBN 978-0689120336.
- Miller, Edward (2013). Nothing Less Than Full Victory. New York: Naval Institute Press. p. 153. ISBN 9781612514352.
- Humphrey, Robert (6 February 2014). Once Upon a Time in War: The 99th Division in World War II (paperback ed.). Oklahoma: University of Oklahoma Press. p. 376. ISBN 978-0806144542. Archived from the original on 12 April 2017.
- "1st Infantry Division, 1942–1945" (PDF). p. 52. Archived (PDF) from the original on 9 October 2014. Retrieved 23 November 2014.
- "Leap Off 404th Fighter Group Combat History" (PDF). Archived (PDF) from the original on 4 March 2016. Retrieved 27 November 2014.
- McAlevey, John F. (March 1971). "Encounter at Remagen U.S. Air Ace's Brush With Death". Veterans of Foreign Wars Magazine: 26–27, 32. Archived from the original on 3 March 2016. Cite journal requires
|journal=(help) - Mitcham, Samuel W. (2006). Panzers in Winter: Hitler's Army and the Battle of the Bulge. Westport, Connecticut: Praeger Security International. ISBN 978-0275971151.
- Bayerlein, Fritz (15 May 1946). "53 Corps, Remagen Bridgehead". Fold3. Ancestry.com. Archived from the original on 5 December 2014.
- Bayerlein, Fritz (15 May 1946). "A-970, Remagen Bridgehead – LIII Corps". Guide to Foreign Military Studies, 1945–54. Ancestry.com. Archived from the original on 9 December 2014.
Manuscripts assembled under the Foreign Military Studies program of the Historical Division, U.S. Army Europe, 1945–54.
- Camm, Frank. "The Personal Memoirs of General Frank Camm Jr". Archived from the original on 9 December 2014. Retrieved 6 December 2014.
- Samuel, Wolfgang W.E. (2004). American raiders the race to capture the Luftwaffe's secrets (ebook ed.). Jackson: University Press of Mississippi. p. 47. ISBN 9781604731361.
- Leckie, Robert (1964). The Story of World War II. New York: Random House. p. 172.
- Buttler, Tony (2004). British Secret Projects: Fighters and Bombers 1935–1950. Midland, England: Hersham UK. ISBN 1-85780-179-2.
- Colley, David P. (2004). Blood for Dignity: the Story of the First Integrated Combat Unit in the U.S. Army (1st St. Martin's Griffin ed.). New York: St. Martin's Griffin. p. 89. ISBN 978-0312325800.
- "Arado Ar 234 B-2 Blitz" (in German). Archived from the original on 3 July 2015. Retrieved 3 September 2015.
- "Arado Ar 234 B-2 Blitz (Lightning)". Smithsonian National Air and Space Museum. Archived from the original on 5 May 2016.
- ""The Watch on the Rhine" Everyday Life of the Soldiers at the Bridge". Friedensmuseum Brücke von Remagen. Archived from the original on 23 September 2015. Retrieved 25 November 2014.
- Lowe, Stan. "Holding the bridgehead at Remagen". Casper Journal.
- Rottman, Gordon L. (2013). World War II river assault tactics. Oxford: Osprey. p. 36. ISBN 9781780961088.
- "Der 7. März 1945. Die Brücke von Remagen" (in German). Archived from the original on 13 November 2014. Retrieved 14 November 2014.
- Jung, Michael. Sabotage unter Wasser: die deutschen Kampfschwimmer im Zweiten Weltkrieg (in German). E. S. Mittler & Sohn GmbH.
- Paterson, Lawrence (August 2009). Waffen der Verzweiflung – Deutsche Kampfschwimmer und Kleinst-U-Boote im Zweiten Weltkrieg (in German) (first ed.). Ullstein Verlag. ISBN 978-3-548-26887-3.
- Beck, Alfred M.; Bortz, Abe; Lynch, Charles W.; Mayo, Lida; Weld, Ralph F. (1985). "US Army TS Engineers 3 War with Germany: Chapter 22: The Roer Crossing and the Remagen Bridgehead". The Corps of Engineers: The War Against Germany.
- Bertha's Big Brother Karl-Gerät (60 cm) & (54 cm): The Super-Heavy Self-Propelled Mortar also known as Gerät 040/041 Nr. I-VII. Boyds, Maryland: Panzer Tracts. 2001. ISBN 0-9708407-2-1.
- MacDonald, Charles B., "Chapter XIV The Rhine Crossings in the North", The Last Offensive, US Army in World War II: European Theater of Operations, p. 294, archived from the original on 22 May 2013
- Zaloga, Steven (2012). Armored Victory 1945 U.S. Army Rank Combat in the European Theater from the Battle of the Bulge to Germany's Surrender (eBook ed.). Mechanicsburg, PA: Stackpole Books. ISBN 9780811745598.
- Thomas, Nigel (1991). Foreign Volunteers of the Allied Forces: 1939–45. London: Osprey. p. 16. ISBN 185532136X.
- Ghirardi, Leo J. "The Ludendorff Bridge at Remagen". Archived from the original on 21 December 2014. Retrieved 21 December 2014.
- "US Troops Capture Ludendorff Railroad Bridge at Remagen". United States Holocaust Museum. Archived from the original on 5 December 2014. Retrieved 29 November 2014.
- Loeb, Sam F. Ford, Gary (ed.). "Saved By Shrapnel". America in WWII. Archived from the original on 13 December 2014. Retrieved 13 December 2014.
- "Rhineland". Archived from the original on 5 December 2014. Retrieved 25 November 2014.
- "Lightening The Story of the 78th Infantry Division". Paris: Stars & Stripes. 1945. Archived from the original on 19 October 2014. Retrieved 29 November 2014.
via lonesentry.com
- Butcher, Harry C. My Three Years With Eisenhower.
- "Engineers in World War II – 1945". Office of History, Headquarters, U.S. Corps of Engineers. Archived from the original on 13 August 2006. Retrieved 3 December 2014.
- Rickard, John Nelson (2011). Advance and Destroy: Patton as Commander in the Bulge. Lexington, Kentucky: University Press of Kentucky. ISBN 9780813134550.
- "De Brug Bij Remagen Ludendorff Brücke" (in Dutch). Archived from the original on 29 November 2014. Retrieved 16 November 2014.
- "Ludendorff Bridge collapse". Jack Carlson. Archived from the original on 13 November 2014. Retrieved 24 June 2014.
- "The Remagen Bridgehead". Wilmer Mathews Memorial Page. Archived from the original on 16 July 2014. Retrieved 3 December 2014.
- "The Lull Before the Storm". 107th Engineer Association. Archived from the original on 22 April 2001. Retrieved 22 November 2014.
- Stonehouse, Frederick (2001). "Spotlight on the 291st Engineer Combat Battalion" (PDF). Combat Engineer! The History of the 107th Engineering Battalion. 107th Engineer Association. pp. 77–78. Archived (PDF) from the original on 23 April 2016.
- Dickerson, Bryan J. "The U.S. 9th Armored Division in the Liberation of Western Czechoslovakia 1945". Archived from the original on 24 September 2015. Retrieved 24 November 2014.
- MacDonald, Charles B. Siegfried Line Campaign. (1984). Center of Military History, United States Army. Pages 454, 468–469.
- Brighton, Terry (2008). "The Ego at War". Archived from the original on 4 March 2016.
- Murphy, Brian John. "VE!". America in WWII. Archived from the original on 13 December 2014. Retrieved 13 December 2014.
- Mansoor, Peter R. (1999). The GI Offensive in Europe: The Triumph of American Infantry Divisions 1941–1945. Lawrence Kansas: University Press of Kansas.
- The Bridge. Beyreuth, Germany: 9th Armored Infantry Division.
- "Eisenhower". Sarasota-Herald Tribune. 22 April 1945.
- Dwight Eisenhower (1948). Crusade in Europe (April 1952 ed.). p. 418.
- "Remembering World War II". Congressional Record Volume 141, Number 42. 7 March 1995. Archived from the original on 9 December 2014.
Eisenhower's chief of staff, his alter ego, General Walter Bedell Smith, termed the Remagan Bridge worth its weight in gold.
- Thompson, John (2 February 1947). "Remagen Bridge Won; War's Last Battle Begins". Chicago Tribune (2). p. 6. Archived from the original on 7 March 2016.
- "Remagen Bridge Shortened War". The Lewiston Daily Sun. 17 December 1945: 2. Cite journal requires
|journal=(help) - Friedrich von Mellenthin. Panzer Battles 1939-45. p. 336.
- Charles B. MacDonald. US Army in World War II - European Theatre of Operations: The Last Offensive. p. 234.
- Dermot, Bradley (2002). Die Generale des Heeres, 1921–1945, Band 6 (Hochbaum-Klutmann) (in German). Osnabrück, Germany: Biblio Verlag.
- "The Bridge at Remagen" (in Spanish). Archived from the original on 29 November 2014. Retrieved 14 November 2014.
- "Ehrenfriedhof von Birnbach" (in German). Archived from the original on 29 November 2014. Retrieved 4 December 2014.
- Kraft, Guenther (1946). "The shooting of Major Kraft in consequence of the Remagen incident; an account by his son". Fold3 (in German). Ancestry.com. Archived from the original on 5 December 2014.
- "Holding the bridgehead at Remagen". 20 April 2013. Archived from the original on 5 December 2014.
- General Orders: Headquarters, First U.S. Army, General Orders No. 49 (1945). US Army. 1945.
- "545th Military Police Regimental History". 15 February 2010. Archived from the original on 31 December 2014.
- Gunnarsson, Robert L. (2011). American Military Police in Europe, 1945–1991: Unit Histories. Jefferson, N.C.: McFarland. p. 34. ISBN 978-0786439751.
- "PAM 672-1 Unit Citation and Campaign Participation Credit Register". United States, Department of the Army. 6 July 1961.
- Higeons, Rebecca. "Colonel John (Jack) F. Hyde (Retired) 1917–2007" (PDF). Archived from the original (PDF) on 7 May 2016. Retrieved 31 July 2018.
- Watson, Andy. "Military Police Heroism" (PDF). Retrieved 31 July 2018.
- D'Este, Carlo (2002). Eisenhower: A Soldier's Life (First ed.). New York: Henry Holt. p. 682. ISBN 978-0805056877. Archived from the original on 7 March 2017.
- "Die Brücke von Remagen". Archived from the original on 29 November 2014. Retrieved 22 November 2014.
- Hansen, Ken (8 March 1962). "Veterans of Ludendorff Bridge battle gather at Remagen". Stars and Stripes. Archived from the original on 24 September 2015.
- Allen, Arthur (7 March 1995). "Americans, Germans Celebrate Bridge Capture That Shortened War". Archived from the original on 14 December 2014.
- Hechler, Kenneth. "Questionnaire on the Remagen Bridge Affair". Fold3 (in English and German). Ancestry.com. Archived from the original on 5 December 2014. Retrieved 29 November 2014.
- "Ein Erdloch entlässt seine Schläfer" (in German). Friedensmuseum Brücke von Remagen. Archived from the original on 22 March 2014. Retrieved 11 December 2014.
- "Bridge at Remagen Stone". Archived from the original on 4 December 2014.
- Gonzalez, Kris (8 September 2010). "Fort Jackson visit stirs vets' memories". Archived from the original on 5 December 2014.
- "The Bridge at Remagen". 21 December 2013. Archived from the original on 7 December 2014.
- Melancon, Dave (9 March 2010). "U.S. Army Europe combat engineers remember, honor their heritage at celebrated bridge". U.S. Army Europe Public Affairs Office. Archived from the original on 22 November 2014.
- Dougherty, Kevin (1 March 2005). "Remagen: Museum pays homage to small German town's role in WWII". Archived from the original on 29 November 2014.
- Wolff, Henry Jr. (27 July 2003). "Remagen Bridge Now a Memorial to Peace". The Victoria Advocate. p. 3.
- "Kunst- und Kulturkreis "Ad Erpelle" kauft ehemaligen Eisenbahntunnel" (in German). Archived from the original on 11 November 2014. Retrieved 7 December 2014.
- Kleifield, Helge (January 2000). Denkmale und Gedenkstätten auf der Erpeler Ley (in German). Rhenish Association for Conservation and Landscape Protection. p. 30ff.
- "Vor 60 Jahren überquerten die Amerikaner bei Erpel den Rhein" (in German). Archived from the original on 13 December 2014. Retrieved 13 December 2014.
- "Ponts et batailles de la seconde guerre mondiale" (in French). Archived from the original on 12 April 2015. Retrieved 5 April 2015.
- Johnson, Niel A. (29 November 1985). "Oral History Interview with Ken Hechler". Harry S. Truman Library and Museum. Archived from the original on 15 December 2014.
Bibliography
- This article incorporates text from one or more United States military publications now in the public domain.
- Barber, Neil "The Bridge at Remagen"
- Brüne, Lothar; Weiler, Jakob (21 January 1995). Remagen im März 1945. Jahrbuch für westdeutsche Landesgeschichte (in German).
- Dejardin, André (1992). Mars 1945 – Des Belges à Remagen. Brussels: Collet. ISBN 2873670053.
- Dittmer, Luther A. (1995). Die Ludendorff Brücke zu Remagen am 7. März 1945: im Lichte bekannter und neuerer Quellen (in German). Institut für Mittelalterliche Musikforschung. ISBN 978-0-931902-35-2.
- Elowski, Ryan M. "US 9th Engineer Battalion". Archived from the original on 7 May 2008. Retrieved 22 July 2005.
- Hechler, Ken (1998). The Bridge at Remagen: The Amazing Story of March 7, 1945, the Day the Rhine River Was Crossed (Third ed.). Novato, California: Presidio. ISBN 978-0-89141-860-3.
- Lewis, Betty (14 July 2001). "Interview with Ken Hechler, WWII Historian author of 'The Bridge at Remagen'". Archived from the original on 10 October 2007.
- McAlevey, John F. "US 8th Air Force ETO Ace Shot Down over Remagen by Allied Gunners". VFW Magazine.
- Palm, Rolf (1985). Die Brücke von Remagen: der Kampf um den letzten Rheinübergang: ein dramatisches Stück deutscher Zeitgeschichte (in German). Scherz. ISBN 978-3-502-16552-1.
- The Remagen Bridgehead, March 7–17, 1945 (PDF). Research and Evaluation Division, The Armored School, United States Army.
- Schäfer, Ralf Anton. "Roer to Rhine". The History of the 3rd Battalion, 310th Infantry Regiment, 78th Lightning Division. 62vgd.de.