SMS Seydlitz
SMS Seydlitz was a battlecruiser of the German Kaiserliche Marine (Imperial Navy), built in Hamburg.[lower-alpha 1] She was ordered in 1910 and commissioned in May 1913, the fourth battlecruiser built for the High Seas Fleet. She was named after Friedrich Wilhelm von Seydlitz, a Prussian general during the reign of King Frederick the Great and the Seven Years' War.[1] Seydlitz represented the culmination of the first generation of German battlecruisers, which had started with the Von der Tann in 1906 and continued with the pair of Moltke-class battlecruisers ordered in 1907 and 1908. Seydlitz featured several incremental improvements over the preceding designs, including a redesigned propulsion system and an improved armor layout. The ship was also significantly larger than her predecessors—at 24,988 metric tons (24,593 long tons; 27,545 short tons), she was approximately 3,000 metric tons heavier than the Moltke-class ships.
.jpg.webp) | |
| Class overview | |
|---|---|
| Operators: |
|
| Preceded by: | Moltke class |
| Succeeded by: | Derfflinger class |
| Completed: | 1 |
| Lost: | 1 |
| History | |
| Name: | Seydlitz |
| Namesake: | Friedrich Wilhelm von Seydlitz |
| Ordered: | 21 March 1910 |
| Builder: | Blohm & Voss, Hamburg |
| Laid down: | 4 February 1911 |
| Launched: | 30 March 1912 |
| Commissioned: | 22 May 1913 |
| Motto: | Always forward |
| Fate: |
|
| General characteristics | |
| Class and type: | Unique battlecruiser |
| Displacement: | |
| Length: | 200.6 m (658 ft 2 in) |
| Beam: | 28.5 m (93 ft 6 in) |
| Draft: | 9.29 m (30 ft 6 in) |
| Installed power: |
|
| Propulsion: |
|
| Speed: | 26.5 knots (49.1 km/h; 30.5 mph) |
| Range: | 4,200 nmi (7,800 km; 4,800 mi) at 14 knots (26 km/h; 16 mph) |
| Complement: | 1,068 |
| Armament: |
|
| Armor: |
|
Seydlitz participated in many of the large fleet actions during World War I, including the battles of Dogger Bank and Jutland in the North Sea. The ship suffered severe damage during both engagements; during the Battle of Dogger Bank, a 13.5 in (34.3 cm) shell from the British battlecruiser Lion struck Seydlitz's rearmost turret and nearly caused a magazine explosion that could have destroyed the ship. At the Battle of Jutland she was hit twenty-one times by large-caliber shells, one of which penetrated the working chamber of the aft superfiring turret. Although the resulting fire destroyed the turret, the safety measures imposed after the battle of Dogger Bank prevented a catastrophe. The ship was also hit by a torpedo during the battle, causing her to take in over 5,300 metric tons of water and her freeboard was reduced to 2.5 m. She had to be lightened significantly to permit her crossing of the Jade Bar. The ship inflicted severe damage on her British opponents as well; early in the battle, salvos from both Seydlitz and the battlecruiser Derfflinger destroyed the battlecruiser Queen Mary in seconds.
Seydlitz saw limited action in the Baltic Sea, when she provided screening for the German flotilla that at Battle of the Gulf of Riga attempted to clear the gulf in 1915. As with the rest of the German battlecruisers that survived the war, the ship was interned in Scapa Flow in 1918. The ship, along with the rest of the High Seas Fleet, was scuttled in June 1919, to prevent her seizure by the British Royal Navy. She was raised on 2 November 1928 and scrapped by 1930 in Rosyth.
Development
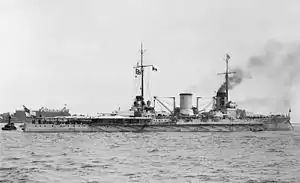
Despite the success of the previous German battlecruisers designs—those of Von der Tann and the Moltke class—there was still significant debate as to how new ships of the type were to be designed. In 1909, the Reichsmarineamt (Navy Department) requested Admiral Alfred von Tirpitz, the State Secretary for the navy, to provide them with the improvements that would be necessary for the next battlecruiser design. Tirpitz continued to push for the use of battlecruisers solely as fleet scouts and to destroy enemy cruisers, along the lines of the battlecruisers employed by the British Royal Navy; this meant larger guns, higher speeds, and less armor protection. Kaiser Wilhelm II and the majority of the Navy Department argued that due to Germany's numerical inferiority compared to the Royal Navy, the ships would also have to fight in the line of battle. This necessitated much heavier armor protection than that afforded to the Royal Navy's battlecruiser designs. Ultimately, the Kaiser and the Navy Department won the debate, and the battlecruiser for the 1909–1910 building year would continue in the pattern of the previous Von der Tann and Moltke-class designs.[2]
Financial constraints meant that there would have to be a trade-off between speed, battle capabilities, and displacement. The initial design specifications mandated that speed was to have been at least as high as with the Moltke class, and that the ship was to have been armed with either eight 30.5 cm (12 in) guns or ten 28 cm (11 in) guns. The design staff considered three-gun turrets, but these were discarded when it was decided that the standard 28 cm twin turret was sufficient.[2]
In August 1909, the Reichstag (Imperial Diet) stated that it would tolerate no increases in cost over the Moltke-class battlecruisers, and so for a time, the Navy Department considered shelving the new design and instead to build a third Moltke-class ship. Admiral Tirpitz was able to negotiate a discount on armor plate from both Krupp and Dillingen; Tirpitz also pressured the ship's builder, Blohm & Voss, for a discount. These cost reductions freed up sufficient funds to make some material improvements to the design. On 27 January 1910, the Kaiser approved the design for the new ship, ordered under the provisional name "Cruiser J".[3]
Design
General characteristics
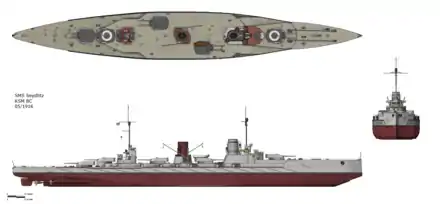
Seydlitz was 200 meters (656 ft 2 in) long at the waterline, and 200.6 m (658 ft 2 in) overall. The ship had a beam of 28.5 m (93 ft 6 in), which was increased to 28.8 m (94 ft 6 in) with anti-torpedo nets equipped. She had a draft of 9.29 m (30 ft 6 in) forward and 9.09 m (29 ft 10 in) aft. Seydlitz displaced 24,988 metric tons (24,593 long tons) as designed, which increased to 28,550 t (28,100 long tons) at full load. Seydlitz had a double bottom for 76 percent of the length of the hull.[4]
The ship carried a number of smaller boats, including one picket boat, three barges, two launches, two yawls, and two dinghies. Seydlitz was described as having been a good sea boat with gentle motion. The ship lost up to 60 percent of her speed at a hard rudder, and would heel over to 9 degrees. The ship had a standard complement of 43 officers and 1025 men, and when serving as the flagship of I Scouting Group, she was manned by an additional 13 officers and 62 men.[5]
Propulsion
Seydlitz was propelled by four Parsons direct-drive steam turbines that were arranged in two sets. Each set consisted of a high-pressure outboard turbine which exhausted into a low-pressure inboard turbine. Each turbine drove a 3-bladed screw propeller that was 3.88 m (12.7 ft) in diameter. Steam for the turbines was provided by twenty-seven small-tube Schulz-Thornycroft boilers that had two fire boxes per boiler. The boilers were divided into three boiler rooms, and they were ducted into a pair of widely spaced funnels. Electrical power was provided by six turbo generators that produced 1,800 kW at 220 V.[5]
The engines were designed to produce 63,000 metric horsepower (62,000 shp) and a top speed of 26.5 knots (49.1 km/h; 30.5 mph). Using forced draft on trials, the engines provided up to 89,738 metric horsepower (88,510 shp) and a top speed of 28.1 knots (52.0 km/h; 32.3 mph). The ship carried up to 3,600 tonnes (3,500 long tons) of coal. With full fuel stores, Seydlitz could steam at a cruising speed of 14 knots (26 km/h; 16 mph) for 4,200 nautical miles (7,800 km; 4,800 mi). Steering was controlled by a pair of side-by-side rudders.[4]
Armament
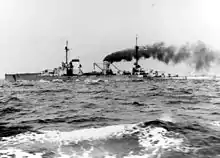
Seydlitz mounted a nearly identical main battery to that of the preceding Moltke-class ships: ten 28 cm (11 in) SK L/50 guns[lower-alpha 2] in five twin-gun turrets. The guns were arranged similarly as well, with one turret fore, two staggered wing turrets amidships, and two super-firing turrets aft.[5] They were placed in newer Drh. L C/1910 mountings,[3] which enabled depression of the guns down to −8 degrees and elevation to 13.5 degrees—the same range of motion of the earlier Drh. L C/1908 turrets. At 13.5 degrees, the guns could be fired to 18,100 m (59,400 ft). In 1916, Seydlitz had her main turrets modified to allow for elevation up to 16 degrees, for a maximum range of 19,100 m (62,700 ft). Each turret was equipped with a 3 m (9.8 ft) rangefinder, apart from the rear turret, and an additional 3 m rangefinder was fitted in the gunnery control tower, which was located directly aft of the conning tower. The main battery was supplied with 87 armor-piercing rounds per gun, for a total of 870 shells.[5] In addition to the 305-kilogram (672 lb) shell, each gun chambered a 24.0 kg (52.9 lb) fore propellant charge in a silk bag and a 75.0 kg (165.3 lb) main charge in a brass case. The guns fired the shells at a muzzle velocity of 880 m/s (2,900 ft/s). The guns were hand-rammed, which required the barrels to be returned to 0 degrees elevation for reloading. Training and elevation was controlled hydraulically.[7]
Seydlitz carried a similar secondary battery to the preceding Moltke-class design. She mounted twelve 15 cm (5.9 in) SK L/45 quick-firing guns in single casemates along the center of the ship. These guns fired armor-piercing shells at a rate of 4 to 5 per minute. The guns could depress to −7 degrees and elevate to 20 degrees, for a maximum range of 13,500 m (14,800 yd), and after the 1916 refit, the range was extended to 16,800 m (18,400 yd). The shells weighed 51-kilogram (112 lb) and were fired at a muzzle velocity of 735 m/s (2,410 ft/s). The guns were manually elevated and trained.[5][8][9]
For defense against torpedo boats, the ship was also armed with twelve 8.8 cm (3.5 in) SK L/45 quick-firing guns, which were mounted in casemates as well. These guns fired 7.04 kg (15.5 lb) at a muzzle velocity of 590 mps (1,936 fps). Their rate of fire was approximately 15 shells per minute; the guns could engage targets out to 6,890 m (7,530 yd). The gun mounts were manually operated.[8][10] Two of these guns were removed in 1916 and replaced with high-angle 8.8 cm Flak L/45 anti-aircraft guns.[5]
As was customary for all German capital ships of the time, Seydlitz was equipped with four submerged torpedo tubes. The ship mounted one tube in the bow, one in the stern, and one was on each side of the vessel. The weapons were 50 cm (19.7 in) in diameter, and a total of eleven torpedoes were stored. She was initially equipped with the G6 version, which carried a 140 kg (310 lb) warhead and could be set at two speeds for different ranges. At 27 knots (50 km/h; 31 mph), the torpedoes could reach 5,000 m (16,000 ft) and at 35 knots (65 km/h; 40 mph), the range fell to 2,200 m (7,200 ft). These were replaced beginning in 1913 by the G7 type, which carried a 200 kg (440 lb) warhead. Their range increased significantly, to 17,200 m (56,400 ft) at 27 knots and 7,400 m (24,300 ft) at 37 knots (69 km/h; 43 mph).[5][11]
Armor
As was standard for German warships of the period, Seydlitz used Krupp cemented and nickel steel for her armor plating. The ship had an armored belt that was 300 mm (11.8 in) thick at its strongest area in the citadel, and tapered down to 100 mm (3.9 in) in the bow and stern. The main belt was reinforced by a torpedo bulkhead that was 50 mm (2 in) thick. The forward conning tower had 350 mm (13.8 in) of armor on the sides, and a 200 mm (7.9 in) thick roof. The turrets were protected by 250 mm (9.8 in) on the sides and armor ranging in thickness from 70–100 mm (2.8–3.9 in) on the turret roofs. The casemates had lighter armor protection, with 150 mm (5.9 in) on the sides and 35 mm (1.4 in) roofs. The deck armor ranged in thickness, depending on the area being protected. In the more vital areas, the deck armor was 80 mm (3.1 in) thick, while less important areas of the ship were covered by only 30 mm (1.2 in). A 50 mm belt of sloping armor was placed under the main deck armor. The turret barbettes were protected by plating 230 mm (9.1 in) thick. The portions of the barbettes that were behind the main belt were thinner to save weight, which was a practice employed on most German and British ships of the period.[12]
Service history
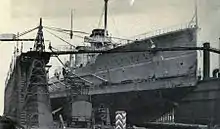
Seydlitz was launched on 30 March 1912, and was christened by General der Kavallerie Karl Wilhelm Heinrich von Kleist. On 22 May 1913 the ship was commissioned into the German fleet, manned by the crew of the old armored cruiser Yorck, which had been recently transferred to the reserve fleet.[1] After trials, Seydlitz joined the rest of the High Seas Fleet for maneuvers off Helgoland. Konteradmiral (Rear Admiral) Franz von Hipper, the commander of I Scouting Group, raised his flag in the ship on 23 June 1914. The ship served as Hipper's flagship until 26 October 1917.[13]
Battle of Heligoland Bight
Shortly after the outbreak of World War I, a brief engagement between German light cruisers and a raiding force of British cruisers and battlecruisers took place on 28 August 1914. During the morning, British cruisers from the Harwich Force attacked the German destroyers patrolling the Heligoland Bight. Six German light cruisers—Cöln, Strassburg, Stettin, Frauenlob, Stralsund, and Ariadne—responded to the attack and inflicted serious damage to the British raiders. The arrival at approximately 13:37 of the British 1st Battlecruiser Squadron, under the command of Vice Admiral David Beatty, quickly put the German ships at a disadvantage.[14]
Along with the rest of the I Scouting Group battlecruisers, Seydlitz was stationed in the Wilhelmshaven Roads on the morning of the battle. By 08:50, Hipper had requested permission from Admiral Friedrich von Ingenohl, the commander in chief of the High Seas Fleet, to send his ships to relieve the beleaguered German cruisers.[15] The battlecruisers Von der Tann and Moltke were ready to sail by 12:10, but the low tide prevented the ships from being able to pass over the sand bar at the mouth of the Jade Estuary safely. At 14:10, Moltke and Von der Tann were able to cross the Jade bar; Hipper ordered the German light cruisers to fall back to his ships, while Hipper himself was about an hour behind in Seydlitz. At 14:25, the remaining light cruisers—Strassburg, Stettin, Frauenlob, Stralsund, and Ariadne—rendezvoused with the battlecruisers.[16] Seydlitz arrived on the scene by 15:10, while Ariadne succumbed to battle damage and sank. Hipper ventured forth cautiously to search for the two missing light cruisers, Mainz and Cöln, which had already sunk. By 16:00, the German flotilla turned around to return to the Jade Estuary, arriving at approximately 20:23.[17]
Bombardment of Yarmouth
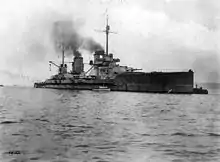
On 2 November 1914, Seydlitz, followed by Moltke, Von der Tann, and the armored cruiser Blücher, along with four light cruisers, left the Jade Estuary and steamed towards the English coast.[18] The flotilla arrived off Great Yarmouth at daybreak the following morning and bombarded the port, while the light cruiser Stralsund laid a minefield. The British submarine D5 responded to the bombardment, but struck one of the mines laid by Stralsund and sank. Shortly thereafter, Hipper ordered his ships to turn back to German waters. While Hipper's ships were returning to German waters, a heavy fog covered the Heligoland Bight, so the ships were ordered to halt until visibility improved so they could safely navigate the defensive minefields. The armored cruiser Yorck made a navigational error that led the ship into one of the German minefields. Yorck struck two mines and quickly sank; the coastal defense ship Hagen was able to save 127 men of the crew.[18]
Bombardment of Scarborough, Hartlepool, and Whitby
Ingenohl decided that another raid on the English coast should to be carried out in the hopes of luring a portion of the Grand Fleet into combat where it could be destroyed.[18] At 03:20 on 15 December, Seydlitz, Moltke, Von der Tann, the new battlecruiser Derfflinger, and Blücher, along with the light cruisers Kolberg, Strassburg, Stralsund, and Graudenz, and two squadrons of torpedo boats left the Jade.[19] The ships sailed north past the island of Heligoland, until they reached the Horns Reef lighthouse, at which point the ships turned west towards Scarborough. Twelve hours after Hipper left the Jade, the High Seas Fleet, consisting of 14 dreadnoughts and 8 pre-dreadnoughts and a screening force of 2 armored cruisers, 7 light cruisers, and 54 torpedo boats, departed to provide distant cover.[19]
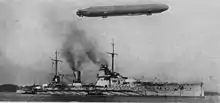
On 26 August 1914, the German light cruiser Magdeburg had run aground in the Gulf of Finland; the wreck was captured by the Russian navy, which found code books used by the German navy, along with navigational charts for the North Sea. These documents were then passed on to the Royal Navy. Room 40 began decrypting German signals, and on 14 December, intercepted messages relating to the plan to bombard Scarborough.[19] The exact details of the plan were unknown, and it was assumed that the High Seas Fleet would remain safely in port, as in the previous bombardment. Beatty's four battlecruisers, supported by the 3rd Cruiser Squadron and the 1st Light Cruiser Squadron, along with the 2nd Battle Squadron's six dreadnoughts, were to ambush Hipper's battlecruisers.[20]
During the night of 15 December, the main body of the High Seas Fleet encountered British destroyers. Fearing the prospect of a nighttime torpedo attack, Ingenohl ordered the ships to retreat.[20] Hipper was unaware of Ingenohl's reversal, and so he continued with the bombardment. Upon reaching the British coast, Hipper's battlecruisers split into two groups. Seydlitz, Moltke, and Blücher went north to shell Hartlepool, while Von der Tann and Derfflinger went south to shell Scarborough and Whitby.[21] During the bombardment of Hartlepool, Seydlitz was hit three times and Blücher was hit six times by the coastal battery. Seydlitz suffered only minimal damage, and no casualties.[21] By 09:45 on the 16th, the two groups had reassembled, and they began to retreat eastward.[22]
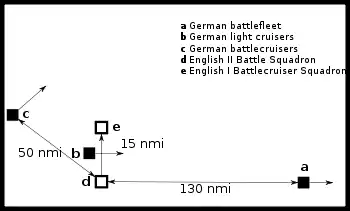
By this time, Beatty's battlecruisers were in position to block Hipper's chosen egress route, while other forces were en route to complete the encirclement. At 12:25, the light cruisers of II Scouting Group began to pass through the British forces searching for Hipper.[23] One of the cruisers in the 2nd Light Cruiser Squadron spotted Stralsund and signaled a report to Beatty. At 12:30, Beatty turned his battlecruisers towards the German ships. Beatty presumed that the German cruisers were the advance screen for Hipper's ships, but the battlecruisers were some 50 km (27 nmi) ahead.[23] The 2nd Light Cruiser Squadron, which had been screening for Beatty's ships, detached to pursue the German cruisers, but a misinterpreted signal from the British battlecruisers sent them back to their screening positions.[lower-alpha 3] This confusion allowed the German light cruisers to escape and alerted Hipper to the location of the British battlecruisers. The German battlecruisers wheeled to the northeast of the British forces and made good their escape.[23]
Both the British and the Germans were disappointed that they failed to effectively engage their opponents. Ingenohl's reputation suffered greatly as a result of his timidity. The captain of the Moltke was furious; he stated that Ingenohl had turned back "because he was afraid of eleven British destroyers which could have been eliminated ... under the present leadership we will accomplish nothing."[24] The official German history criticized Ingenohl for failing to use his light forces to determine the size of the British fleet, stating: "He decided on a measure which not only seriously jeopardized his advance forces off the English coast but also deprived the German Fleet of a signal and certain victory."[24]
Battle of Dogger Bank
_Map.png.webp)
In early January 1915, it became known that British ships were conducting reconnaissance in the Dogger Bank area. Ingenohl was initially reluctant to attempt to destroy these forces, because I Scouting Group was temporarily weakened while Von der Tann was in drydock for periodic maintenance. Konteradmiral Richard Eckermann, the Chief of Staff of the High Seas Fleet, insisted on the operation, and so Ingenohl relented and ordered Hipper to take his battlecruisers to the Dogger Bank.[25] On 23 January, Hipper sortied, with Seydlitz in the lead, followed by Moltke, Derfflinger, and Blücher, along with the light cruisers Graudenz, Rostock, Stralsund, and Kolberg and 19 torpedo boats from V Flotilla and II and XVIII Half-Flotillas. Graudenz and Stralsund were assigned to the forward screen, while Kolberg and Rostock were assigned to the starboard and port, respectively. Each light cruiser had a half-flotilla of torpedo boats attached.[25]
Again, interception and decryption of German wireless signals played an important role. Although they were unaware of the exact plans, the cryptographers of Room 40 were able to deduce that Hipper would be conducting an operation in the Dogger Bank area.[25] To counter it, Beatty's 1st Battlecruiser Squadron, Rear Admiral Archibald Moore's 2nd Battlecruiser Squadron and Commodore William Goodenough's 2nd Light Cruiser Squadron were to rendezvous with Commodore Reginald Tyrwhitt's Harwich Force at 8:00 on 24 January, approximately 30 nmi (56 km) north of the Dogger Bank.[25] At 08:14, Kolberg spotted the light cruiser Aurora and several destroyers from the Harwich Force.[26] Aurora challenged Kolberg with a search light, at which point Kolberg attacked Aurora and scored two hits. Aurora returned fire and scored two hits on Kolberg in retaliation. Hipper immediately turned his battlecruisers towards the gunfire, when, almost simultaneously, Stralsund spotted a large amount of smoke to the northwest of her position. This was identified as a number of large British warships steaming towards Hipper's ships.[26]
Hipper turned south to flee, but was limited to 23 knots (43 km/h), which was the maximum speed of the older armored cruiser Blücher. The pursuing British battlecruisers were steaming at 27 knots (50 km/h), and quickly caught up to the German ships. At 09:52, Lion opened fire on Blücher from a range of approximately 20,000 yards (18,000 m); shortly thereafter, Queen Mary and Tiger began firing as well.[26] At 10:09, the British guns made their first hit on Blücher. Two minutes later, the German ships began returning fire, primarily concentrating on Lion, from a range of 18,000 yards (16,000 m). At 10:28, Lion was struck on the waterline, which tore a hole in the side of the ship and flooded a coal bunker.[27] At 10:30, New Zealand, the fourth ship in Beatty's line, came within range of Blücher and opened fire. By 10:35, the range had closed to 17,500 yards (16,000 m), at which point the entire German line was within the effective range of the British ships. Beatty ordered his battlecruisers to engage their German counterparts.[lower-alpha 4] Confusion aboard Tiger led the captain to believe he was to fire on Seydlitz, which left Moltke able to fire without distraction.[27]

Seydlitz was struck in her forecastle at 10:25, by a 13.5 in (343 mm) shell from Lion, but this hit did minor damage. At 10:40, Lion hit Seydlitz with another 13.5 in shell, which holed the deck and penetrated the rear barbette. The shell itself failed to enter the barbette, but the explosion flashed into the working chamber and detonated the propellant charges inside.[13]
In the reloading chamber, where the shell penetrated, part of the charge in readiness for loading was set on fire. The flames rose high up into the turret and down into the ammunition chamber, and thence through a connecting door, usually kept shut, through which men from the ammunition chamber tried to escape into the fore turret. The flames thus made their way through to the other ammunition chamber and thence up to the second turret, and from this cause the entire guns' crews of both turrets perished very quickly. The flames rose above the turrets as high as a house.[27]
The explosion killed 159 men, and destroyed both of the rear turrets. The fire was prevented from spreading to the shell magazines, which could have destroyed the ship, by the quick action of the executive officer, who ordered both magazines be flooded.[lower-alpha 5] The Pumpenmeister Wilhelm Heidkamp was severely injured when he turned the red-hot valves to flood the magazines.[29] At 11:01, Seydlitz struck back at Lion, and with a single 28 cm shell, knocked out two of Lion's engines. Shortly thereafter, a pair of 30.5 cm shells fired by Derfflinger struck Lion, one at the waterline. The penetration allowed water to enter the port feed tank—this hit eventually crippled Lion, the sea water contamination forced the ship's crew to shut down the port engine.[28] At 11:25, Seydlitz was struck on her armored belt amidships by a third and final shell, which did little damage.[13]
By this time, Blücher was severely damaged after having been pounded by heavy shells. The chase ended when there were several reports of U-boats ahead of the British ships; Beatty quickly ordered evasive maneuvers, which allowed the German ships to increase the distance to their pursuers.[30] At this time, Lion's last operational dynamo failed, which dropped her speed to 15 knots (28 km/h). Beatty, in the stricken Lion, ordered the remaining battlecruisers to "Engage the enemy's rear," but signal confusion caused the ships to solely target Blücher, allowing Moltke, Seydlitz, and Derfflinger to escape.[31] By the time Beatty regained control over his ships, after having boarded Princess Royal, the German ships had increased their lead to a distance too great for the British to reengage; at 13:50, he broke off the chase.[32]
Seydlitz was repaired at the Kaiserliche Werft (Imperial Dockyard) in Wilhelmshaven from 25 January to 31 March 1915, after which she rejoined the fleet.[13]
Battle of the Gulf of Riga
On 3 August 1915, Seydlitz, Moltke, and Von der Tann were transferred to the Baltic with I Reconnaissance Group (AG) to participate in a planned foray into the Riga Gulf. The intention was to destroy the Russian naval forces in the area, including the pre-dreadnought Slava, and to use the minelayer Deutschland to block the entrance to Moon Sound with naval mines. The German forces, under the command of Hipper, included the four Nassau and four Helgoland-class battleships, the battlecruisers Seydlitz, Moltke, and Von der Tann, and a number of smaller craft.[33] Throughout the operation, Seydlitz and the other two battlecruisers remained in the Baltic and provided cover for the assault into the Gulf of Riga.[29]
Following the operation, Seydlitz and the other heavy units of the High Seas Fleet returned to the North Sea. On 11–12 September, Seydlitz and the rest of I Scouting Group covered a minefield laying operation off Terschelling. On 24 November, the ship ran aground in the Kaiser Wilhelm Canal, but was quickly refloated. On 4 December, while exiting the Kaiser Wilhelm Canal, Seydlitz became entangled in one of the net barriers. Divers had to remove the tangled nets from the starboard screws.[29]
Bombardment of Yarmouth and Lowestoft

On 24–25 April 1916, I Scouting Group undertook another operation to bombard the English coast, this time, the towns of Yarmouth and Lowestoft. Hipper was on sick leave, so the German ships were under the command of Konteradmiral Friedrich Boedicker, who flew his flag in Seydlitz. The German battlecruisers Derfflinger, Lützow, Moltke, Seydlitz and Von der Tann left the Jade Estuary at 10:55 on 24 April, and were supported by a screening force of 6 light cruisers and two torpedo boat flotillas.[34] The heavy units of the High Seas Fleet sailed at 13:40, with the objective to provide distant support for Boedicker's ships. The British Admiralty was made aware of the German sortie through the interception of German wireless signals, and deployed the Grand Fleet at 15:50.[34]
By 14:00, Boedicker's ships had reached a position off Norderney, at which point he turned his ships northward to avoid the Dutch observers on the island of Terschelling. At 15:38, Seydlitz struck a mine, which tore a 15 m (50-foot) hole in her hull, just abaft of the starboard broadside torpedo tube. 11 men were killed and 1,400 short tons (1,200 long tons) of water entered the ship. The ship's draft increased 1.4 metres (4.6 ft) at the bow of the ship.[34] Seydlitz turned back with the screen of light cruisers at a speed of 15 knots (28 km/h). The four remaining battlecruisers turned south immediately in the direction of Norderney to avoid further mine damage. By 16:00, Seydlitz was clear of imminent danger, so the ship stopped to allow Boedicker to disembark. The torpedo boat V28 brought Boedicker to Lützow, and the operation continued as planned. After Boedicker departed the ship, Seydlitz, escorted by a pair of torpedo boats, withdrew southward to the Jade.[35] She was out of service for over a month for repair work due to the mine damage.[36]
Battle of Jutland

Deployment
Almost immediately after the Lowestoft raid, Vizeadmiral (Vice Admiral) Reinhard Scheer began planning another foray into the North Sea. He had initially intended to launch the operation in mid-May, but the mine damage to Seydlitz had proved difficult to repair—Scheer was unwilling to embark on a major raid without his battlecruiser forces at full strength. On 22 May, the Wilhelmshaven dockyard reported the ship to be fit for duty, but tests carried out that night showed that the broadside torpedo flat that had been damaged by the mine was still not watertight, and there were still leaks in the fore and aft transverse bulkheads. Further repairs were necessary, and so the operation was postponed another week, by which time the Wilhelmshaven dockyard assured Scheer that the ship would be ready. At noon on 28 May, the repairs to Seydlitz were finally completed, and the ship returned to I Scouting Group.[37]
On the night of 30 May 1916, Seydlitz and the other four battlecruisers of I Scouting Group lay in anchor in the Jade roadstead. The following morning, at 02:00 CET,[lower-alpha 6] the ships slowly steamed out towards the Skagerrak at a speed of 16 knots (30 km/h). By this time, Hipper had transferred his flag from Seydlitz to the newer battlecruiser Lützow. Seydlitz took her place in the center of the line, to the rear of Derfflinger and ahead of Moltke. II Scouting Group, consisting of the light cruisers Frankfurt, Boedicker's flagship, Wiesbaden, Pillau, and Elbing, and 30 torpedo boats of II, VI, and IX Flotillas, accompanied Hipper's battlecruisers.[38]
An hour and a half later, the High Seas Fleet under the command of Scheer left the Jade; the force was composed of 16 dreadnoughts. The High Seas Fleet was accompanied by IV Scouting Group, composed of the light cruisers Stettin, München, Hamburg, Frauenlob, and Stuttgart, and 31 torpedo boats of I, III, V, and VII Flotillas, led by the light cruiser Rostock. The six pre-dreadnoughts of II Battle Squadron had departed from the Elbe roads at 02:45, and rendezvoused with the battle fleet at 5:00.[38]
Run to the south
Shortly before 16:00, Hipper's force encountered Beatty's battlecruiser squadron. The German ships were the first to open fire, at a range of approximately 15,000 yards (14,000 m).[39] The British rangefinders had misread the range to their German targets, and so the first salvos fired by the British ships fell a mile past the German battlecruisers. As the two lines of battlecruisers deployed to engage each other, Seydlitz began to duel with her opposite in the British line, Queen Mary. By 16:54, the range between the ships decreased to 12,900 yards (11,800 m), which enabled Seydlitz's secondary battery to enter the fray. She was close enough to the ships of the British 9th and 10th Destroyer Flotillas that her secondary guns could effectively engage them. The other four German battlecruisers employed their secondary battery against the British battlecruisers.[40]
Between 16:55 and 16:57, Seydlitz was struck by two heavy caliber shells from Queen Mary. The first shell penetrated the side of the ship five feet above the main battery deck, and caused a number of small fires. The second shell penetrated the barbette of the aft superfiring turret. Four propellant charges were ignited in the working chamber; the resulting fire flashed up into the turret and down to the magazine. The anti-flash precautions that had been put in place after the explosion at Dogger Bank prevented any further propellant explosions. Regardless, the turret was destroyed and most of the gun crew had been killed in the blaze.[41]

By 17:25, the British battlecruisers were taking a severe battering from their German opponents. Indefatigable had been destroyed by a salvo from Von der Tann approximately 20 minutes before, and Beatty sought to turn his ships away by 2 points in order to regroup, while the Queen Elizabeth-class battleships of the 5th Battle Squadron arrived on the scene and provided covering fire. As the British battlecruisers began to turn away, Seydlitz and Derfflinger were able to concentrate their fire on Queen Mary. Witnesses reported at least 5 shells from two salvos hit the ship, which caused an intense explosion that ripped the Queen Mary in half. Shortly after the destruction of Queen Mary, both British and German destroyers attempted to make torpedo attacks on the opposing lines. One British torpedo struck Seydlitz at 17:57. The torpedo hit the ship directly below the fore turret, slightly aft of where she had been mined the month before. The explosion tore a hole 40 feet long by 13 feet wide (12 m × 4.0 m), and caused a slight list. Despite the damage, the ship was still able to maintain her top speed, and kept position in the line.[42]
The leading ships of the German battle fleet had by 18:00 come within effective range of the British ships, and had begun trading shots with the British battlecruisers and Queen Elizabeth-class battleships. Between 18:09 and 18:19, Seydlitz was hit by a 380 mm (15 in) shell from either Barham or Valiant. This shell struck the face of the port wing turret and disabled the guns. A second 380 mm shell penetrated the already disabled aft superfiring turret and detonated the cordite charges that had not already burned. The ship also had two of her 150 mm guns disabled from British gunfire, and the rear turret lost its right-hand gun.[43]
As the evening wore on, visibility steadily decreased for the German ships. Seydlitz's commander, Kapitän zur See von Egidy, later remarked:
"Visibility had generally become unfavorable. There was a dense mist, so that as a rule only the flashes of the enemy's guns, but not the ships themselves, could be seen. Our distance had been reduced from 18,000 to 13,000 yards. From north-west to north-east we had before us a hostile line firing its guns, though in the mist we could only glimpse the flashes from time to time. It was a mighty and terrible spectacle."[44]
Battlefleets engage
At around 19:00, Beatty's forces were nearing the main body of the Grand Fleet, and to delay the discovery of the Grand Fleet's location by the German fleet, he turned his ships towards the German line, in order to force them to turn as well. This reduced the distance between the British and German battlecruisers from 14,000 to 12,000 yards (13,000 to 11,000 m). Visibility continued to favor the British, and the German battlecruisers paid the price. Over the next several minutes, Seydlitz was hit six times, primarily on the forward section of the ship. A fire started under the ship's forecastle. The smothering fire from Beatty's ships forced Hipper to temporarily withdraw his battlecruisers to the southwest. As the ships withdrew, Seydlitz began taking on more water, and the list to starboard worsened. The ship was thoroughly flooded above the middle deck in the fore compartments, and had nearly lost all buoyancy.[45]
By 19:30, the High Seas Fleet, which was by that point pursuing the British battlecruisers, had not yet encountered the Grand Fleet. Scheer had been considering retiring his forces before darkness exposed his ships to torpedo boat attack. He had not yet made a decision when his leading battleships encountered the main body of the Grand Fleet. This development made it impossible for Scheer to retreat, for doing so would have sacrificed the slower pre-dreadnought battleships of II Battle Squadron, while using his dreadnoughts and battlecruisers to cover their retreat would have subjected his strongest ships to overwhelming British fire. Instead, Scheer ordered his ships to turn 16 points to starboard, which would bring the pre-dreadnoughts to the relative safety of the disengaged side of the German battle line.[46]
Seydlitz and the other battlecruisers followed the move, which put them astern of König. Hipper's badly battered ships gained a temporary moment of respite, and uncertainty over the exact location and course of Scheer's ships led Admiral Jellicoe to turn his ships eastward, towards what he thought was the likely path of the German retreat. The German fleet was instead sailing west, but Scheer ordered a second 16-point turn, which reversed course and pointed his ships at the center of the British fleet. The German fleet came under intense fire from the British line, and Scheer sent Seydlitz, Von der Tann, Moltke, and Derfflinger at high speed towards the British fleet, in an attempt to disrupt their formation and gain time for his main force to retreat. By 20:17, the German battlecruisers had closed to within 7,700 yards (7,000 m) of Colossus, at which point Scheer directed the ships to engage the lead ship of the British line. Seydlitz managed to hit Colossus once, but caused only minor damage to the ship's superstructure. Three minutes later, the German battlecruisers turned in retreat, covered by a torpedo boat attack.[47]
Withdrawal
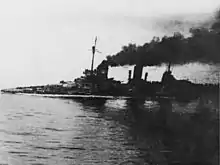
A pause in the battle at dusk allowed Seydlitz and the other German battlecruisers to cut away wreckage that interfered with the main guns, extinguish fires, repair the fire control and signal equipment, and ready the searchlights for nighttime action. During this period, the German fleet reorganized into a well-ordered formation in reverse order, when the German light forces encountered the British screen shortly after 21:00. The renewed gunfire gained Beatty's attention, so he turned his battlecruisers westward. At 21:09, he sighted the German battlecruisers, and drew to within 8,500 yards (7,800 m) before opening fire at 20:20. In the ensuing melee, Seydlitz was hit several times; one shell struck the rear gun turret and other hit the ship's bridge. The entire bridge crew was killed and several men in the conning tower were wounded. The German ships returned fire with every gun available, and at 21:32 hit both Lion and Princess Royal in the darkness. The maneuvering of the German battlecruisers forced the leading I Battle Squadron to turn westward to avoid collision. This brought the pre-dreadnoughts of II Battle Squadron directly behind the battlecruisers, and prevented the British ships from pursuing the German battlecruisers when they turned southward. The British battlecruisers opened fire on the old battleships; the German ships turned southwest to bring all of their guns to bear against the British ships.[48]
By 22:15, Hipper was finally able to transfer to Moltke, and then ordered his ships to steam at 20 knots (37 km/h) towards the head of the German line. Only Seydlitz and Moltke were in condition to comply; Derfflinger and Von der Tann could make at most 18 knots (33 km/h), and so these ships lagged behind. Seydlitz and Moltke were in the process of steaming to the front of the line when the ships passed close to Stettin, which forced the ship to drastically slow down to avoid collision. This forced Frauenlob, Stuttgart, and München to turn to port, which led them into contact with the 2nd Light Cruiser Squadron; at a range of 800 yards (730 m), the cruisers on both sides pummeled each other. Konteradmiral Ludwig von Reuter decided to attempt to lure the British cruisers towards Moltke and Seydlitz. Nearly simultaneously, the heavily damaged British cruisers broke off the attack. As the light cruisers were disengaging, a torpedo fired by Southampton struck Frauenlob, and the ship exploded. The German formation fell into disarray, and in the confusion, Seydlitz lost sight of Moltke. The ship was no longer able to keep up with Moltke's 22 knots, and so detached herself to proceed to the Horns Reef lighthouse independently.[49]

At 00:45, Seydlitz was attempting to thread her way through the British fleet, but was sighted by the dreadnought Agincourt and noted as a "ship or Destroyer". Agincourt's captain did not want to risk giving away his ship's position, and so allowed her to pass.[50] By 01:12, Seydlitz had managed to slip through the British fleet, and she was able to head for the safety of Horns Reef.[51] At approximately 03:40, she scraped over Horns Reef. Both of the ship's gyro-compasses had failed, so the light cruiser Pillau was sent to guide the ship home. By 15:30 on 1 June, Seydlitz was in critical condition; the bow was nearly completely submerged, and the only buoyancy that remained in the forward section of the ship was the broadside torpedo room. Preparations were being made to evacuate the wounded crew when a pair of pump steamers arrived on the scene. The ships were able to stabilize Seydlitz's flooding, and the ship managed to limp back to port. She reached the outer Jade river on the morning of 2 June, and on 3 June the ship entered Entrance III of the Wilhelmshaven Lock. At most, Seydlitz had been flooded by 5,308 tonnes (5,224 long tons) of water.[52]
Close to the end of the battle, at 03:55, Hipper transmitted a report to Scheer informing him of the tremendous damage his ships had suffered. By that time, Derfflinger and Von der Tann each had only two guns in operation, Moltke was flooded with 1,000 tons of water, and Seydlitz was severely damaged. Hipper reported: "I Scouting Group was therefore no longer of any value for a serious engagement, and was consequently directed to return to harbor by the Commander-in-Chief, while he himself determined to await developments off Horns Reef with the battlefleet."[53] In the course of the battle, Seydlitz was hit 21 times by heavy-caliber shells, twice by secondary battery shells, and once by a torpedo. The ship suffered a total of 98 of her crew killed and 55 wounded.[54] Seydlitz herself fired 376 main battery shells and scored approximately 10 hits.[52]
Later operations
On 15 June 1916, repair work to Seydlitz began in the Imperial Dockyard in Wilhelmshaven, and continued until 1 October. The ship then underwent individual training, and rejoined the fleet in November. With his previous flagship Lützow at the bottom of the North Sea, Hipper again raised his flag in Seydlitz. On 4 November, Seydlitz and Moltke, along with II Division, I Battle Squadron, III Battle Squadron, and the new battleship Bayern sailed to Bovbjerg on the Danish coast, in order to retrieve the stranded U-boats U-20 and U-30.[52]
Scheer had begun to use light surface forces to attack British convoys to Norway beginning in late 1917. As a result, the Royal Navy attached a squadron of battleships to protect the convoys, which presented Scheer with the possibility of destroying a detached squadron of the Grand Fleet. Scheer remarked that "A successful attack on such a convoy would not only result in the sinking of much tonnage, but would be a great military success, and would ... force the English to send more warships to the northern waters."[55] Scheer instituted strict wireless silence in preparation for the planned attack. This denied the British the ability to intercept and decrypt German signals, which had previously been a significant advantage. The operation called for Hipper's battlecruisers to attack the convoy and its escorts on 23 April while the battleships of the High Seas Fleet stood by in support.[55] At 05:00 on 23 April 1918, the High Seas Fleet left harbor with the intention of intercepting one of the heavily escorted convoys.[56]
Hipper's forces were 60 nmi (110 km; 69 mi) west of Egerö, Norway, by 05:20 on 24 April. Despite the success in reaching the convoy route undetected, the operation failed due to faulty intelligence. Reports from U-boats indicated to Scheer that the convoys sailed at the start and middle of each week, but a west-bound convoy had left Bergen on Tuesday the 22nd and an east-bound group left Methil, Scotland, on the 24th, a Thursday. As a result, there was no convoy for Hipper to attack. The same day, one of Moltke's screws slipped off, which caused serious damage to the power plant and allowed 2,000 metric tons (2,000 long tons; 2,200 short tons) of water into the ship. Moltke was forced to break radio silence in order to inform Scheer of the ship's condition, which alerted the Royal Navy to the High Seas Fleet's activities. Beatty sortied with a force of 31 battleships and four battlecruisers, but was too late to intercept the retreating Germans. The Germans reached their defensive minefields early on 25 April, though approximately 40 nmi (74 km; 46 mi) off Helgoland Moltke was torpedoed by the submarine E42, though she successfully returned to port.[57]
Fate

Seydlitz was to have taken part in what would have amounted to the "death ride" of the High Seas Fleet shortly before the end of World War I. The bulk of the High Seas Fleet was to have sortied from their base in Wilhelmshaven to engage the British Grand Fleet; Scheer—by now the Großadmiral of the fleet—intended to inflict as much damage as possible on the British navy, in order to retain a better bargaining position for Germany, whatever the cost to the fleet.[58] While the fleet was consolidating in Wilhelmshaven, war-weary sailors began deserting en masse. As Von der Tann and Derfflinger passed through the locks that separated Wilhelmshaven's inner harbor and roadstead, some 300 men from both ships climbed over the side and disappeared ashore.[59]
On 24 October 1918, the order was given to sail from Wilhelmshaven. Many of the war-weary sailors felt the operation would disrupt the peace process and prolong the war. Starting on the night of 29 October, sailors on several battleships mutinied; three ships from III Squadron refused to weigh anchors, and acts of sabotage were committed on board the battleships Thüringen and Helgoland. The unrest ultimately forced Hipper and Scheer to cancel the operation.[60] Informed of the situation, the Kaiser stated "I no longer have a navy."[61] The Wilhelmshaven mutiny spread to Kiel, and fueled a larger German Revolution that continued after the end of the war. Germany's military position was hopeless, and so Generals Paul von Hindenburg and Erich Ludendorff convinced the government to sign the Armistice to end the war.[62]
Following the capitulation of Germany in November 1918, most of the High Seas Fleet, under the command of Reuter, were interned in the British naval base in Scapa Flow.[63] Prior to the departure of the German fleet, Admiral Adolf von Trotha made clear to Reuter that he could not allow the Allies to seize the ships, under any conditions. The fleet rendezvoused with the British light cruiser Cardiff, which led the ships to the Allied fleet that was to escort the Germans to Scapa Flow. The massive flotilla consisted of some 370 British, American, and French warships. Once the ships were interned, their guns were disabled through the removal of their breech blocks, and their crews were reduced to 200 officers and men.[64]
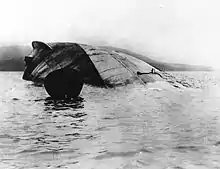
The fleet remained in captivity during the negotiations that ultimately produced the Treaty of Versailles. Reuter believed that the British intended to seize the German ships on 21 June 1919, which was the deadline for Germany to have signed the peace treaty. Unaware that the deadline had been extended by two days, Reuter ordered the ships to be sunk at the next opportunity. On the morning of 21 June, the British fleet left Scapa Flow to conduct training maneuvers, and at 11:20 Reuter transmitted the order to his ships.[65] Seydlitz slipped beneath the surface at 13:50. On her side and on the bottom in twelve fathoms of water the wreck was frequently mistaken for a small island, and was sold in this condition as scrap to the salvage firm of Cox and Danks, led by Ernest Cox, along with a battleship and twenty-six destroyers.[5]
Salvaging Seydlitz also proved difficult, as the ship sank again during the first attempt to raise her, wrecking most of the salvage equipment. Undaunted, Cox tried again, ordering that when she was next raised, news cameras would be there to capture him witnessing the moment. The plan nearly backfired when Seydlitz was accidentally refloated while Cox was holidaying in Switzerland. Cox told the workers to sink her again, then returned to Britain to be present as Seydlitz was duly refloated a third time.[66] The ship was raised on 2 November 1928, and while still inverted was towed south to be scrapped in Rosyth by 1930. Seydlitz's bell is on display at the Laboe Naval Memorial.[5] One of the ship's 15 cm guns, which had been removed in 1916, was later mounted aboard the commerce raider Kormoran during World War II.[67]
Footnotes
Notes
- "SMS" stands for "Seiner Majestät Schiff", or "His Majesty's Ship" in German.
- In Imperial German Navy gun nomenclature, "SK" (Schnelladekanone) denotes that the gun is quick firing, while the L/50 denotes the length of the gun. In this case, the L/50 gun is 50 caliber, meaning that the gun is 50 times as long as it is in diameter.[6]
- Beatty had intended to retain only the two rearmost light cruisers from Goodenough's squadron, but Nottingham's signalman misinterpreted the signal, thinking that it was intended for the whole squadron, and thus transmitted it to Goodenough, who ordered his ships back into their screening positions ahead of Beatty's battlecruisers.
- Thus, Lion on Seydlitz, Tiger on Moltke, Princess Royal on Derfflinger, and New Zealand on Blücher.
- The near destruction of Seydlitz revealed the dangers flash fires in main battery turrets and their working chambers. Following an investigation into the explosion, the German navy tightened ammunition and propellant handling procedures, which to a large degree made it unlikely that a flash fire could destroy a ship. The British navy was unaware of these dangers, and so did not take similar measures, which resulted in disastrous consequences for the British battlecruisers at the Battle of Jutland, where three ships were destroyed by magazine explosions.[28]
- The times mentioned in this section are in CET, which is congruent with the German perspective. This is one hour ahead of GMT, the time zone commonly used in British works.
Citations
- Staff, p. 22.
- Staff, p. 20.
- Staff, p. 21.
- Gröner, p. 55.
- Gröner, p. 56.
- Grießmer, p. 177.
- Friedman, pp. 139–141.
- Gardiner & Gray, p. 140.
- Friedman, p. 143.
- Friedman, p. 146.
- Friedman, pp. 337–338.
- Staff, pp. 21–22.
- Staff, p. 23.
- Tarrant, p. 26.
- Massie, p. 107.
- Strachan, p. 417.
- Massie, p. 114.
- Tarrant, p. 30.
- Tarrant, p. 31.
- Tarrant, p. 32.
- Tarrant, p. 33.
- Scheer, p. 70.
- Tarrant, p. 34.
- Tarrant, p. 35.
- Tarrant, p. 36.
- Tarrant, p. 38.
- Tarrant, p. 39.
- Tarrant, p. 40.
- Staff, p. 24.
- Tarrant, pp. 40–41.
- Tarrant, p. 41.
- Tarrant, p. 42.
- Halpern, p. 196.
- Tarrant, p. 52.
- Tarrant, p. 53.
- Tarrant, p. 55.
- Tarrant, pp. 58, 62.
- Tarrant, p. 62.
- Bennett, p. 183.
- Tarrant, pp. 90, 92.
- Tarrant, pp. 92–93.
- Tarrant, pp. 100–101, 113.
- Tarrant, pp. 118–119.
- Tarrant, p. 122.
- Tarrant, pp. 126, 137.
- Tarrant, pp. 150, 152–153.
- Tarrant, pp. 155–156, 163, 170, 173, 179, 181.
- Tarrant, pp. 188, 193–195.
- Tarrant, pp. 213–214.
- Battle of Jutland: Official Despatches, p. 93.
- Tarrant, p. 217.
- Staff, p. 33.
- Tarrant, p. 255.
- Tarrant, pp. 296, 298.
- Halpern, p. 418.
- Massie, p. 748.
- Halpern, pp. 419–420.
- Tarrant, pp. 280–281.
- Massie, p. 775.
- Tarrant, pp. 280–282.
- Herwig, p. 252.
- Tarrant, pp. 281–282.
- Tarrant, p. 282.
- Herwig, pp. 254–256.
- Herwig, p. 256.
- Fine.
- Frame, p. 46.
References
- Battle of Jutland 30th May to 1st June 1916: Official Despatches with Appendices. London: H.M.S.O. 1920. OCLC 58965862.
- Bennett, Geoffrey (2005). Naval Battles of the First World War. Barnsley: Pen & Sword Military Classics. ISBN 978-1-84415-300-8.
- Fine, John Christopher (2004). Lost on the Ocean Floor: Diving the World's Ghost Ships. Annapolis: Naval Institute Press. ISBN 1-59114-275-X.
- Frame, Tom (1993). HMAS Sydney: Loss and Controversy. Rydalmere: Hodder & Stoughton. ISBN 0-340-58468-8.
- Friedman, Norman (2011). Naval Weapons of World War One: Guns, Torpedoes, Mines and ASW Weapons of All Nations; An Illustrated Directory. Annapolis: Naval Institute Press. ISBN 978-1-84832-100-7.
- Gardiner, Robert & Gray, Randal, eds. (1985). Conway's All the World's Fighting Ships: 1906–1921. Annapolis: Naval Institute Press. ISBN 978-0-87021-907-8.
- Grießmer, Axel (1999). Die Linienschiffe der Kaiserlichen Marine: 1906–1918; Konstruktionen zwischen Rüstungskonkurrenz und Flottengesetz [The Battleships of the Imperial Navy: 1906–1918; Constructions between Arms Competition and Fleet Laws] (in German). Bonn: Bernard & Graefe Verlag. ISBN 978-3-7637-5985-9.
- Gröner, Erich (1990). German Warships: 1815–1945. Vol. I: Major Surface Vessels. Annapolis: Naval Institute Press. ISBN 978-0-87021-790-6.
- Halpern, Paul G. (1995). A Naval History of World War I. Annapolis: Naval Institute Press. ISBN 978-1-55750-352-7.
- Herwig, Holger (1998) [1980]. "Luxury" Fleet: The Imperial German Navy 1888–1918. Amherst: Humanity Books. ISBN 978-1-57392-286-9.
- Massie, Robert K. (2003). Castles of Steel. New York: Ballantine Books. ISBN 978-0-345-40878-5.
- Scheer, Reinhard (1920). Germany's High Seas Fleet in the World War. London: Cassell and Company. OCLC 2765294.
- Staff, Gary (2006). German Battlecruisers: 1914–1918. Oxford: Osprey Books. ISBN 978-1-84603-009-3.
- Strachan, Hew (2001). The First World War: Volume 1: To Arms. Oxford: Oxford University Press. ISBN 978-0-19-926191-8.
- Tarrant, V. E. (2001) [1995]. Jutland: The German Perspective. London: Cassell Military Paperbacks. ISBN 978-0-304-35848-9.
Further reading
- Breyer, Siegfried (1997). Die Kaiserliche Marine und ihre Großen Kreuzer [The Imperial Navy and its Large Cruisers] (in German). Wölfersheim: Podzun-Pallas Verlag. ISBN 3-7909-0603-4.
- Campbell, N. J. M. (1978). Battle Cruisers. Warship Special. 1. Greenwich: Conway Maritime Press. ISBN 978-0-85177-130-4.
External links
![]() Media related to SMS Seydlitz (ship, 1912) at Wikimedia Commons
Media related to SMS Seydlitz (ship, 1912) at Wikimedia Commons
- DreadnoughtProject.org three high resolution dockyard drawings.