No. 3 Commando
No. 3 Commando was a battalion-sized Commando unit raised by the British Army during the Second World War. Formed in July 1940 from volunteers for special service, it was the first such unit to carry the title of "Commando". Shortly afterwards the unit was involved in a largely unsuccessful raid upon the German-occupied Channel Island of Guernsey.
| No. 3 Commando | |
|---|---|
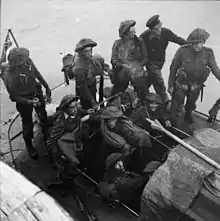
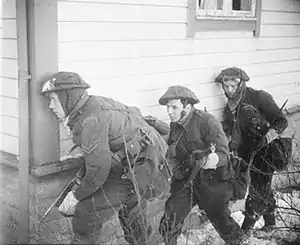 Commandos take cover during Operation Archery, a raid on the Lofoten Islands | |
| Active | 1940–1946 |
| Disbanded | 4 January 1946 |
| Country | |
| Branch | |
| Type | Commando |
| Role | Special Forces |
| Size | 470–535 men all ranks[1] |
| Part of | 1st Special Service Brigade |
| Engagements | Second World War |
| Commanders | |
| Notable commanders | John Durnford-Slater Peter Young |
| Insignia | |
| Combined Operations Shoulder Patch |  |
In 1941 they were involved in successful raids on the Lofoten Islands and Vaagso, in Norway, before taking part in the costly Dieppe raid in August 1942, where the unit was tasked with knocking out a German coastal artillery battery on the eastern flank of the main landings, although due to a chance encounter in the Channel with a German convoy, a large majority of the unit failed to make it ashore.
In early 1943, the unit was sent to Gibraltar before moving to North Africa in April from where they were involved in the Allied invasion of Sicily and operations in Italy prior to being withdrawn to Britain to prepare for Operation Overlord. On D-Day they went ashore on 6 June 1944 as part of the 1st Special Service Brigade tasked with linking up with the 6th Airborne Division on the eastern flank of Sword before being withdrawn. Later they took part in the Allied counterattack during the Ardennes Offensive in early 1945 before taking part in the advance into Germany as part of Operation Plunder.
Following the end of the war, No. 3 Commando carried out occupation duties in Germany before it was disbanded on 4 January 1946.
History
Formation and early raids
Formed in Plymouth in late June 1940 following the Dunkirk evacuation, under the command of Lieutenant Colonel John Durnford-Slater, No. 3 Commando was the first British unit to use the title of "Commando".[2][3][Note 1] By 5 July 1940 they had been fully raised[4] and a little more than a week later they carried out one of the first Commando raids of the war. This raid, known as Operation Ambassador, which had been hastily organised at the behest of the British prime minister, Winston Churchill, was probing raid on the German-occupied island of Guernsey.[5][6] As a result of a number of mishaps and hurried planning, the raid proved to be unsuccessful.[6][7]
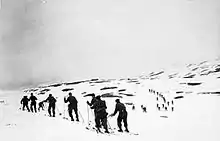
In October 1940, as part of a reorganisation of the Commando formations, the unit was amalgamated with No. 8 (Guards) Commando into a single special service battalion known as the 4th Special Service Battalion, under the command of Lieutenant Colonel Robert Laycock.[8] As a part of this organisation, the unit's name was changed to 'A' Special Service Company.[9] At the end of 1940, the special service battalions were reorganised into a headquarters and two Commandos and the name of the unit reverted to No. 3 Commando. In January 1941 the special service battalions were broken up, the Commandos were delinked and raised back to full battalion-sized units themselves.[10][11]
In March 1941, 250 officers and men from No. 3 Commando took part in the first large-scale Commando raid, which was launched on four ports in the Lofoten Islands in Norway.[12] The raid, codenamed Operation Claymore, proved to be a considerable success, resulting in the capture of a number of wheels of the German Enigma encoding machine which helped the Allies to decode German radio traffic later in the war, as well as the destruction of a considerable amount of petrol and oil and the capture of several hundred Germans.[13]
Vaagso
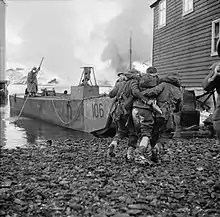
On 27 December 1941, the Commandos carried out another raid in Norway, this time on the port of Vaagso (Nor:Vågsøy) and the island of Maaloy (Måløy) known as Operation Archery.[14] Under overall operational command of Brigadier Joseph (Charles) Haydon who directed the operation from HMS Kenya, Nos. 5 and 6 Troops under Major Jack Churchill landed on Maaloy while Durnford-Slater led Nos. 1, 2, 3 and 4 Troops ashore on Vaagso. In addition to the troops from No. 3 Commando, there were two troops from No. 2 Commando acting as the floating reserve.[15][Note 2]
Following a brief naval bombardment the troops on Maaloy succeeded in securing the island;[14] however, the four troops in Vaagso experienced considerable resistance from the German garrison and their attack up the main street briefly stalled before Durnford-Slater signalled Haydon requesting the floating reserve be released to him and No. 6 Troop under Peter Young were ferried across from Maaloy.[16]
Overhead a considerable air battle ensued, while in the anchorage the naval force continued to bombard the shore line and attack German shipping in the port.[17] On the shore the fighting in the streets continued for a number of hours and as the Commandos advanced up the main street intelligence teams searched buildings for valuable documents before demolition teams planted explosives and destroyed them.[18] Finally, by 13:45 the order for the Commandos to withdraw was given.[19] Withdrawing by troops back down the road, they moved back to the landing craft and by 14:45 they had re-embarked, taking a number of German prisoners and Norwegian volunteers with them.[14][20]
The overall losses for the Commandos were 19 killed and 57 wounded,[14] the majority of which were from No. 3 Commando while 120 Germans were killed and a further 98 captured.[21][Note 3]
Dieppe
In August 1942 No. 3 Commando was involved in the ill-fated Operation Jubilee, an exploratory raid on Dieppe in France. The plan called for a frontal assault on the port by the Canadian 2nd Division. Before this would take place, however, Troops from No. 3 and 4 Commandos would land at beaches on the eastern and western flanks and neutralise two German artillery batteries that were covering the main anchorage.[22] No. 3 Commando was assigned the task of attacking the Goebbels Battery, landing on the eastern flank, under Durnford-Slater's command.[23] The battery was located near Berneval-le-Grand, about half a mile from the sea with steep cliffs in front of it. It was decided that No. 3 Commando would land on two beaches to the east and west of the battery, from which gullies rose towards the battery and which would provide concealment while the Commandos approached the battery.[24]
As the convoy of landing craft and other vessels ferried the Commandos across the English Channel; however, they had a chance encounter with a German tanker escorted by a number of armed trawlers which proceeded to fire upon them. In the confusion that followed a number of the landing craft were damaged and forced to turn back, while others were reported as missing and believed sunk.[25][Note 4] As a result the decision was made to abandon the attack.[26]
Nevertheless, unbeknown to their commanders and each other, and having lost communications, the seven landing craft that had been reported missing made for their assigned beaches, determined to press on with the attack.[27] In the end two parties landed, one party consisting of six craft carrying approximately 120 men under Captain R.L Willis landed on the beach opposite Le Petit Berneval to the east of the battery—Yellow I—while the other, consisting of only one craft of 20 men from No. 6 Troop under Captain Peter Young landed to the west at Yellow II.[27]
Of the 120 men that landed at Yellow I, 37 were killed, 81 were captured, mostly after having been wounded, and just one managed to evade capture and return to Britain.[28] Among those that were killed was Lieutenant Edward Loustalot, a United States Army Ranger, who was the first American soldier to be killed in the European theatre of operations.[29][30][Note 5] The smaller party, under Young, however, fared better and managed to advance within 200 yards (180 m) of the battery, however, due to lack of numbers they were unable to launch an assault on the battery and instead proceeded to harass the gunners for a number of hours and distract them from their purpose of firing on the anchorage before they were forced to withdraw.[31] They succeeded, albeit briefly, to divert the guns from their task of firing on the ships off the coast.[28]
Sicily and Italy
After the Dieppe raid, a long period of lull followed for No. 3 Commando during which time they were based around Weymouth and were brought back up to strength with an intake of 120 former policemen who had volunteered for service with the Commandos and had just completed their training at the Commando Depot at Achnacarry in Scotland.[32] In January 1943, however, the unit received orders to move to Gibraltar, where they were stationed as a precaution in case Germany decided to invade Spain.[33][34] While there the commanding officer, John Durnford-Slater, carried out reconnaissance of potential targets in Spain from the air and sent officers on leave across the border to gather intelligence.[35]
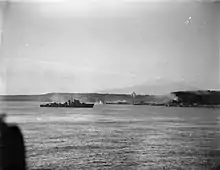
In April 1943 the unit was moved to North Africa, landing at Algiers[34] before later moving to the Suez where they began preparing for operations as part of Operation Husky, the Allied invasion of Sicily.[36] On 10 July 1943, landing ahead of the main force near Cassible, a few miles south of Syracuse on the Sicilian coast, half of No. 3 Commando—Nos. 4, 5 and 6 Troops—under the command of Durnford-Slater, carried out a night time attack on an Italian artillery battery without suffering a single casualty.[37][38] Meanwhile, Nos. 1, 2 and 3 Troops under the command of Peter Young, carried out a landing at Scoglio Imbiancato unopposed after a series of navigational delays meant that they landed later than planned. Nevertheless, the two forces managed to link up before capturing the town of Cassible later that night.[39]
On 13 July, the Commandos embarked once more upon the Prince Albert[39] with the task of landing in the Bay of Agnone, behind enemy lines and capture the Ponte dei Malati bridge and hold it, intact, until the 50th Division, which formed the vanguard of the advancing British Eighth Army, under General Bernard Montgomery, could relieve them.[40] It was described as the "most perilous enterprise of its career".[39]
The landing took place in two waves due to a shortage of landing craft.[41] The first wave hit the beach near Agnone, about 7 miles (11 km) from the bridge, at 22:00 hours and took fire from the Italian defenders almost immediately. Under the leadership of Durnford-Slater, Young and Lieutenant George Herbert, all experienced combat officers, the Commandos eventually managed to fight their way off the beach and push inland. The second wave followed a few hours later, also under fire, and despite one of the eight landing craft running aground on some rocks, most of the men were also able to get off the beach.[42]
The Commandos were involved in a number of minor skirmishes as they advanced towards the bridge, however, by 03:00[43] on 14 July the lead elements reached the north-east end of the bridge, where Durnford-Slater halted the men to re-organise before launching the assault.[44] Shortly after the assault began, with No. 4 Troop leading the way. Within ten minutes the pillboxes had been cleared and No. 3 Commando, had taken control of the bridge.[45]
With a strength that continued to grow until there was about 350 men around the bridge, the charges that had been placed on the bridge were removed[46] and No. 3 Commando settled in to defend the bridge as they waited for 50th Division to arrive. Over the course of the next few hours they were subjected to mortar fire and shelling from a Panzer IV tank.[Note 6] Eventually, as casualties mounted and their reinforcement became overdue the Commandos were forced to abandon the position, nevertheless they had prevented the bridge from being blown up and it was eventually recaptured as the Eighth Army arrived a short time later. The unit, however, suffered heavily for the success, suffering 30 killed, 66 wounded and 59 missing or captured.[47] The bridge was later renamed No. 3 Commando Bridge in their honour.[47]
At the end of the Sicilian campaign Durnford-Slater took over command of a brigade-sized element consisting of No. 3 and No. 40 (Royal Marine) Commando and the Special Raiding Squadron and as a result Peter Young took over command of the unit.[48][Note 7] Following this, in late August 1943, after receiving replacements from No. 12 Commando[49] which was in the process of being disbanded, the unit carried out a number of reconnaissance operations across the Strait in preparation for the invasion of Italy.[50]
On 8 September, two troops from No. 3 Commando took part in a dawn landing at San Venere as part of the main invasion, helping to clear the quay. The rest of unit arrived shortly after that and then they moved on to Vibo Valenta, where they waited for further orders.[51] On 19 September, No. 3 Commando received orders to proceed to Bari along with the rest of Durnford-Slater's brigade. Arriving there on 30 September, two days later 180 men from No. 3 Commando, organised into four troops under Captain Arthur Komrower,[Note 8] embarked from Manfredonia as part of the attack force tasked with capturing the port of Termoli.[52]
The detachment from No. 3 Commando went ashore in the first wave, securing a bridgehead through which the rest of the force proceeded to advance. By 08:00 on 3 October Termoli had been captured, although counterattacks continued until early on 6 October.[53] Shortly after they received orders to return to the United Kingdom in order to prepare for the invasion of Normandy.[54]
D-Day and beyond
After returning from Italy, No. 3 Commando became part of the 1st Special Service Brigade, commanded by Brigadier The Lord Lovat.[55] It marked the end of the unit's independence, as from then they were part of a larger organisation,[56] and the role of the Commandos had evolved from small scale raiding and precision operations, to more large scale operations in which they were mainly used as highly trained infantry assault units.[57][58]
On D-Day, the 1st Special Service Brigade was tasked with linking up with the 6th Airborne Division on the eastern flank of Sword and securing the high ground near La Plein.[56] No. 3 Commando landed at La Breche, west of Ouistreham at 09:05[59] coming ashore in the second wave. They were engaged before they hit the beach, and three of the landing craft that the Commandos were travelling in were hit by high-velocity shells. Casualties were high, with No. 6 Troop suffering at least 20 wounded, but in the end they were lower than had been expected.[60]
Despite one of the landing craft running aground on a false beach, the majority of the unit crossed the beach and reached the form-up point about 1,000 yards (910 m) inland.[61] Apart from the men from No. 6 Troop which had been wounded in their landing craft, the commanding officer, Peter Young, found that his command was largely intact. Nevertheless, he was unable to begin the advance immediately as the narrow route upon which they were to march was blocked by No. 6 Commando. As a result they were held up in the form-up point for a while, where they were subjected to more German mortar fire.[62]
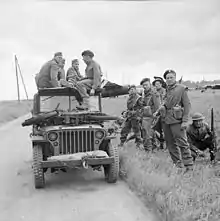
Later, No. 3 Commando resumed the advance, passing through No. 45 (Royal Marine) Commando's positions in Collevile and marching along the road to St. Aubin d'Aquenay where they met up again with No. 6 Commando. From there they advanced quickly to the bridge that spanned the River Orne, where they linked up with the airborne and glider troops that had seized the bridge in the early hours of the morning.[63] Crossing the bridge, which was still under fire from enemy snipers, Peter Young made contact with the airborne headquarters and was told to take the unit to Le Bas de Ranville instead of advancing on Cabourg. Detaching No. 3 Troop to capture Amfreville and Le Pein, the rest of the No. 3 Commando took up positions as ordered, but were shortly relieved and were able to rejoin No. 3 Troop, tasked with holding the high ground around La Pein.[63]
On 7 June, a combined force from Nos. 4 and 5 Troops under command of the second-in-command, Major John Pooley, carried out an attack on the Merville battery near the coast where there were still guns firing on the landing beaches.[64] The battery had been taken the previous day by a force from the 9th Parachute Battalion, but had been reoccupied later by the Germans[65] and it was heavily defended by mortars and landmines. Approaching from the south, No. 4 Troop moved across the open ground before taking up position behind the hedgerows 300 yards from the battery and from where laid down covering fire for No. 5 Troop which approached from the east with fixed bayonets.[66]
After a stubborn defence, in which a number of Commandos, including Pooley, were killed, they took the battery, however, shortly afterwards they were counterattacked by German force supported by self-propelled artillery.[67] Casualties during this attack were high and eventually the Commandos were forced to withdraw back to La Plein.[67]
Following this the unit became involved in largely defensive operations as the 1st Special Service Brigade dug in.[68] Nevertheless they kept up the pressure on the Germans by carrying out offensive patrols, small scale raids and sniping.[69] In mid-July a breakout from the beachhead was attempted and the 1st Special Service Brigade moved through the Le Bois de Bavent, a large wooded area, as the Germans began to withdraw.[70] No. 3 Commando was involved in this advance, moving to Varaville where they caught up with the German rearguard and proceeded to clear the village. The advance continued into the following month and on 19 August they were ordered to seize the high ground to the north of Dozule. Attacking at night, the brigade advanced with No. 3 Commando leading the main body behind the vanguard and was able to infiltrate the German positions before the lead sections ran into the German headquarters units.[71]
Over the next five days, the brigade advanced a further 40 miles (64 km) before a halt was finally called on 26 August 1944.[71] On 7 September, No. 3 Commando, along with the rest of the 1st Special Service Brigade, were withdrawn from the line and returned to the United Kingdom to prepare to be redeployed to the Far East for operations against the Japanese.[72] They had been in action continuously for 83 days.[72] Shortly after this, No. 3 Commando's commanding officer, Peter Young, was promoted to colonel and left to take command of the 3rd Commando Brigade in Burma. As a result, Arthur Komrower took command of No. 3 Commando.[72][73]
Final operations
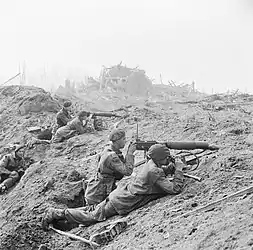
Throughout 1944, plans were made to send the brigade, which had been renamed the 1st Commando Brigade, to the Far East; however, the effect of the German Ardennes Offensive resulted in these being cancelled.[74] In January 1945, under the command of Brigadier Derek Mills-Roberts, No. 3 Commando was deployed to Asten on the Maas.[72] Later in the month, the unit took up positions at Maeseyck and on 24–25 January, with snow falling on the streets and a heavy German artillery barrage on the town, they took part in an assault on Linne.[75] The assault was only partially successful and due to the destruction of the bridges that spanned the frozen Montforterbeek Canal, the Allies were unable to bring up armour to support No. 3 Commando which had moved across the ice on foot. When the Germans brought up their own tanks, the advance came to a halt.[76]
The Commandos were forced to spend the night freezing in the open in a ditch. The following day, after sappers from the Royal Engineers managed to erect a temporary bridge across the canal, a number of Churchill and Sherman tanks from the 8th Hussars managed to get across and No. 1 and No. 6 Troops climbed on top and advanced across the open ground and into the centre of the town.[77]
A brief period of lull followed as the 1st Commando Brigade prepared to resume operations[77] and on 13 February they were relieved in Linne by No. 46 Royal Marine Commando and went back to Maasbrecht for a rest.[78] The rest did not last long, however, and later in the month they relieved the marines at Smakt and began preparing for Operation Plunder, the crossing of the Rhine. At 22:00 on 23 March 1945, No. 3 Commando crossed the river in Buffalo landing vehicles and began moving on Wesel, where, on 25 March they cleared the centre of the town and captured a large number of German prisoners.[79][80]
After this the brigade continued to advance, moving through Ruddenburg and Greven before carrying out an attack on Osnabruck, which No. 3 Commando led, on 4 April 1945.[81] The next day, they crossed the Weser River in assault boats and under the cover of darkness carried out a flanking manoeuvre on the Germans occupying the town of Leese. As other elements from the brigade attacked from the east, No. 3 Commando, now under the command of Peter Bartholomew[82] after Komrower had been posted to the Commando Training Depot, carried out a follow-up operation to the north.[83] The operation was an attack on a factory that had been producing V-2 rockets and after No. 3 Commando had captured it with the support of a number of tanks, a search found a number of these weapons, along with about 100 scientists who had been working in the factory.[84]
The advance continued throughout the month and by 29 April, No. 3 Commando crossed the Elbe and carried out an attack on Launenberg.[85] No. 6 Commando led the assault, with Brigade Headquarters and No. 3 Commando following shortly behind them and established themselves on the high ground, before being clearing operations in Launenberg itself.[86] By the end of the month all German opposition in the area had ceased and it marked the end of No. 3 Commando's offensive operations.[86] On 7 May, when the Germans surrendered, No. 3 Commando was firmly established in Lübeck, where they began the next phase of their service history as occupation troops.[87]
Disbandment
After undertaking occupation duties in Germany after the war, No. 3 Commando was finally disbanded on 4 January 1946 while at Victoria Station.[88] During the course of their operational service, members of the unit received the following decorations: 6 Distinguished Service Orders, 23 Military Crosses, 33 Military Medals, 6 Distinguished Conduct Medals, 18 Mentions in Despatches, and 1 George Medal. One member of the unit was also appointed as a Member of the Order of the British Empire.[89][90]
Structure
The Commando units went through a number of organisational structures as the concept was refined and their roles became clearer throughout the course of the war. Upon formation, No. 3 Commando had an establishment of 535 all ranks organised into ten troops each with 50 men underneath a headquarters troop.[9] In late 1940, the Commando units were merged into a special service brigade which was made up of five special service battalions, each of which were made up of two company-sized elements. By the end of the year, this was changed again as the battalions were organised around a headquarters and two Commandos.[10] The special service battalion organisation was discontinued in March 1941, and the unit establishment was set at 470 all ranks, with a headquarters troop of 80 officers and men and six troops of three officers and 62 other ranks.[10][91]
Commanding officers
- Lieutenant Colonel John Durnford-Slater, DSO and Bar: July 1940 – August 1943;[4]
- Lieutenant Colonel Peter Young, DSO, MC & 2 Bars: August 1943 – September 1944;[48]
- Lieutenant Colonel Arthur Komrower, DSO: September 1944 – April 1945;[72]
- Lieutenant Colonel Peter Bartholomew, DSO: April 1945 – January 1946.[82][84]
Battle honours
The following battle honours were awarded to the British Commandos during the Second World War.[92]
- Adriatic
- Alethangyaw
- Aller
- Anzio
- Argenta Gap
- Burma 1943–45
- Crete
- Dieppe
- Dives Crossing
- Djebel Choucha
- Flushing
- Greece 1944–45
- Italy 1943–45
- Kangaw
- Landing at Porto San Venere
- Landing in Sicily
- Leese
- Litani
- Madagascar
- Middle East 1941, 1942, 1944
- Monte Ornito
- Myebon
- Normandy Landing
- North Africa 1941–43
- North-West Europe 1942, 1944–1945
- Norway 1941
- Pursuit to Messina
- Rhine
- St. Nazaire
- Salerno
- Sedjenane 1
- Sicily 1943
- Steamroller Farm
- Syria 1941
- Termoli
- Vaagso
- Valli di Comacchio
- Westkapelle
Notes
Footnotes
- No. 3 Commando is considered to be the first Commando unit raised, as at the time No. 1 and No. 2 Commando did not exist as the intention was to raise them as airborne units later, while other Commando units were raised shortly after. Durnford-Slater 2002, p. 12; Saunders 1959, pp. 22–23.
- There were also medical and engineer personnel from No. 4 and No. 6 Commandos. Chappell 1996, p. 14.
- Naval casualties consisted of two killed and six wounded, while eight Royal Air Force aircraft were shot down. Durnford-Slater 2002, p. 88.
- Of the 23 landing craft that originally set out, four had been forced to turn back with engine trouble before the run in with the German convoy, eight were forced to turn back due to damage as a result, four were sunk, and seven were originally thought missing but eventually made the coast. Saunders 1959, p. 89.
- For the raid 42 officers and men from the US 1st Ranger Battalion were attached to No. 3 Commando. Durnford-Slater 2002, p. xiii.
- Both Saunders and Durnford-Slater incorrectly identify this as a Tiger; however, David List, who edited the updated version of Durnford-Slater's memoirs clarifies that this tank had to have been a Panzer IV as the Germans did not have any Tigers in the area at the time. Durnford-Slater 2002, p. xv.
- Durnford-Slater subsequently was promoted to brigadier and became Deputy Commander of the Commando Group, a divisional sized headquarters responsible for all British commando units—both Army and Royal Marines—and in this role he was charged with carrying out planning Commando operations for D-Day and beyond. Durnford-Slater 2000, p. 171; Laffin 1999, p. 18.
- Peter Young was in hospital at the time, recovering from injuries he received during one of the reconnaissance raids undertaken prior to the invasion of Italy, although he did return in time to take command of the unit in Termoli during the German counterattack. Saunders 1959, p. 175.
Citations
- Durnford-Slater 2003, pp. ix–xvi.
- Durnford-Slater 2002, p. 12.
- Chappell 1996, p. 52 & 57.
- Durnford-Slater 2002, p. 15.
- Chappell 1996, p. 45.
- Saunders 1959, pp. 21–22.
- Laffin 1999, p. 13.
- Durnford-Slater 2002, pp. ix–x.
- Durnford-Slater 2002, p. ix.
- Chappell 1996, p. 7.
- Durnford-Slater 2002, p. x.
- Chappell 1996, p. 12.
- Chappell 1996, pp. 12–13.
- Chappell 1996, p. 14.
- Durnford-Slater 2002, pp. 75–76.
- Durnford-Slater 2002, pp. 81–82.
- Durnford-Slater 2002, pp. 84–85.
- Durnford-Slater 2002, p. 86.
- Durnford-Slater 2002, p. 84.
- Saunders 1959, p. 51.
- Durnford-Slater 2002, p. 88.
- Ford 2003, pp. 30-33.
- Ford 2003, p. 33.
- Durnford-Slater 2002, pp. 91–92.
- Ford 2003, pp. 41–43.
- Durnford-Slater 2002, p. 105.
- Ford 2003, p. 43.
- Ford 2003, p. 44.
- Ford 2003, p. 45.
- Saunders 1959, p. 90.
- Saunders 1959, pp. 7–11.
- Durnford-Slater 2002, p. 109.
- Durnford-Slater 2002, p. 116.
- Saunders 1959, p. 131.
- Durnford-Slater 2002, p. 117.
- Saunders 1959, p. 132.
- Durnford-Slater 2002, p. 135.
- Saunders 1959, p. 136–137.
- Saunders 1959, p. 137.
- Saunders 1959, pp. 138–139.
- Durnford-Slater 2002, p. 139.
- Saunders 1959, pp. 140–141.
- Saunders 1959, p. 141.
- Durnford-Slater 2002, p. 142.
- Durnford-Slater 2002, p. 143.
- Saunders 1959, p. 143.
- Saunders 1959, p. 147.
- Durnford-Slater 2002, p. 150.
- Durnford-Slater 2000, p. xv.
- Saunders 1959, p. 151.
- Saunders 1959, p. 156.
- Saunders 1959, p. 171.
- Saunders 1959, p. 175.
- Durnford-Slater 2002, p. 170.
- Moreman 2006, p. 91.
- Durnford-Slater 2002, p. 185.
- Chappell 1996, p. 3.
- Laffin 1999, p. 18.
- "No. 3 Commando (June 1944)". Pegasus Archive. Retrieved 12 August 2009.
- Durnford-Slater 2002, pp. 188–189.
- Durnford-Slater 2002, p. 189.
- Durnford-Slater 2002, p. 190.
- Durnford-Slater 2002, p. 191.
- Durnford-Slater 2002, p. 193.
- Saunders 1959, p. 241.
- Durnford-Slater 2002, p. 194.
- Saunders 1959, p. 242.
- Durnford-Slater 2002, p. 197.
- Durnford-Slater 2002, p. 199.
- Durnford-Slater 2002, p. 202.
- Durnford-Slater 2002, p. 203.
- Saunders 1959, p. 289.
- Durnford-Slater 2002, p. 204.
- Durnford-Slater 2002, p. 212.
- Durnford-Slater 2002, p. 213.
- Saunders 1959, p. 290.
- Saunders 1959, p. 291.
- Durnford-Slater 2002, p. 214.
- Durnford-Slater 2002, pp. 216–217.
- Saunders 1959, pp. 296–297.
- Durnford-Slater 2002, p. 217.
- Saunders 1959, p. 296.
- Durnford-Slater 2002, p. 218.
- Saunders 1959, p. 300.
- Durnford-Slater 2002, p. 220.
- Saunders 1959, p. 302.
- Durnford-Slater 2002, p. 221.
- Durnford-Slater 2002, p. xvi.
- Durnford-Slater 2002, pp. 231–234.
- Laffin 1999, p. 19.
- Durnford-Slater 2002, p. xi.
- Moreman, p.94
References
- Chappell, Mike (1996). Army Commandos 1940–1945. Elite Series # 64. London: Osprey Publishing. ISBN 1-85532-579-9.
- Durnford-Slater, John (2002) [1953]. Commando: Memoirs of a Fighting Commando in World War Two. London: Greenhill Books. ISBN 1-85367-479-6.
- Ford, Ken (2003). Dieppe 1942. Campaign # 127. Botley, Oxford: Osprey Publishing. ISBN 1-84176-624-0.
- Laffin, John (1999). Raiders: Great Exploits of the Second World War. Stroud: Sutton. ISBN 978-0-7509-1525-0.
- Moreman, Tim (2006). British Commandos 1940–46. Botley, Oxford: Osprey Publishing. ISBN 978-1-84176-986-8.
- Saunders, Hilary St. George (1959) [1949]. The Green Beret: The Commandos at War. London: Four Square Books. OCLC 1260659.