3rd The King's Own Hussars
The 3rd (The King's Own) Hussars was a cavalry regiment of the British Army, first raised in 1685. It saw service for three centuries, including the First World War and the Second World War, before being amalgamated with the 7th Queen's Own Hussars, to form the Queen's Own Hussars in November 1958.
| 3rd The King's Own Hussars | |
|---|---|
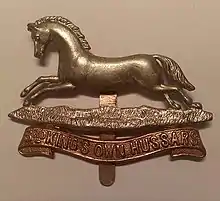 3rd The King's Own Hussars Cap Badge | |
| Active | 1685–1958 |
| Country | Kingdom of England (1685–1707) |
| Branch | |
| Type | Cavalry of the Line/Royal Armoured Corps |
| Role | Light Cavalry |
| Size | 1 Regiment |
| Nickname(s) | The Moodkee Wallahs, Bland's Dragoons |
| Motto(s) | Nec Aspera Terrent (Latin Nor do difficulties deter) |
| March | (Quick) Robert the Devil (slow) The 3rd Hussars |
| Anniversaries | Dettingen Day, El Alamein Day. |
History
The Glorious Revolution
The origins of the King's Own Hussars lie in the 1685 Monmouth and Argyll rebellions which forced James II to borrow the Scots Brigade from his son-in-law William of Orange, later William III. On 16 June, three troops were detached from the Duke of Somerset's Royal Dragoons and their captains ordered to recruit additional volunteers from the London area, including Middlesex and Essex.[1] The unit was based in Acton, West London to guard approaches to the City of London but the rebellion collapsed after defeat at Sedgemoor on 6 July without the regiment seeing action. Three new troops, one independent and two newly raised were now added to the original three to form The Queen Consort's Regiment of Dragoons.[2]
Alexander Cannon a Scot who previously served in the Dutch Scots Brigade was appointed Colonel in August 1687.[3] On 5 November 1688, William III landed at Torbay in the invasion later known as the Glorious Revolution and James assembled his army on Salisbury Plain to block an advance on London. However, many now changed sides; the majority of the Queen Consort's Regiment followed Lieutenant-Colonel Richard Leveson into William's camp while Cannon and his own troop remained loyal, staying with James as he retreated to London.[4] On 31 December, Leveson replaced Cannon as Colonel and as was customary, the regiment now took his name and became Leveson's Dragoons.[lower-alpha 1]
The Williamite War in Ireland
In August 1689, the regiment, numbering approximately 400 officers and men organised into six troops, was transported to Ireland to take part in the Williamite War. James had fled from England to France in December 1688, but had returned with an army in March 1689 and landed at Cork, Ireland, where he found that he had the support of a majority of the Catholic population.[5] William's expeditionary force had landed south of Belfast on 13 August, encountering little resistance from the local Catholic forces, and entered the city on 17 August; Leveson's Dragoons landed in Ireland four days later, taking up position just outside Belfast.[6] Early records of the activities of the regiment are scarce, but it appears that it advanced with the rest of the Williamite forces southwards on 2 September, advancing to the town of Newry, but failing to catch the garrison of the town as it retreated. The Williamite army moved south to Dundalk, which they fortified. They did not advance any further, as a Catholic army, estimated 35,000 strong, was reportedly encamped nearby at Ardee. The regiment encountered a small Catholic force and killed five men on 20 September, but was forced to wait until October to take part in its first major action. On 27 October, 200 troopers from the regiment, along with a detachment from the 6th (Inniskilling) Dragoons, raided Ardee, killing a number of sentries and capturing a large number of cattle and horses.[7] In November, the Williamite army moved northwards and the regiment saw action one last time before entering winter quarters at Lisburn; on 26 November, 60 troopers from the regiment were reconnoitring near Charlemont when they encountered a detachment from the town's garrison; they engage it, taking several prisoners. The regiment then retired to its winter quarters to rest and took on approximately 200 recruits shipped from England to replace losses from disease; whilst the exact casualty figures for the regiment are unknown, the entire army had suffered approximately 6,000 casualties as a result of fever, ague and dysentery by November.[8][9] The regiment emerged from winter quarters in mid-February 1690 and immediately saw action; a gazette issued from Belfast on 14 February announced that a squadron from the regiment had formed part of a raiding force that had crossed enemy lines and burnt down a castle and looted a town, killing ten men and taking 20 prisoners. The next recorded action by the regiment took place on 22 June, when a squadron and a company of infantry from the Tangier Regiment encountered a fort garrisoned by a force of infantry and approximately 500 cavalry; the enemy force stood its ground and fought a pitched battle until its commanding officer was killed and the Catholic force retreated.[10]
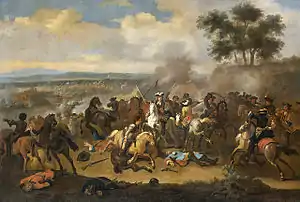
The regiment was present for the Battle of the Boyne on 1 July, forming part of the 36,000-strong Williamite army that engaged the 25,000-strong Catholic army commanded by James II.[11] During the closing stages of the battle, a large portion of James' cavalry repeatedly charged the advancing Williamite infantry to provide protection for the retreating Catholic infantry, and were able to reach the village of Donore. The village was sited on an area of high ground from which the dismounted cavalrymen were able to fire down on the advancing Williamite troops. To counter this move, a squadron from the regiment charged up the hill and engaged the dismounted cavalry whilst the remainder of the regiment outflanked the village and attacked the Catholic force from the rear, inflicting a large number of casualties.[12] After routing this force, the regiment joined up with a Dutch cavalry unit and advanced. Sighting another Catholic cavalry force, the Dutch cavalry attacked, but were repelled with heavy losses and retreated down a narrow lane. As the Dutch regrouped, Leveson's men dismounted and took up position amongst the hedgerows lining the lane, as well as a nearby house; when the Catholic cavalry advanced down the lane, they came under fire from the regiment, inflicting heavy losses and forcing the survivors to retreat.[13] The battle was a decisive victory for the Williamite forces, with James forced to retire first to Dublin and then to France as the Williamite army advanced south and captured Dublin on 4 July. The regiment did not take part in the capture of Dublin, instead it was ordered to advance to the city of Waterford, where it accepted the surrender of the city's garrison (as well as the garrison of the nearby port of Youghal) and remained for the rest of the summer.[14] One of the regiment's troops patrolled the surrounding area, with a detachment engaging a large band of armed Catholic citizens who had been attacking Protestant settlements in the area; the detachment killed 60 and took 12 civilian prisoners, as well as attacking the village of Castlemartyr and taking its Catholic garrison prisoner. The remainder of the regiment moved to Limerick and took part in the failed siege of that city, although the specifics of what the regiment did are unknown.[15] Before the regiment retired to its winter quarters in December, it engaged and dispersed several more armed bands of civilians and came to the aid of a detachment from the 27th (Inniskilling) Regiment of Foot, who had been ambushed by Catholic infantry and had taken shelter in a ruined castle; a troop from the regiment drove off the infantry and escorted the Inniskilling detachment to safety.[16]
The regiment left its winter quarters in February 1691 and immediately saw action, forming part of a combined force of infantry and cavalry that engaged a 2,000-strong Catholic force near Streamstown and forced it to retreat; the role that the regiment played in this action led to Leveson being promoted to Brigadier-General. In May, the majority of the Williamite army moved north and besieged the town of Athlone, which fell after eleven days, but the regiment took no part in the siege, having been ordered to encamp in the county of Mullingar. At the beginning of July, the regiment formed part of the 12,000-strong Williamite army that defeated an 8,000-strong Catholic army during the Battle of Aughrim, taking part in a massed cavalry charge that breached the Catholic positions around the village of Aughrim. The Battle of Aughrim was a decisive victory for King William, with a number of leading Catholic generals being killed, and the Williamite forces pressed their advantage; they forced the surrender of Galway on 20 July and then began a second siege of Limerick in August.[17] The regiment did not take part directly in the siege, instead being detached in late August and ordered to advance south-west into Kerry to reconnoitre and harass Catholic forces in the area around Limerick. On 2 September, the regiment ambushed and routed two regiments of Catholic cavalry, and several days later subdued a number of Catholic garrisons between Cork and Limerick. The regiment inflicted a number of casualties, but more importantly captured thousands of cattle and oxen; one contemporary source states that the majority of the army's provisions for the siege of Limerick were provided by the regiment. On 22 September, Limerick fell to the Williamite forces, effectively ending the conflict in Ireland; the regiment was withdrawn to its winter quarters and was then transported to England in the spring of 1692.[18]
Nine Years' War
The regiment remained in England for nearly three years before it saw battle again. During this period, in which it recruited to refill its ranks, it lost Colonel Leveson when he was promoted to the rank of Major-General by King William. (Leveson was dispatched to command forces fighting in the Spanish Netherlands as part of the English contribution to the Nine Years' War before dying in March 1699 at Belvoir Castle). He was replaced by Thomas, 5th Baron Fairfax of Cameron in January 1694; as a consequence, the regiment lost the title of Leveson's Dragoons and reverted to its previous title of The Queen's Dragoons.[19]
In the spring of 1694, the regiment was reviewed by King William, along with a number of other English units, and was then transported to the Netherlands, landing at Willemstad, (nowadays in North Brabant) on 16 April. After two months, the regiment marched to join the main body of the English Army at Tirlemont in Flanders, encamping to the rear of the Army's positions in order 'to cover His Majesty's quarters'.[20] The regiment spent the summer of 1694 as part of a brigade with the Royal Horse Guards and Royal Scots Greys, taking part in manoeuvres and skirmishing with enemy troops before retiring to winter quarters in October near Ghent. By February 1695, the strength of the regiment had increased from six to eight troops, and the regiment had also gained another new commander, with Lord Fairfax being replaced by William Lloyd, previously the Lieutenant-Colonel of Essex's Dragoon's.[20]
During the summer of 1695, while the majority of the English forces were occupied with the second siege of Namur, the regiment formed part of a force that occupied the city of Diksmuide with the intention of luring away French forces that were seeking to relieve the siege of Namur. The force was successful, luring a large number of French troops away from Namur who proceeded to besiege the city; instead of holding Diksmuide as intended, however, the Danish general commanding the force surrendered the city on 18 July and, as a consequence, the regiment became prisoners of war. The officer commanding the regiment demanded that the regiment be allowed to attempt to break the siege of the city and escape, but the general denied the request.[21][22] Although the request was denied, many of the officers and troopers broke their weapons to deny them to the French before they surrendered. The regiment remained in captivity for several weeks, only being released when the siege of Namur was successful and the commander of the French forces there, the Duke of Boufflers, surrendered the city; after a period of negotiation with Louis XIII, Boufflers was exchanged for all English prisoners of war.[21]
After its release, the regiment retired to winter quarters and received reinforcements. Then, during the summer of 1696, it formed part of a detached Corps encamped near Nieuwpoort, Belgium, skirmishing several times with French forces when they attempted to attack the region, but never being committed to a major battle. The regiment also appears to have seen little combat during 1697, moving to Brussels sometime during the year to protect the approaches to the city and remaining there until the Treaty of Ryswick was signed in September 1697. Once the treaty was signed, signalling the end of the Nine Years' War, the regiment returned to England.[23]
War of the Spanish Succession
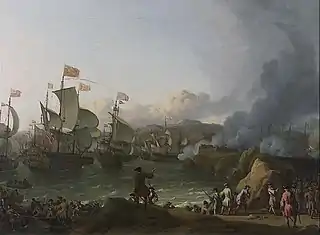
The huge expense incurred by England during William III's prosecution of the Nine Years' War angered Parliament, leading to large cuts in funding for the military; these primarily affected soldiers pay, which was drastically reduced, and the withholding of gratuities that soldiers were often promised prior to going into battle. Many regiments had their strengths reduced, including The Queen's Own Dragoon's, which had its strength reduced by half. During the period of peace between the end of the Nine Years' War in 1697 and the beginning of the War of the Spanish Succession in 1702, the regiment performed a number of small tasks befitting its reduced size; it conducted coastal revenue duty, confronted smugglers, and escorted the King when he travelled to Holland.[24] The War of the Spanish Succession began in May 1702, and in June an English expeditionary force was assembled at Cowes on the Isle of Wight under the command of the Earl of Ormond, tasked with landing in Cadiz, Spain and capturing the surrounding area; 18 officers, 24 non-commissioned officers and 186 troopers from the regiment formed part of the force. It sailed from Cowes on 23 June and landed in Cadiz on 15 August, where it soon engaged Spanish forces. As the only cavalry formation with the expeditionary force, the regiment was constantly employed as picquets at the forefront of the English advance, as well as being used to guard and protect outposts.[25] The regiment skirmished with Spanish forces throughout September, but an attempt to besiege Cadiz was far more difficult than was expected, ending in a Spanish victory and, as a result, the regiment was embarked on transports destined for England. During the voyage, however, the transports received word that a Spanish naval force had been sighted attempting to land near the city of Vigo. The transports turned back towards Spain, reaching Vigo on 12 October, and off-loaded the regiment. There are few details about the regiment's involvement in the ensuing Battle of Vigo Bay, but records indicate that all of the Spanish vessels involved in the attempted landing were either destroyed or burnt, and the regiment received a considerable amount of prize money for its part in the action.[26]
After the battle, the regiment did not return to Spain to rejoin the English expeditionary force, but was instead ordered back to England; for a period of nearly four years the regiment remained in England, being quartered in Kent and the Isle of Wight as a garrison force, mustering for occasional parades and reviews. In December 1703, William Lloyd sold the colonelcy of the regiment to George Carpenter, who then assumed command.[27] In 1706, the regiment was once again transferred to the Isle of Wight, where 240 officers, non-commissioned officers and troopers were attached to an 8,000 strong force assembling there. The force was tasked with landing on the coast of France near Charente and fighting its way inland, aided by local Protestant civilians. The fleet left England on 30 July, but the operation was cancelled due to poor weather and the failure of Dutch naval forces, who were to rendezvous with the transports and escort them to the French coast. The transports were then ordered to head for Spain, where they would land at Cadiz and reinforce English forces in the area; however, poor weather forced the ships to remain in Torbay for eleven weeks, with the troops remaining on board, until mid-August, when they attempted to sail for Lisbon. Even more severe weather meant that the ships could not be unloaded at Lisbon either, however, and they remained there for a further two months; during this time the regiment and the other English troops on board the ships suffered hundreds of casualties from a lack of proper food and water, and outbreaks of disease.[28] By January 1707, the weather calmed down enough for the ships to leave Lisbon harbour and, in February, they reached Alicante, where the troops were off-loaded; of the 8,000 troops who had boarded the transports in July 1706, only 4,400 had survived.[29]
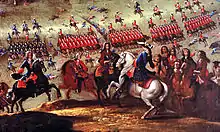
The remnants of the force, including the regiment, then marched 40 miles to Caudete to link up with an Allied army composed of English, Dutch, German and Portuguese troops under the command of the Earl of Galway. This army was to support Spanish forces loyal to Charles of Austria, who claimed that he was the legitimate heir to the Spanish throne; however, this claim was contested by his opponent, Philip of Anjou, who had gathered his own army and was determined to defeat Charles in battle.[29] The campaign against Anjou's forces began in March, with the Allies advancing, destroying several magazines and besieging the city of Villena; soon after beginning the siege, however, they were alerted by several French deserters that a large Franco-Spanish force was advancing towards Almansa to the north-east. The Earl of Galway was also informed that a second enemy force under the command of Philippe II, Duke of Orléans was marching to reinforce the first force; in response to this information the Earl advanced immediately in an attempt to prevent the two forces from linking up. However, the manoeuvre failed, leading to the 15,000-strong Allied army being opposed by 25,000 French and Spanish troops who also possessed a superior number of artillery pieces.[30] The two forces clashed during the Battle of Almansa, which began on the afternoon of 25 April. The battle began with both sides bombarding the others positions with artillery fire. After this general bombardment had ended, the Allied cavalry were dispatched to attack the centre of the Franco-Spanish positions; The Queen's Own Dragoon's were committed alongside Essex's Dragoons to attack an enemy artillery battery that was bombarding the Allied line. The regiment charged the battery and forced it to withdraw, but were then engaged by a force of Spanish cavalry that outnumbered them by approximately three to one according to regimental records, the ensuing battle 'nearly annihilated' the regiment, with its Colonel being killed along with a large number of officers and troopers.[31] The remnants of the two cavalry regiments retreated to the Allied lines, where volley-fire from the Allied infantry was beginning to inflict significant casualties on the Franco-Spanish forces; it was at this point, however, that the 7,000 Portuguese troops belonging to the Allied army suddenly deserted, starting with their cavalry and rapidly followed by the infantry. The desertion turned the tide of the battle and led to a Franco-Spanish victory, with 2,000 Allied infantrymen being taken prisoner and the remnants of the Allied army being routed.[31] The Allied army suffered approximately 4,000 killed and wounded and another 3,000 taken prisoner; whilst there are no specific casualty numbers for the regiment, when it returned to England in the spring and began recruiting, it could only muster 150 troopers and officers.[32]
Jacobite Rising and Regimental Name Change

When the regiment had finished recruiting in England, it was dispatched north to Scotland. There, it formed part of the English garrison, intimidating the Scottish population in an attempt to repress any attempts at a Jacobite rising.[33] When George I ascended to the English throne in 1714, the regiment's title was once again altered, and that same year became The King's Own Regiment of Dragoons.[34] Shortly after his ascension, a major Jacobite uprising occurred; the regiment was amongst the English troops assembled in Scotland to bar the advance of the Jacobite forces. At the Battle of Sheriffmuir on 13 November, an English army commanded by the Duke of Argyll, which included the regiment, defeated a larger Jacobite army; sources are vague on the exact details of the regiment's involvement, but it is known that it formed part of the army's left wing, supporting several infantry regiments. The wing was struck by a Jacobite infantry assault, which inflicted significant casualties, but three squadrons from the regiment charged the infantry and forced it to retreat; this allowed the English forces to retire and reassemble without further loss.[35] The regiment did not see any further action during the uprising, remaining with the Duke of Argyll's army, which pursued Jacobite forces as they retreated northwards. The army occupied Aberdeen on 8 February; shortly after the rebellion came to an end.[36] For a short period, the regiment was stationed at Elgin, and then was transferred to southern England, where it remained for more than 20 years; it became an understrength garrison force and did little apart from conduct occasional raids against smugglers on the English coast.[37]
War of the Austrian Succession
On 20 October 1740, Charles VI died and his daughter, Maria Theresa of Austria, took his place on the Habsburg throne; the ascendancy caused a great deal of political controversy, which resulted in The War of the Austrian Succession. King George II pledged the support of Great Britain to Maria Theresa and, in May 1742, a 16,000 strong British army sailed to Ostend to link up with military forces of the Dutch Republic, which had also decided to support Maria Theresa. The King's Own Dragoons formed part of the army.[38]
The English forces arrived in the Dutch Republic, but did not immediately go on campaign, instead moving into winter quarters in Bruges and Ghent. The army finally departed in February 1743 and advanced towards the Rhine Valley; the regiment was chosen to form part of the advance guard.[39] By June, the English army had joined Hanoverian and Austrian forces by the river Main. The Allied forces, which totalled approximately 44,000 troops, were opposed by some 70,000 French troops. After a period of marching and counter-marching, and the arrival of King George II who took personal command of the Allied forces, the French army engaged the Allies at the Battle of Dettingen on 27 June. The King's Own Dragoons were placed on the left flank of the Allied army, with instructions to protect an infantry force as it advanced. Exposed to French artillery fire for three hours, suffering heavy casualties, the regiment was eventually ordered to advance, and then clashed with a larger force of French Household Cavalry; after a fierce engagement, and more casualties, it drove off the French cavalry. Shortly after this, the French army was forced to retreat, and the remnants of the regiment participated in a general cavalry pursuit of the French forces, which inflicted further casualties.[40] The regiment suffered 42 officer and other ranks killed, and 106 wounded, shrinking its size considerably; this provoked a comment from George II when he reviewed the Allied forces after the end of the battle. He asked an aide to whom the regiment belonged in a sharp tone, to which its commanding officer replied, 'Please, your Majesty, it is my regiment, and I believe the remainder of it is at Dettingen.'[41]
The Battle of Dettingen had brought the French advance towards the Dutch Republic to a halt, and the conflict devolved into a long series of small and indecisive battles in the Southern Netherlands. In late 1743, the regiment moved to winter quarters in Ghent and received a shipment of recruits to bolster its ranks; however, the regiment did not move from the Southern Netherlands until May 1745, when the Duke of Cumberland was dispatched to the continent to take command of the Allied army.[42] Cumberland advanced towards the city of Tournai in early May, but failed to besiege it due to its strengthened defences; a few days later, the Allied army was engaged at the Battle of Fontenoy, where it was decisively defeated by superior French forces. Unfortunately, there are no detailed records that describe the King's Own Dragoons's participation in the battle; the regiments commanding officer only noted that the regiment had launched several cavalry charges against the French line, but had been forced to retreat with the rest of the Allied army after suffering nine killed and 18 missing.[43] The Allied Army retreated back towards the Southern Netherlands, pursued by the French, but the regiment did not engage in any further fighting; instead, it was dispatched northwards to receive more recruits, and then ordered to prepare to be transported to England. On 25 July, taking advantage of the English defeat at the Battle of Fontenoy, Prince Charles Edward Stuart landed in Invernessshire and began to organise another Jacobite uprising.[44]
Within a month of landing, Stuart had raised a force of 1,600 men from various Scottish clans, and began to march south, increasing his numbers to 2,500 by mid-September, when he entered Edinburgh. As the Prince advanced, the Duke of Cumberland assembled his English regiments in Flanders and then had them transported to England, arriving in London on 25 October and joining the rest of the English army at Lichfield.[44] However, the advice of several of his senior officers, combined with a lack of support from the French and English Jacobites, prompted Stuart to order a retreat, his forces moving back north towards Scotland with the English army in pursuit. On 16 December, the advance guard of the English army, which included the King's Own Dragoons, managed to overtake the Jacobite rearguard and laid an ambush. The ambush did not completely succeed due to it being performed in the dark, and the English forces suffered more casualties than they inflicted. The regiment dismounted and fought as infantry during the ambush, clashing repeatedly with the Jacobite forces and engaging in hand-to-hand fighting, suffering a number of casualties.[45] The regiment then re-mounted and pursued the Jacobite rearguard to Carlisle, being stationed near the town until it surrendered on 30 December. The records for the regiment for the next year are vague; it appears that it did see action during the Battle of Culloden in 1746, but there are no details. After the English victory at Culloden, the regiment advanced into Scotland with the rest of the English army, before being detached to Dundee; after the rebellion had been suppressed, it moved to York, where it guarded Jacobite prisoners.[46]
Seven Years' War
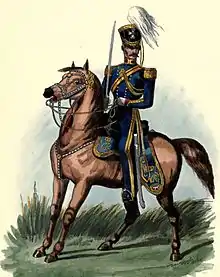
The regiment next saw action during the Raid on St Malo, destroying much of the French stores, in June 1758 during the Seven Years' War.[47] It went on to equal success, destroying the vessels in the harbour, at the Raid on Cherbourg in August 1758.[47] The regiment was stationed in Islington and was placed on guarding duties at Apsley House, the home of Lord Bathurst, during the Gordon Riots in 1780.[48]
Napoleonic Wars
In July 1809, the regiment departed for the Netherlands and took part in the disastrous Walcheren Campaign: many of the men caught a disease called "Walcheren Fever", thought to be a combination of malaria and typhus, before returning home in September.[49] In April 1810 the regiment was tasked with restoring order after the riots caused by protesters objecting to the incarceration of Sir Francis Burdett in the Tower of London.[50] The regiment landed in Lisbon in August 1811 for service in the Peninsular War.[51] It took part in the Siege of Ciudad Rodrigo in January 1812 and the Siege of Badajoz in March 1812[52] and then undertook successful charges at the Battle of Villagarcia in April 1812[53] and at the Battle of Salamanca in July 1812.[54] The regiment next saw action at the Battle of Vitoria in June 1813[55] and then, having pursued the French Army into France, at the Battle of Toulouse in April 1814.[56] The regiment returned home in July 1814.[57]
Victorian era
The regiment was renamed the 3rd (The King's Own) Regiment of (Light) Dragoons in 1818.[58] It served in Ireland between January 1820 and June 1822[59] and between March 1826 and April 1829.[60] It was dispatched in India in July 1837[61] and, having moved on to Afghanistan, saw action at the Battle of Kabul in September 1842 during the First Anglo-Afghan War.[62] It fought again at the Battle of Mudki and at the Battle of Ferozeshah in December 1845 and at the Battle of Sobraon in February 1846 during the First Anglo-Sikh War.[63] It then went on to fight at the Battle of Chillianwala in January 1849 and the Battle of Gujrat in February 1849 during the Second Anglo-Sikh War.[64] The regiment was renamed the 3rd (The King's Own) Hussars in 1861.[58] It was posted to India in 1868, was back in England in 1879, then had a brief posting to Scotland from 1887 before they were stationed in Ireland from 1889 to 1894. The regiment was back in India in 1898.[65] It was deployed to South Africa in December 1901 for service in the Second Boer War and was involved in the last great drives, capturing the boers, in the north-east of the Orange River Colony.[66] Following the end of the war in South Africa, 507 officers and men of the regiment returned to India on the SS Ionian in October 1902, where they were stationed in Sialkot in Punjab Province.[67]
First World War

On the outbreak of the First World War, the regiment was stationed at Shorncliffe as part of the 4th Cavalry Brigade. On mobilisation, the brigade was assigned to the Cavalry Division of the British Expeditionary Force, and was sent to France. The 4th Brigade was assigned to the 2nd Cavalry Division in October, with which it remained for the remainder of the war, serving on the Western Front.[68]
Inter-War period
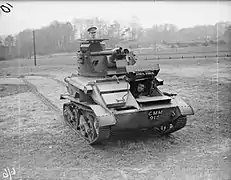
The regiment was renamed the 3rd The King's Own Hussars in January 1921.[58] It was deployed to Turkey in November 1921 as part of the British intervention force, remaining there until 24 August 1923, when it sailed to Egypt.[69] In 1926, the regiment was stationed in Lucknow, India. Returning to England in 1932, the regiment was initially garrisoned in York, but moved to Tidworth in 1934. The regiment began mechanising in 1935, when it began receiving lorries, followed by armoured cars in the following year. In 1937, the regiment moved to Aldershot, where it served as the reconnaissance unit of the 2nd Infantry Division.[70]
Second World War
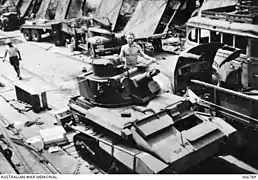
The 3rd The King's Own Hussars was brigaded with the 4th Hussars in the 1st Armoured Brigade in 1939. After the fall of France, the 3rd The King's Own Hussars was shipped to North Africa and assigned to the 7th Armoured Brigade. The regiment served in the North African Campaign. In 1941, B Squadron was sent to Singapore as reinforcements, but with the fall of Singapore, it was diverted to Java where, after a brief fight, it was ordered to surrender and the men spent the rest of the war as Prisoners of War.[71] Fifty four members of B Squadron died as prisoners of the Japanese Army. The few survivors returned to the regiment in 1945 after the war ended.[72] The remainder of the regiment fought as part of 9th Armoured Brigade in the Battle of El Alamein. After the campaign in North Africa, the 3rd The King's Own Hussars next saw action in the Italian campaign, serving through 1944 and 1945.[72]
Post-War period and amalgamation
The regiment was posted to Palestine in October 1945.[73] It moved to Kingsway Barracks in Rendsburg in summer 1948 before transferring to Ripon Barracks in Bielefeld in 1951, to Epsom Barracks in Iserlohn in July 1953 and York Barracks in Munster in September 1957.[73] It returned home in October 1958 to Tidworth Camp, where it amalgamated with the 7th Queen's Own Hussars, to form the Queen's Own Hussars in November 1958.[73]
Regimental museum
The regimental collection is moving to a new facility in Warwick known as "Trinity Mews": it is due to open in 2018.[74]
Battle honours
The regiment's battle honours were as follows:[58]
- War of Austrian Succession: Dettingen
- Napoleonic Wars: Salamanca, Vittoria, Toulouse, Peninsula
- India: Cabool 1842, Moodkee, Ferozeshar, Sobraon, Chillianwallah, Battle of Goojerat, Punjaub
- Boer War: South Africa 1902
- The Great War: Mons, Le Cateau, Retreat from Mons, Marne 1914, Aisne 1914, Messines 1914, Armentières 1914, Ypres 1914 '15, Gheluvelt, St. Julien, Bellewaarde, Arras 1917, Scarpe 1917, Cambrai 1917 '18, Somme 1918, St. Quentin, Lys, Hazebrouck, Amiens, Bapaume 1918, Hindenburg Line, Canal du Nord, Selle, Sambre, France and Flanders 1914–18
- The Second World War: Sidi Barrani, Buq Buq, Beda Fomm, Sidi Suleiman, El Alamein, North Africa 1940–42, Citta della Pieve, Citta di Castello, Italy 1944, Battle of Crete
Colonel-in-Chief
- 1953–: The Princess Margaret, Countess of Snowdon, CI, GCVO
Colonels of the Regiment
Colonels of the Regiment were:[58]
- Duke of Somerset's Regiment of Dragoons
- 1685–1687: Brig-Gen. Charles Seymour, 6th Duke of Somerset, KG
- 1687–1688: Col. Alexander Cannon
- 1688–1694: Maj-Gen. Richard Leveson
- The Queen Consort's Own Regiment of Dragoons (1694)
- 1694–1695: Col. Thomas Fairfax, 5th Lord Fairfax
- 1695–1703: Maj-Gen. William Lloyd
- 1703–1732: Lt-Gen. George Carpenter, 1st Baron Carpenter
- The King's Regiment of Dragoons (1714)
- 1732–1743: Gen. Sir Philip Honywood, KB
- 1743–1752: Lt-Gen. Humphrey Bland
- 3rd (King's Own) Regiment of Dragoons (1751)
- 1752–1755: F.M. James O'Hara, 2nd Baron Tyrawley, (Lord Kilmaine)
- 1755–1772: Lt-Gen. George Keppel, 3rd Earl of Albemarle, KG (Viscount Bury)
- 1772–1797: Gen. Charles Fitzroy, 1st Baron Southampton
- 1797–1799: Gen. Francis Lascelles
- 1799–1807: Gen. Charles Grey, 1st Earl Grey, KB
- 1807–1821: Gen. William Cartwright
- 3rd (The King's Own) Regiment of (Light) Dragoons (1818)
- 1821–1829: F.M. Stapleton Cotton, 1st Viscount Combermere, GCB, GCH, KSI
- 1829–1839: Lt-Gen. Lord George Thomas Beresford, GCH
- 1839–1855: Gen. Lord Charles Henry Somerset Manners, KCB
- 1855–1866: Gen. Peter Augustus Latour, CB, KH
- 3rd (King's Own) Hussars (1861)
- 1866–1872: Gen. Henry Aitchison Hankey
- 1872–1884: Gen. Sir George Henry Lockwood, KCB
- 1884–1891: Lt-Gen. Sir Frederick Wellington John FitzWygram, Bt.
- 1891: Lt-Gen. Edward Burgoyne Cuerton
- 1891–1909: Lt-Gen. Edward Howard-Vyse
- 1909–1912: Maj-Gen. Richard Blundell-Hollinshed-Blundell
- 1912–1924: F.M. Julian Hedworth George Byng, 1st Viscount Byng of Vimy, GCB, GCMG, MVO
- 3rd The King's Own Hussars (1921)
- 1924–1926: Maj-Gen. Alfred Alexander Kennedy, CB, CMG
- 1926–1946: Brig-Gen. Philip James Vandeleur Kelly, CMG, DSO
- 1946–1955: Brig. George Edward Younghusband, CBE
- 1955–1958: Lt-Col. (Hon. Col.) Sir Douglas Winchester Scott, Bt.
- 1958: Regiment amalgamated with 7th Queen's Own Hussars to form The Queen's Own Hussars
Notes
- This was deliberate policy to prevent regiments owing primary allegiance to the Crown and a response to the perceived use of a standing army by Cromwell, Charles and James as a tool of domestic oppression.
References
- Bolitho, Hector (1963). The Galloping Third: The Story of the 3rd the King's Own Hussars. Murray. p. 3. ISBN 1135540497.
- Chant, Christopher (1988). Handbook of British Regiments (2014 ed.). Routledge. p. 27. ISBN 0415710790.
- Cannon, Richard (1846). Historical Record of the Third, or the King's Own Regiment of Light Dragoons (2015 ed.). Forgotten Books. ISBN 1-330-44220-2.
- Bolitho, Hector (1963). The Galloping Third: The Story of the 3rd the King's Own Hussars. Murray. pp. 10–11. ISBN 1135540497.
- Bolitho, p. 11
- Bolitho, pp. 13–14
- Bolitho, p. 15
- Bolitho, p. 16
- Childs, John. (1997). "The Williamite War 1689–1691". In Thomas Bartlett & Keith Jeffery (Eds.), A Military History or Ireland, p.125. Cambridge: Cambridge University Press.
- Bolitho, pp. 17–18
- Bolitho, p. 19
- Bolitho, p. 21
- Bolitho, p. 22
- Bolitho, p. 23
- Bolitho, p. 24
- Bolitho, pp. 24–25
- Bolitho, pp. 26–27
- Bolitho, pp. 27–28
- Bolitho, p. 31
- Bolitho, p. 32
- Bolitho, p. 33
- Childs, p. 287
- Bolitho, pp. 34–35
- Bolitho, p. 36
- Bolitho, pp. 37–38
- Bolitho, p. 38
- Bolitho, pp. 38–40
- Bolitho, pp. 40–41
- Bolitho, p. 41
- Bolitho, pp. 41–42
- Bolitho, p. 43
- Bolitho, p. 44
- Bolitho, p. 46
- Bolitho, p. 47
- Bolitho, pp. 49–50
- Bolitho, p. 51
- Bolitho, pp. 52–53
- Bolitho, pp. 56–57
- Bolitho, pp. 57–58
- Bolitho, pp. 59–60
- Boolitho, pp. 61–62
- Bolitho, p. 69
- Bolitho, p. 71
- Bolitho, p. 72
- Bolitho, pp. 73–74
- Bolitho, p. 74
- Cannon, p. 42
- Cannon, p. 46
- Cannon, p. 52
- Cannon, p. 53
- Cannon, p. 54
- Cannon, p. 55
- Cannon, p. 57
- Cannon, p. 61
- Cannon, p. 69
- Cannon, p. 71
- Cannon, p. 74
- "3rd The King's Own Hussars". Regiments.org. Archived from the original on 9 June 2007. Retrieved 27 August 2016.
- Cannon, p. 81
- Cannon, p. 85
- Cannon, p. 88
- Cannon, p. 93
- Cannon, p. 101
- "3rd The King's Own Hussars". National Army Museum. Retrieved 28 August 2016.
- Hart′s Army list, 1903
- "3rd Hussars". Anglo-Boer War. Retrieved 28 August 2016.
- "The Army in South Africa - Troops returning Home". The Times (36893). London. 8 October 1902. p. 8.
- Baker, Chris. "The Hussars". The Long, Long Trail;The British Army of 1914–1918. Archived from the original on 24 March 2009. Retrieved 29 March 2009.
- Locations of British cavalry, infantry and machine gun units, 1914–1924. Robert W. Gould, Heraldene, 1977
- Graham Watson & T F Mills (5 March 2005). "Deployments of the 3rd The King's Own Hussars". regiments.org. Archived from the original on 15 July 2007.
- L, Klemen (1999–2000). "The conquest of Java Island, March 1942". Forgotten Campaign: The Dutch East Indies Campaign 1941–1942. Archived from the original on 26 July 2011.
- "Queen's Own Husssars Museum". Queen's Own Hussars Museum Site. Archived from the original on 12 December 2009. Retrieved 28 September 2009.
- "3rd The King's Own Hussars". British Army units 1945 on. Retrieved 7 August 2016.
- "More about the New Museum". The Queen's Own Hussars Museum. Retrieved 11 June 2018.
Bibliography
- Anonymous (1985). The Queen's Own Hussars: Tercentenary Edition. The Queen's Own Hussar's Regimental Museum. ISBN 0-9510300-0-0.
- Bartlett, Thomas; Keith Jeffrey (1997). A Military History of Ireland. Cambridge University Press. ISBN 0-521-62989-6.
- Bolitho, Hector (1963). The Galloping Third: The Story of the 3rd the King's Own Hussars. John Murray Ltd.
- Burnside, Lieutenant-Colonel F.R. (1945). A Short History of 3rd the King's Own Hussars 1685–1945. Gale and Polden Ltd.
- Cannon, Richard (1847). The Third or The King's Own Regiment of Light Dragoons containing an account of the formation of the regiment in 1865 and its subsequent services to 1846. Parker, Furnivall and Parker.
- Chant, Christopher (1988). The Handbook of British Regiments. Routledge. ISBN 0-415-00241-9.
- Childs, John (1991). The Nine Years' War and the British Army, 1688–1697: The Operations in the Low Countries. Manchester University Press. ISBN 0-7190-3461-2.
- Latimer, Jon (2002). Alamein. John Murray Ltd. ISBN 0-7195-6213-9.
External links
- Historical website
- Regimental Association
- British Army Locations from 1945 British Army Locations from 1945